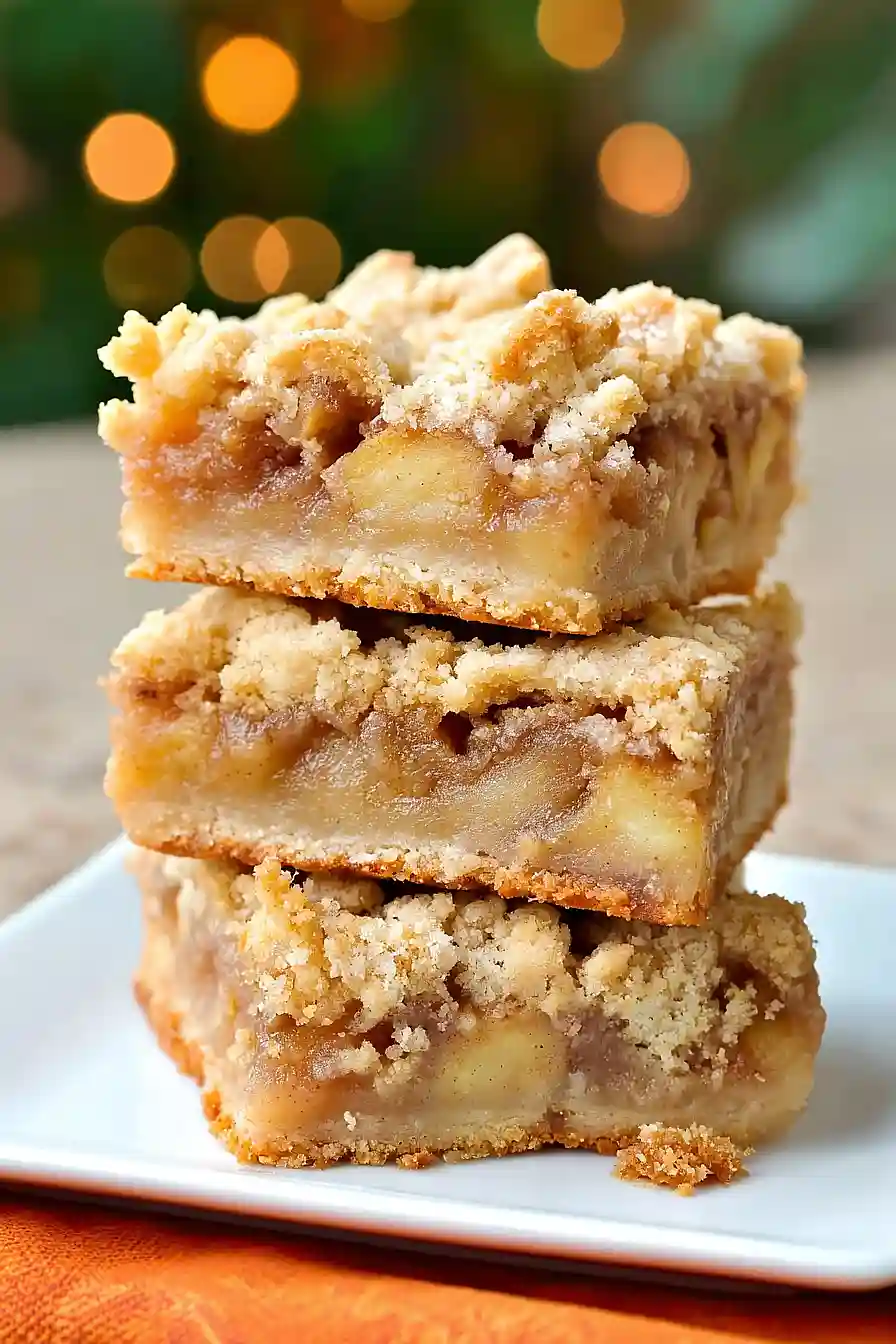
Here are my favorite apple pie bars inspired by Ina Garten, with a buttery shortbread crust, sweet cinnamon apple filling, and a crumbly oat topping that bakes to golden perfection.
These apple pie bars are so much easier than making a whole pie, but they taste just as good. I love making them when I want that classic apple pie flavor but don’t have time to roll out pie dough. Plus, they’re perfect for taking to potlucks!
Why You’ll Love These Apple Pie Bars
- Easier than traditional apple pie – No rolling out pie dough or worrying about crimping edges – these bars give you all the flavors of apple pie in a much simpler format that’s perfect for beginners.
- Perfect for sharing – Cut into neat squares, these bars are ideal for potlucks, bake sales, or family gatherings where you need individual servings that are easy to grab and go.
- Warm fall spices – The combination of cinnamon and nutmeg creates that cozy, seasonal flavor that makes your kitchen smell amazing while they bake.
- Simple pantry ingredients – Most of these ingredients are probably already in your kitchen, making this an easy dessert to whip up when you’re craving something homemade.
- Great for meal prep – These bars keep well for several days, so you can make them ahead of time and have a delicious dessert ready whenever you need it.
What Kind of Apples Should I Use?
For apple pie bars, you’ll want to stick with apples that hold their shape well during baking and won’t turn to mush. Gala, Braeburn, Golden Delicious, and Pink Lady are all great choices because they have the right balance of sweetness and tartness, plus they keep their texture when cooked. You can mix and match different varieties if you want – combining a sweeter apple like Gala with a more tart one like Pink Lady can give you really nice flavor depth. Just avoid super soft apples like Red Delicious, which tend to break down too much during baking and can make your bars soggy.
Options for Substitutions
These apple pie bars are pretty forgiving when it comes to swaps, so here’s what you can change up:
- Apples: The recipe calls for specific apple varieties, but you can use whatever apples you have on hand. Granny Smith works great if you like tart flavors, or Honeycrisp for extra sweetness. Just avoid Red Delicious as they get too mushy when baked.
- Walnuts: Not a walnut fan? Try chopped pecans, almonds, or even leave them out completely if you prefer nut-free bars.
- Unsalted butter: You can use salted butter instead – just reduce the kosher salt in the recipe by about half. If you’re dairy-free, try using cold vegan butter sticks for similar results.
- Fresh lemon juice: Bottled lemon juice works fine here, or you can substitute with apple cider vinegar if that’s what you have. The acid helps prevent the apples from browning.
- Fresh nutmeg: Pre-ground nutmeg from your spice rack is perfectly fine – just use the same amount. If you don’t have nutmeg at all, add a pinch more cinnamon or try a dash of allspice.
- All-purpose flour: This is one ingredient I’d stick with as written. The flour creates the perfect shortbread-like base, and substituting with other flours might change the texture too much.
Watch Out for These Mistakes While Baking
The biggest mistake when making apple pie bars is not pre-cooking the apple filling, which can leave you with a watery mess that makes the crust soggy – always sauté your sliced apples with the sugar and spices for about 5-7 minutes until they’re slightly tender and the juices have thickened.
Another common error is not pressing the bottom crust firmly into the pan, so make sure to really pack it down with your fingers or the bottom of a measuring cup to create a solid foundation that won’t crumble when you cut the bars.
Don’t skip the cornstarch in the apple mixture, as this little bit helps absorb any remaining juices and prevents the filling from being too wet, and always let the bars cool completely before cutting – I know it’s tempting, but warm bars will fall apart and won’t give you those clean, picture-perfect squares you’re after.
What to Serve With Apple Pie Bars?
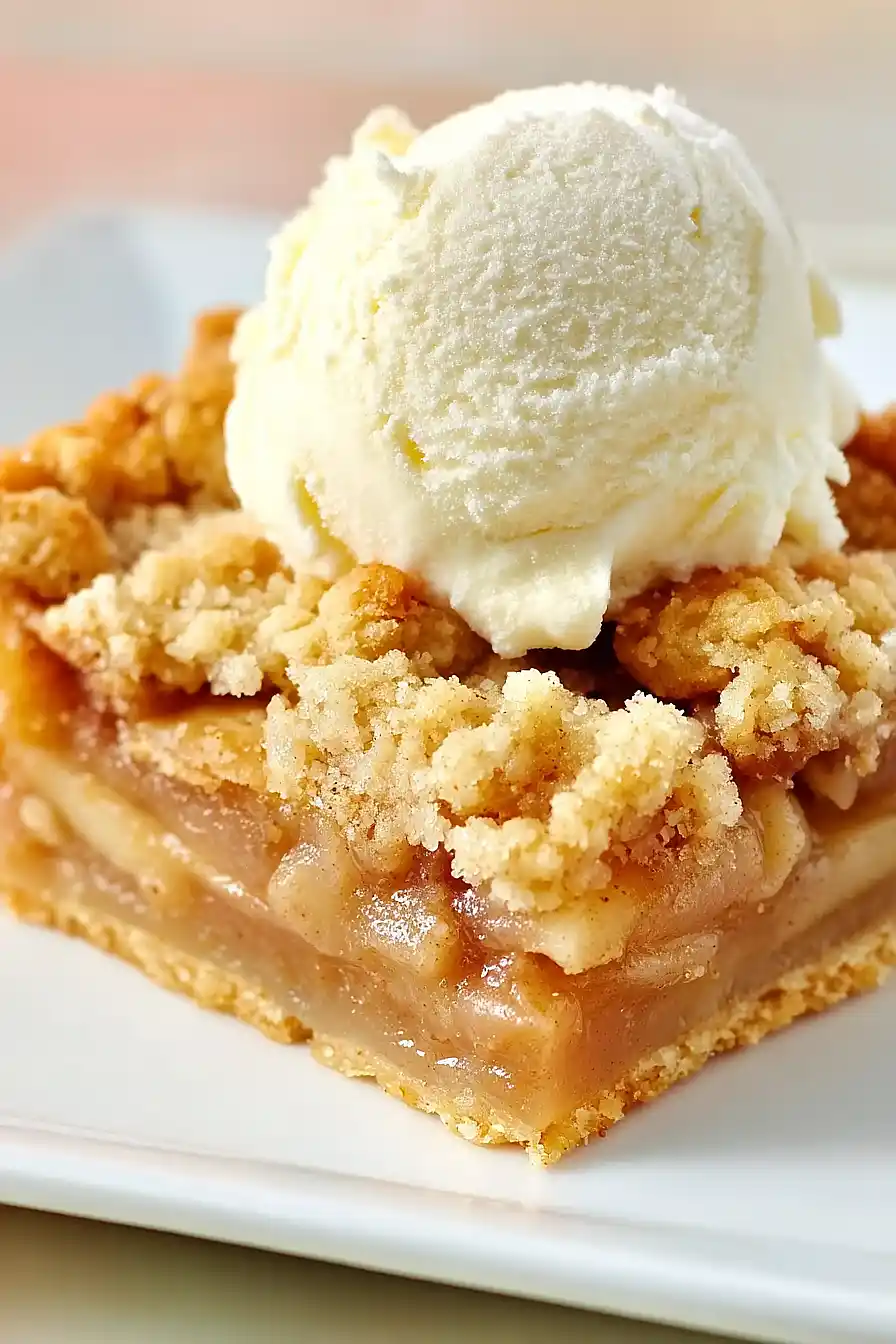
These apple pie bars are perfect on their own, but a scoop of vanilla ice cream on top takes them to the next level – especially when they’re still warm from the oven. A dollop of freshly whipped cream or even some caramel sauce drizzled over the bars makes for a really nice touch too. I love serving these with a hot cup of coffee or spiced apple cider, since the warm spices in the bars pair so well with those cozy fall drinks. For a fun presentation, you can dust the bars with a little powdered sugar before serving, which makes them look extra special for guests.
Storage Instructions
Keep Fresh: These apple pie bars taste amazing for days! Store them covered at room temperature for up to 3 days, or in the refrigerator for up to a week. I actually think they taste even better the next day once all those cinnamon and apple flavors have had time to meld together.
Freeze: You can absolutely freeze these bars for longer storage. Wrap them individually in plastic wrap or store in a freezer-safe container with parchment paper between layers for up to 3 months. They’re perfect for having a homemade treat ready whenever you need one.
Warm Up: If you want to serve them warm like fresh from the oven, just pop a piece in the microwave for about 15-20 seconds. You can also warm them in a 300°F oven for about 5 minutes if you’re heating several pieces at once.
| Preparation Time | 20-30 minutes |
| Cooking Time | 45-60 minutes |
| Total Time | 65-90 minutes |
| Level of Difficulty | Medium |
Estimated Nutrition
Estimated nutrition for the whole recipe (without optional ingredients):
- Calories: 3100-3400
- Protein: 25-30 g
- Fat: 175-195 g
- Carbohydrates: 390-430 g
Ingredients
For the crust and topping:
- 1/3 cup white sugar
- 1 cup unsalted butter (softened to room temperature)
- 2 cups all-purpose flour
- 3/4 tsp kosher salt
- 1 tsp vanilla extract (I like Nielsen-Massey for baking)
- 1/3 cup finely chopped walnuts
- 1/4 cup light brown sugar (gently packed)
- 1 tsp ground cinnamon
For the apple filling:
- 1 tsp cornstarch
- 1 tbsp lemon juice
- 1 1/2 tsp ground cinnamon
- 3 tbsp white sugar
- 2 tbsp unsalted butter
- 3 lb apples (peeled, cored, and sliced 1/4 inch thick, I prefer a mix of Granny Smith and Honeycrisp)
- 1/2 tsp freshly grated nutmeg (for best flavor and aroma)
Step 1: Preheat Oven and Prepare Pan
Preheat your oven to 375°F (190°C).
Prepare an 8×8-inch square baking pan by lining it with parchment paper that is 8 inches wide but long enough to hang over two edges.
These overhanging edges will act as handles to lift the bars easily out of the pan after baking.
Step 2: Make and Bake the Crust
- 1 cup unsalted butter (2 sticks), softened
- 1/3 cup white sugar
- 1/4 cup light brown sugar, gently packed
- 1 tsp vanilla extract
- 2 cups all-purpose flour
- 3/4 tsp kosher salt
- 1/3 cup finely chopped walnuts
- 1 tsp ground cinnamon
In a large mixing bowl, combine the softened unsalted butter, white sugar, light brown sugar, and vanilla extract.
Beat using a stand mixer or hand mixer on medium speed for about 2 minutes, until the mixture is lightened and creamy.
In another bowl, whisk together the all-purpose flour, kosher salt, 1 teaspoon ground cinnamon, and finely chopped walnuts.
Gradually add the dry mixture to the butter-sugar mixture with the mixer on low speed, beating until just combined.
Scatter two-thirds of the dough into the prepared pan and press it down lightly to evenly cover the bottom and about 1/2 inch up the sides.
Reserve the remaining third of the dough for later.
Refrigerate the pan with the crust for 20 minutes, then bake for 18–20 minutes until the crust is golden brown.
Set aside to cool.
I always take a moment to lightly press the crust into the corners to ensure sturdy edges for the bars.
Step 3: Prepare the Apple Filling
- 2 tbsp unsalted butter
- 3 lb apples (about 4 medium, peeled, cored, and sliced 1/4 inch thick)
- 1 tbsp lemon juice
- 3 tbsp white sugar
- 1 1/2 tsp ground cinnamon
- 1/2 tsp freshly grated nutmeg
- 1 tsp cornstarch
While the crust chills and bakes, prepare the apple filling.
In a large heavy pot, melt the unsalted butter over medium-low heat.
Add the sliced apples, lemon juice, white sugar, 1 1/2 teaspoons ground cinnamon, and freshly grated nutmeg.
Cook, stirring often, for about 15 minutes, or until the apples are tender and most of the liquid has evaporated.
In the last minute of cooking, stir in the cornstarch and continue to cook until the mixture thickens.
Remove from heat.
Step 4: Assemble and Bake the Bars
- baked crust (from Step 2)
- apple filling (from Step 3)
- reserved crust dough (from Step 2)
Spread the apple filling evenly over the baked crust, leaving a 1/2-inch border around the edges.
Take the reserved dough from Step 2, smush it with your fingers, and scatter the pieces evenly over the apples—don’t worry if the topping doesn’t cover the filling completely.
Bake in the oven at 375°F (190°C) for 25–30 minutes, or until the topping is nicely browned.
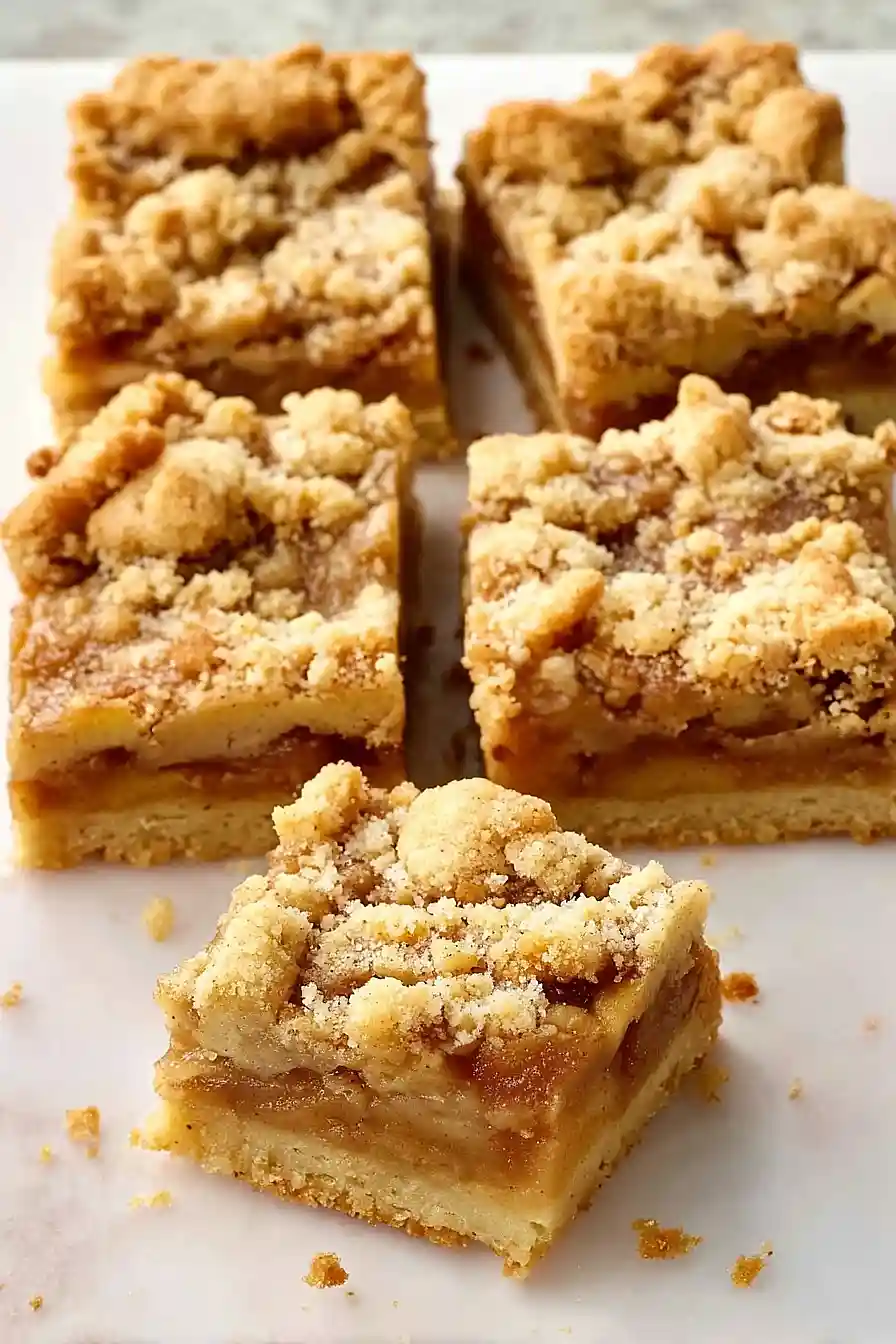
Step 5: Cool, Slice, and Serve
Allow the bars to cool completely in the pan.
Use the parchment paper overhang as handles to lift the bars out of the pan.
Transfer to a cutting board and slice into bars.
For extra flavor, I sometimes dust the top lightly with powdered sugar before serving.
