Christmas cookies are my weakness. I’ve tried every variation of sugar cookie, gingerbread, and snickerdoodle out there. But Russian tea cakes hold a special place in my heart because they’re so easy to make and they look fancy without any extra work.
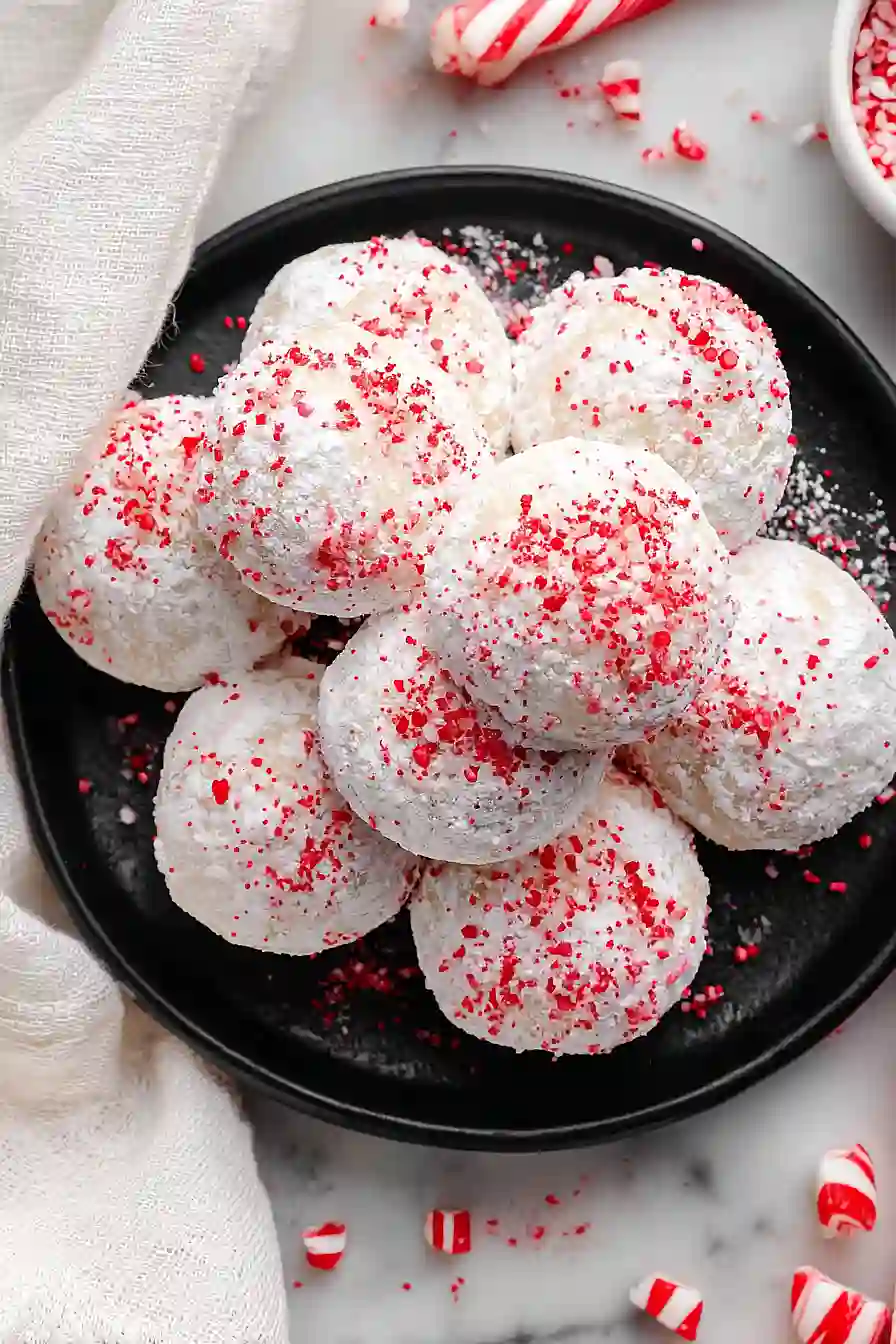
This year I decided to give them a twist with peppermint and white chocolate. The peppermint extract gives them that holiday flavor we all love, and the white chocolate chips add a creamy sweetness that balances everything out. Plus, if you throw on some red sugar sprinkles, they look festive enough to bring to any cookie exchange.
These cookies come together quickly, which is perfect when you’re already juggling a dozen other things during the holidays. Mix, roll, bake, and coat in powdered sugar. That’s it. No fancy piping bags or cookie cutters required.

Why You’ll Love These Peppermint Russian Tea Cakes
- Quick and easy – These cookies come together in under 30 minutes, making them perfect for last-minute holiday gatherings or when you need a sweet treat fast.
- Festive holiday flavor – The peppermint and white chocolate combo gives classic Russian tea cakes a fun seasonal twist that everyone will love during the holidays.
- Simple ingredients – You probably have most of these pantry staples on hand already, so you can whip up a batch whenever the craving hits.
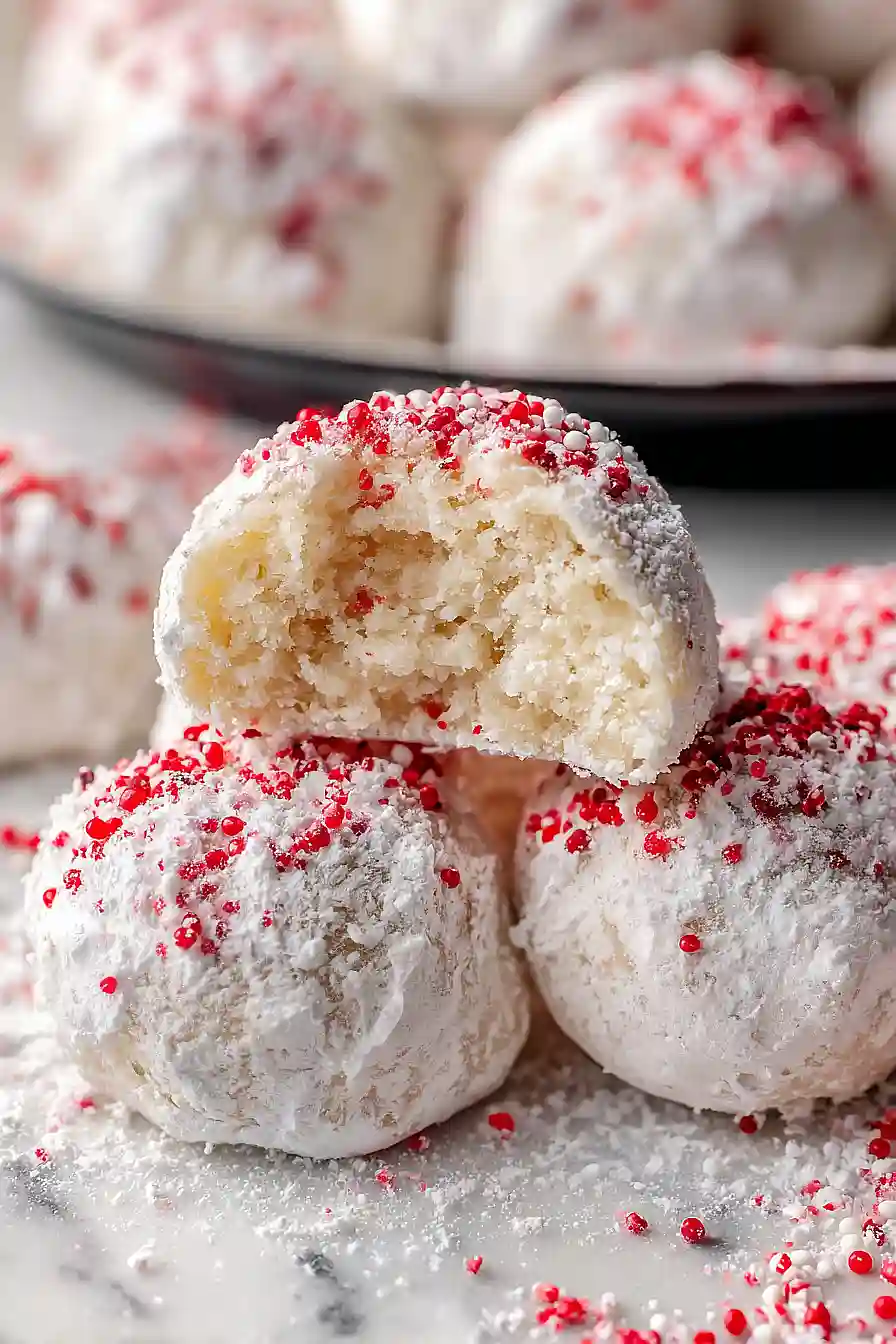
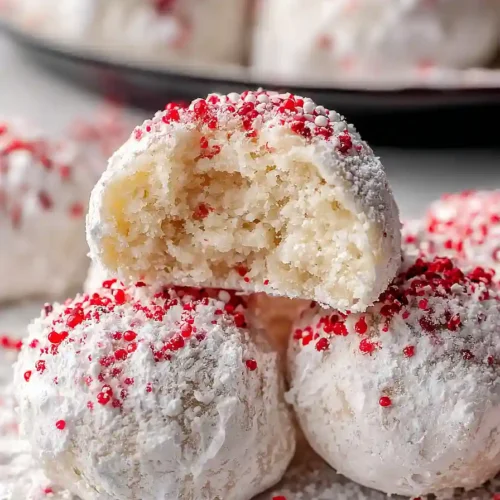
- Melt-in-your-mouth texture – These cookies are buttery, tender, and delicate with a snowy coating of powdered sugar that makes them irresistible.
- Great for gifting – They look beautiful on a cookie platter and hold up well in tins, making them ideal for holiday cookie exchanges or homemade gifts.
What Kind of White Chocolate Should I Use?
For these peppermint Russian tea cakes, you’ll want to use good quality white chocolate chips that you’ll chop up into smaller pieces. Regular white chocolate chips from brands like Ghirardelli or Nestle work great, but if you want to go the extra mile, you can use a white chocolate baking bar and chop it yourself for more irregular chunks. Just avoid using white chocolate candy melts or almond bark, as they don’t have the same creamy texture and can taste waxy in baked goods. The key is to roughly chop your chips so you get different sized pieces throughout the cookies, which creates nice pockets of melted chocolate in every bite.
Options for Substitutions
These festive cookies are pretty forgiving when it comes to swaps:
- Unsalted butter: You can use salted butter if that’s what you have, just skip the added salt in the recipe. Margarine works too, though the texture won’t be quite as rich.
- Peppermint extract: If peppermint isn’t your thing, try vanilla extract for classic Russian tea cakes, or almond extract for a nutty twist. Use the same amount.
- White chocolate chips: Semi-sweet or milk chocolate chips work great here. You can also use crushed peppermint candies for extra mint flavor, or leave out the mix-ins entirely for traditional tea cakes.
- All purpose flour: Don’t substitute this one – all purpose flour is what gives these cookies their signature crumbly, melt-in-your-mouth texture.
- Red sugar sprinkles: Any color sprinkles work, or you can skip them altogether. Crushed candy canes make a nice seasonal alternative.
Watch Out for These Mistakes While Baking
The biggest mistake when making Russian tea cakes is overbaking them, which turns these delicate cookies dry and crumbly instead of tender and melt-in-your-mouth – pull them from the oven when they’re just barely set and still pale, not golden brown.
Another common error is rolling the cookies in powdered sugar while they’re too hot, which causes the sugar to melt and disappear into the cookie rather than creating that signature snowy coating – let them cool for about 5 minutes first, then roll them twice for the best coverage.
Make sure your butter is truly softened to room temperature (not melted or too cold), as this affects how well the dough holds together and shapes into balls.
Finally, don’t skip chilling your hands or the dough if it gets too soft while rolling, since warm dough will stick to your palms and make shaping the cookies frustrating and messy.
What to Serve With Peppermint Russian Tea Cakes?
These cookies are perfect alongside a hot cup of coffee or tea during the holidays, and they make a great addition to any cookie platter. I love serving them with hot chocolate topped with whipped cream and crushed candy canes for a full peppermint experience. They’re also nice paired with other holiday cookies like gingerbread or sugar cookies when you’re putting together a dessert spread for guests. Since they’re on the sweeter side with all that powdered sugar, a strong black tea or espresso helps balance out the flavors nicely.
Storage Instructions
Store: These peppermint tea cakes stay fresh in an airtight container at room temperature for about a week. Just layer them with parchment paper between each layer so they don’t stick together. They’re actually great to make a few days ahead since the flavors meld together nicely!
Freeze: You can freeze these cookies for up to 3 months, which makes them perfect for holiday baking ahead of time. Freeze them in a single layer first, then transfer to a freezer bag once they’re solid. When you’re ready to serve, just thaw them at room temperature and dust with fresh powdered sugar if needed.
Make Ahead: The dough freezes really well if you want to get a head start. Roll the dough into balls and freeze them on a baking sheet, then transfer to a freezer bag. You can bake them straight from frozen, just add a couple extra minutes to the baking time.
| Preparation Time | 15-20 minutes |
| Cooking Time | 10-12 minutes |
| Total Time | 25-32 minutes |
| Level of Difficulty | Easy |
Estimated Nutrition
Estimated nutrition for the whole recipe (without optional ingredients):
- Calories: 2900-3100
- Protein: 24-28 g
- Fat: 170-180 g
- Carbohydrates: 340-360 g
Ingredients
For the dough:
- 1/2 tsp peppermint extract (for best flavor and aroma)
- 1 cup unsalted butter (softened to room temperature)
- 2 cups all-purpose flour (I use King Arthur all-purpose flour)
- 3/4 cup white chocolate chips (finely chopped)
- 1/2 tsp salt
- 1/2 cup powdered sugar
For the coating:
- 1/2 cup powdered sugar (for rolling)
- 2 tsp red sugar sprinkles (optional but recommended for festive appearance)
Step 1: Prepare Mise en Place and Preheat
- 3/4 cup white chocolate chips
- 1/2 cup powdered sugar
- 1/2 cup powdered sugar
Preheat your oven to 350°F (note: the original recipe suggests 400°F, but I find 350°F gives these delicate cookies a more even, tender crumb without over-browning the bottoms).
While the oven preheats, finely chop the white chocolate chips into small pieces—this helps them distribute evenly throughout the dough and prevents large chunks from melting unevenly.
Have your baking sheet ready and measure out both portions of powdered sugar into separate bowls: one for mixing into the dough and one for the final coating.
Step 2: Cream Butter with Peppermint and Sugar
- 1 cup unsalted butter
- 1/2 cup powdered sugar
- 1/2 tsp peppermint extract
In a stand mixer or with a hand mixer, beat the softened unsalted butter on medium-high speed for about 1-2 minutes until it becomes pale and fluffy.
This creaming process incorporates air into the butter, which is essential for a tender cookie texture.
Add the 1/2 cup powdered sugar and peppermint extract, then beat for another 1-2 minutes until the mixture is light, fluffy, and the peppermint aroma is fully developed.
I like to use peppermint extract rather than peppermint oil because it distributes more evenly and gives a cleaner flavor without an overly medicinal note.
Step 3: Combine Dry Ingredients and Finish Dough
- butter mixture from Step 2
- 2 cups all-purpose flour
- 1/2 tsp salt
- 3/4 cup white chocolate chips
Reduce the mixer speed to low and gradually add the all-purpose flour and salt, mixing just until the flour is incorporated—be careful not to overmix, as this can develop gluten and make the cookies tough.
Once the flour is mostly combined, add the finely chopped white chocolate chips and mix on low speed for just a few more seconds until evenly distributed.
The dough will be slightly crumbly but should hold together when pressed.
I recommend letting the dough rest in the mixer bowl for a minute before rolling to let the flour fully hydrate.
Step 4: Shape and Bake Cookies
- dough from Step 3
Working with the dough from Step 3, roll it into balls roughly 1 inch in diameter—this size ensures even baking and the classic Russian tea cake appearance.
Place each ball about 1 inch apart on the baking sheet, as they will spread slightly.
Bake for 9-11 minutes until the edges are just barely set but the centers still look slightly underbaked (the cookies will continue to set as they cool).
The cookies should be pale golden or cream-colored, not brown—overbaking will make them dry and lose their delicate texture.
Step 5: Cool and Prepare Coating
- 1/2 cup powdered sugar
- 2 tsp red sugar sprinkles
Remove the baking sheet from the oven and let the cookies cool on the sheet for 3-4 minutes—this allows them to firm up enough to handle without breaking but while they’re still warm (which is key for the coating to adhere).
While the cookies cool, pour the reserved 1/2 cup powdered sugar into a shallow bowl and add the red sugar sprinkles if using.
Stir the mixture together so the sprinkles are evenly distributed throughout the sugar.
Step 6: Roll in Sugar Coating and Final Cool
- warm cookies from Step 4
- sugar and sprinkle mixture from Step 5
Working quickly while the cookies are still warm, gently toss each cookie in the powdered sugar and sprinkle mixture until fully coated.
Place the coated cookies on a wire rack to cool completely—the residual heat from the cookies will help set the sugar coating, creating that signature snowy appearance.
Let them cool for at least 15-20 minutes before serving or storing.
For serving, I like to dust them with a tiny bit more powdered sugar right before plating for an extra festive presentation.
Homemade Peppermint Russian Tea Cakes
Ingredients
For the dough:
- 1/2 tsp peppermint extract (for best flavor and aroma)
- 1 cup unsalted butter (softened to room temperature)
- 2 cups all-purpose flour (I use King Arthur all-purpose flour)
- 3/4 cup white chocolate chips (finely chopped)
- 1/2 tsp salt
- 1/2 cup powdered sugar
For the coating:
- 1/2 cup powdered sugar (for rolling)
- 2 tsp red sugar sprinkles (optional but recommended for festive appearance)
Instructions
- Preheat your oven to 350°F (note: the original recipe suggests 400°F, but I find 350°F gives these delicate cookies a more even, tender crumb without over-browning the bottoms). While the oven preheats, finely chop the white chocolate chips into small pieces—this helps them distribute evenly throughout the dough and prevents large chunks from melting unevenly. Have your baking sheet ready and measure out both portions of powdered sugar into separate bowls: one for mixing into the dough and one for the final coating.
- In a stand mixer or with a hand mixer, beat the softened unsalted butter on medium-high speed for about 1-2 minutes until it becomes pale and fluffy. This creaming process incorporates air into the butter, which is essential for a tender cookie texture. Add the 1/2 cup powdered sugar and peppermint extract, then beat for another 1-2 minutes until the mixture is light, fluffy, and the peppermint aroma is fully developed. I like to use peppermint extract rather than peppermint oil because it distributes more evenly and gives a cleaner flavor without an overly medicinal note.
- Reduce the mixer speed to low and gradually add the all-purpose flour and salt, mixing just until the flour is incorporated—be careful not to overmix, as this can develop gluten and make the cookies tough. Once the flour is mostly combined, add the finely chopped white chocolate chips and mix on low speed for just a few more seconds until evenly distributed. The dough will be slightly crumbly but should hold together when pressed. I recommend letting the dough rest in the mixer bowl for a minute before rolling to let the flour fully hydrate.
- Working with the dough from Step 3, roll it into balls roughly 1 inch in diameter—this size ensures even baking and the classic Russian tea cake appearance. Place each ball about 1 inch apart on the baking sheet, as they will spread slightly. Bake for 9-11 minutes until the edges are just barely set but the centers still look slightly underbaked (the cookies will continue to set as they cool). The cookies should be pale golden or cream-colored, not brown—overbaking will make them dry and lose their delicate texture.
- Remove the baking sheet from the oven and let the cookies cool on the sheet for 3-4 minutes—this allows them to firm up enough to handle without breaking but while they're still warm (which is key for the coating to adhere). While the cookies cool, pour the reserved 1/2 cup powdered sugar into a shallow bowl and add the red sugar sprinkles if using. Stir the mixture together so the sprinkles are evenly distributed throughout the sugar.
- Working quickly while the cookies are still warm, gently toss each cookie in the powdered sugar and sprinkle mixture until fully coated. Place the coated cookies on a wire rack to cool completely—the residual heat from the cookies will help set the sugar coating, creating that signature snowy appearance. Let them cool for at least 15-20 minutes before serving or storing. For serving, I like to dust them with a tiny bit more powdered sugar right before plating for an extra festive presentation.
