Bread baking used to scare me. All that kneading and rising and timing felt like too much work for a busy weeknight. But then I discovered focaccia, and everything changed. It’s basically the lazy baker’s dream bread.
Focaccia is forgiving in all the ways regular bread isn’t. You can’t really mess up the texture, and it actually gets better when you let it sit around for a while. Plus, you can top it with whatever you have on hand. Tonight’s dinner getting boring? Slice up some focaccia and suddenly you’ve got something special.
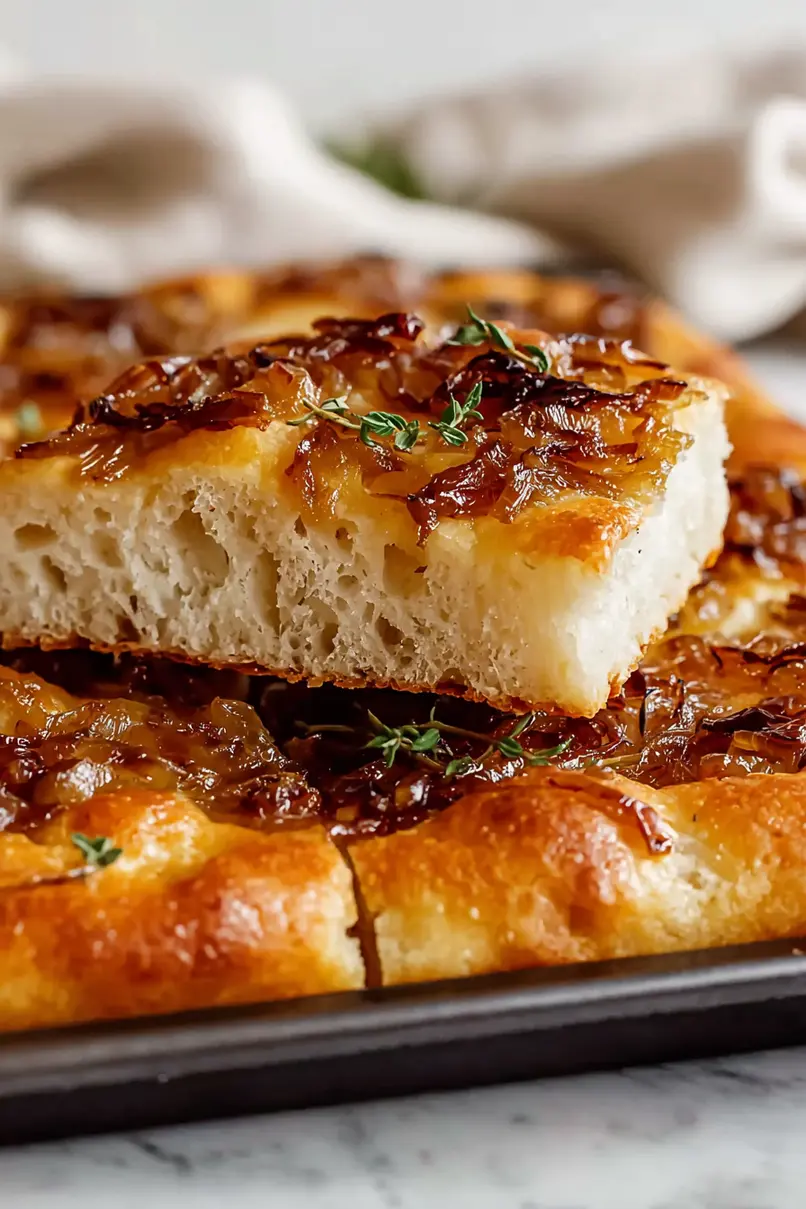
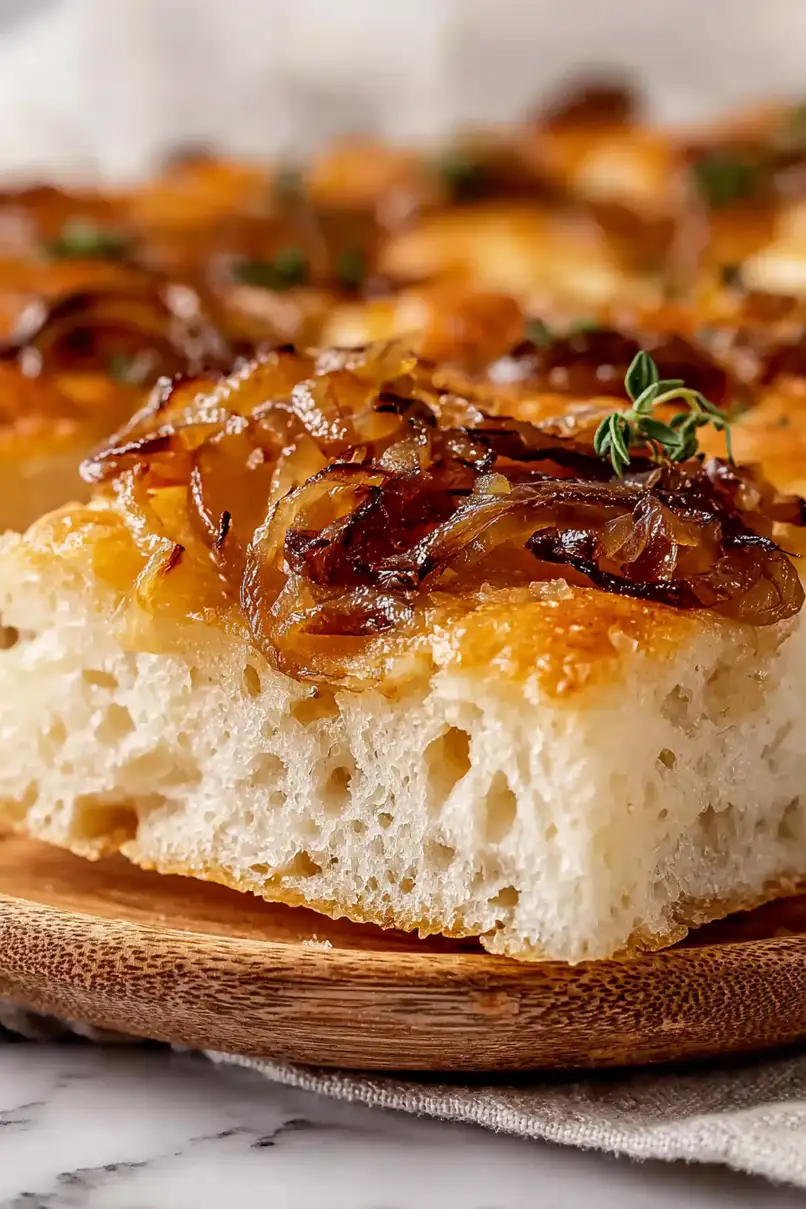
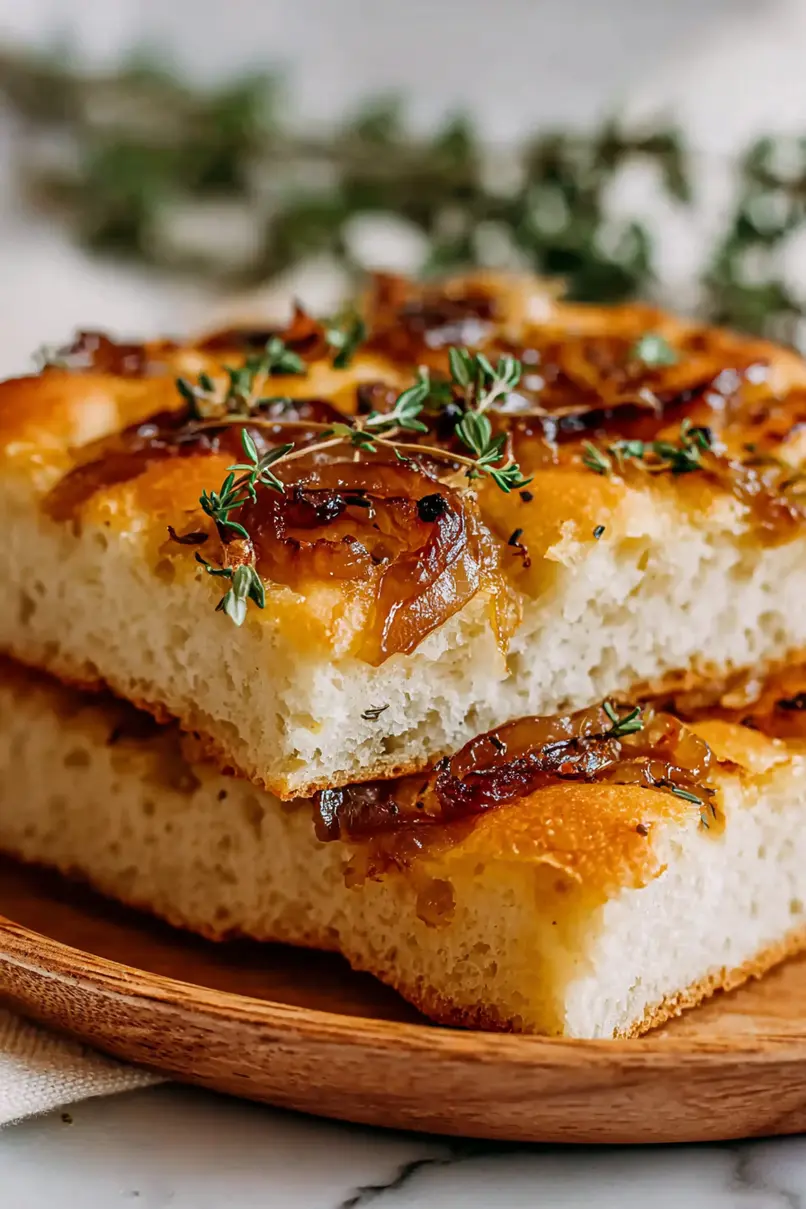
This caramelized onion version is my go-to when I want to look like I spent hours in the kitchen but really only put in about twenty minutes of actual work. The onions do their thing low and slow while I’m helping with homework or folding laundry. Before I know it, I’ve got golden, sweet onions ready to pile on top of pillowy bread. It’s the kind of recipe that makes you feel like a kitchen genius without breaking a sweat.
Why You’ll Love This Caramelized Onion Focaccia
- Rich, sweet caramelized onions – The slow-cooked onions become golden and jammy, creating an incredible depth of flavor that pairs perfectly with the herb-infused bread.
- Simple bread-making technique – This focaccia doesn’t require any kneading or complicated shaping – just mix, rise, and bake for bakery-quality results at home.
- Fresh herb flavor – The combination of fresh thyme and garlic-infused olive oil gives this bread an aromatic, restaurant-quality taste that fills your kitchen with amazing smells.
- Perfect for sharing – This makes a generous portion that’s ideal for dinner parties, family meals, or just having delicious homemade bread on hand for the week.
- Impressive but approachable – While it looks and tastes fancy enough for special occasions, the straightforward process makes it totally doable for home bakers of any skill level.
What Kind of Onions Should I Use?
Yellow onions are your best bet for this focaccia recipe since they caramelize beautifully and develop that sweet, rich flavor we’re after. They have the perfect balance of sweetness and sharpness that mellows out during the long cooking process. White onions can work in a pinch, but they tend to be a bit more pungent and won’t give you quite the same depth of flavor. I’d avoid red onions here since they can turn an odd color when caramelized and have a slightly different taste profile. When you’re shopping, look for onions that feel firm and heavy for their size, with dry, papery skins and no soft spots.
Options for Substitutions
This focaccia recipe is pretty forgiving when it comes to swaps, though some ingredients are better left as-is:
- All-purpose flour: Stick with all-purpose flour for the best texture – bread flour will make it too chewy, and other flours won’t give you that perfect focaccia crumb.
- Instant yeast: If you only have active dry yeast, use the same amount but dissolve it in the lukewarm water first and let it foam for 5 minutes before mixing with the flour.
- Yellow onions: Sweet onions or white onions work great too. Red onions will give you a slightly different flavor and color, but they’re totally fine to use.
- Fresh thyme: Dried thyme works in a pinch – use about 1/3 the amount called for. Rosemary is another great herb option if you prefer that flavor.
- Parmesan cheese: Pecorino Romano or aged Asiago make good substitutes. You can also skip the cheese entirely if needed.
- Salted butter: Unsalted butter works fine – just add a pinch more salt to the onions. You can even use all olive oil instead of butter for the caramelized onions.
Watch Out for These Mistakes While Baking
The biggest mistake when making caramelized onion focaccia is rushing the onion caramelization process – those onions need at least 30-40 minutes of slow, patient cooking over medium-low heat to develop their sweet, golden flavor, so resist the urge to crank up the heat.
Another common error is not letting your dough rise properly in a warm, draft-free spot, which can result in dense, heavy bread instead of the light, airy texture focaccia is known for.
When it comes to the final olive oil drizzle, don’t be shy – focaccia should have plenty of oil pooling in those signature dimples you create with your fingers, as this is what gives the bread its crispy bottom and tender interior.
Finally, make sure your oven is fully preheated to the right temperature before baking, and keep an eye on the top during the last few minutes to prevent the garlic and thyme from burning.
What to Serve With Caramelized Onion Focaccia?
This focaccia is perfect as an appetizer with a simple charcuterie board – just add some cured meats, soft cheeses, and olives for an easy spread. I love serving it alongside a big bowl of minestrone or Italian wedding soup since the bread is ideal for soaking up all those delicious flavors. You can also slice it up and use it for sandwiches, especially with roasted vegetables, fresh mozzarella, and a drizzle of balsamic glaze. For a lighter option, pair it with a crisp arugula salad dressed with lemon and olive oil to balance out the rich, caramelized onions.
Storage Instructions
Keep Fresh: Your focaccia will stay soft and delicious when wrapped in plastic wrap or stored in an airtight container at room temperature for up to 3 days. I like to keep mine on the counter since it tastes best when it’s not cold from the fridge.
Freeze: This bread freezes really well for up to 3 months! Just wrap it tightly in plastic wrap, then pop it in a freezer bag. You can freeze the whole loaf or cut it into portions first – whatever works better for your family.
Warm Up: To bring your focaccia back to life, wrap it in foil and warm it in a 350°F oven for about 10-15 minutes if it’s from the counter, or 20-25 minutes if it’s frozen. You can also slice it and toast individual pieces for a crispy texture that’s perfect with soup or salad.
| Preparation Time | 30-45 minutes |
| Cooking Time | 75-90 minutes |
| Total Time | 105-135 minutes |
| Level of Difficulty | Medium |
Estimated Nutrition
Estimated nutrition for the whole recipe (without optional ingredients):
- Calories: 2400-2600
- Protein: 45-55 g
- Fat: 110-125 g
- Carbohydrates: 310-335 g
Ingredients
For the caramelized onions:
- 1/4 cup water
- 2 tbsp olive oil (good quality for flavor)
- 2 tbsp chopped fresh thyme
- 1 tbsp salted butter
- 4 cups chopped yellow onions (about 2 large onions)
For the dough:
- 2 tbsp olive oil
- 2 tsp instant yeast
- 1 1/4 cup warm water (105-115°F)
- 1 tbsp sugar
- 1/4 cup finely shredded parmesan
- 2 1/2 cups all-purpose flour
- 3/4 tsp salt
For the garlic oil and topping:
- 3 crushed garlic cloves (freshly crushed for best flavor)
- 1–2 tbsp fresh thyme
- 1/4 cup olive oil (I use Colavita)
Step 1: Caramelize the Onions
- 2 tbsp olive oil
- 1 tbsp salted butter
- 4 cups chopped yellow onions
- 1/4 cup water
- 2 tbsp chopped fresh thyme
Melt the butter and 2 tablespoons of olive oil in a large skillet over medium heat.
Stir in the chopped yellow onions, then add 1/4 cup water and cover the pan.
Cook until the onions have softened, about 5 minutes.
Remove the cover and reduce the heat to medium-low.
Stir the onions frequently (be sure not to let them burn!) for about 1 hour, or until they are deeply caramelized.
Scrape the caramelized onions into a bowl and stir in 2 tablespoons of chopped fresh thyme.
I find that low and slow is the key here—a little patience gives you truly rich, sweet onions.
Step 2: Prepare the Dough
- 2 1/2 cups all-purpose flour
- 1 1/4 cup warm water
- 1/4 cup finely shredded parmesan
- 2 tbsp olive oil
- 1 tbsp sugar
- 2 tsp instant yeast
- 3/4 tsp salt
In a large bowl, combine the all-purpose flour, 1 1/4 cups warm water, finely shredded parmesan, 2 tablespoons olive oil, sugar, instant yeast, and salt.
Use a wooden spoon to mix the ingredients until everything is completely combined and a sticky dough forms.
Step 3: Allow Dough to Rise (First Proof)
- olive oil (for greasing, from remaining supply)
Lightly oil your hands and a separate large bowl.
Place the dough (from Step 2) into the prepared bowl, cover with plastic wrap, and set in a warm place to rise until doubled in size, about 1 hour.
Step 4: Make Garlic Oil
- 1/4 cup olive oil
- 3 crushed garlic cloves
While the dough is rising, make the garlic oil.
Heat 1/4 cup olive oil in a skillet, then add the crushed garlic cloves.
Cook for about 5 minutes, until the garlic is fragrant and beginning to brown.
Remove the garlic cloves and discard them, then set the oil aside to cool before using.
I like to infuse the oil gently and always remove the garlic before it turns bitter.
Step 5: Shape and Second Rise
- garlic oil from Step 4 (half)
- dough from Step 3
- olive oil (for greasing, from remaining supply)
Preheat your oven to 425°F (220°C).
Pour half of the prepared garlic oil (from Step 4) into an unlined 9×9 inch metal baking pan.
Once the dough (from Step 3) has doubled in size, lightly oil your hands and stretch the dough: grab the top section, stretch upwards, and fold it back onto itself.
Repeat with the other 3 sides.
Transfer the dough, seam side down, into the oiled baking pan.
Cover the pan with plastic wrap and let it rise again in a warm place for about 1 hour, or until doubled in size and almost filling the pan.
Step 6: Dimple, Top, and Bake the Focaccia
- garlic oil from Step 4 (remaining half)
- 1–2 tbsp fresh thyme
After the second rise, the dough should be bubbly and jiggly.
Pour the rest of the garlic oil (from Step 4) evenly over the top of the dough.
Using your fingers, press straight down into the dough to create deep dimples.
Sprinkle with 1–2 tablespoons of fresh thyme.
Transfer the pan to the oven and bake for 12–18 minutes, until the top is golden brown and the internal temperature is at least 190°F (88°C).
For a more authentic Italian touch, I like to add an extra pinch of thyme just before baking.
Step 7: Finish and Serve
- caramelized onions from Step 1
Once the focaccia comes out of the oven, spoon the caramelized onions (from Step 1) over the top.
Let the focaccia cool in the pan on a wire rack.
When cool, sprinkle with flaky sea salt and extra fresh thyme if you desire.
Slice into servings and enjoy!
I always love serving focaccia fresh—the flavors and textures are truly at their peak right out of the oven.
