If you ask me, no-bake desserts are one of life’s little wins.
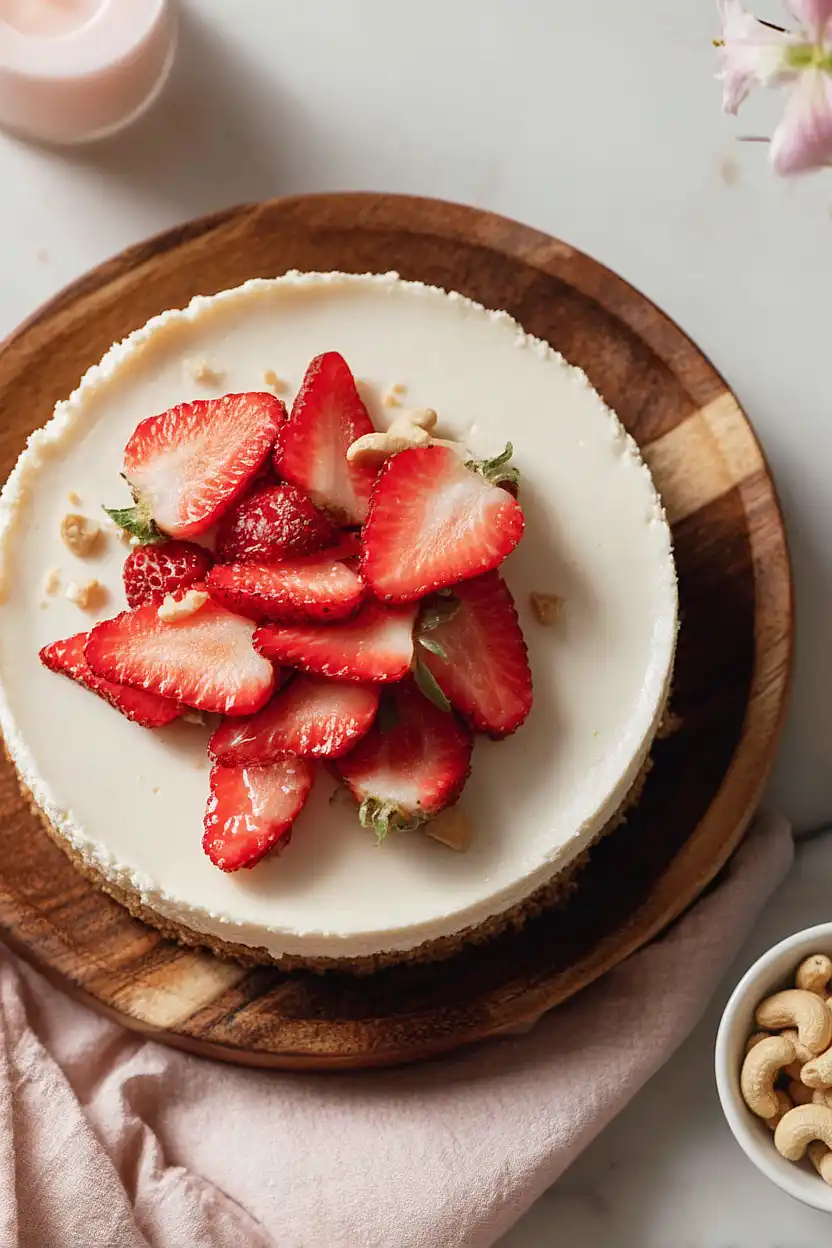
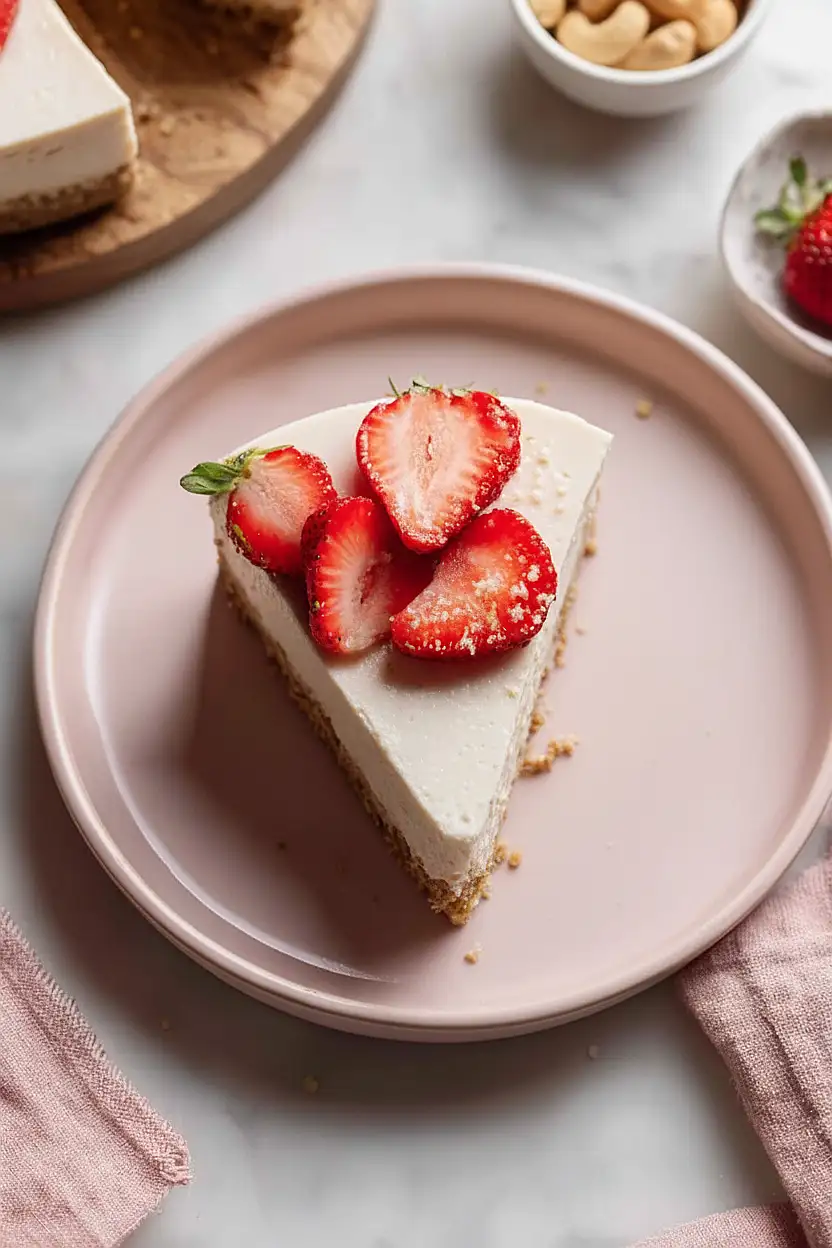
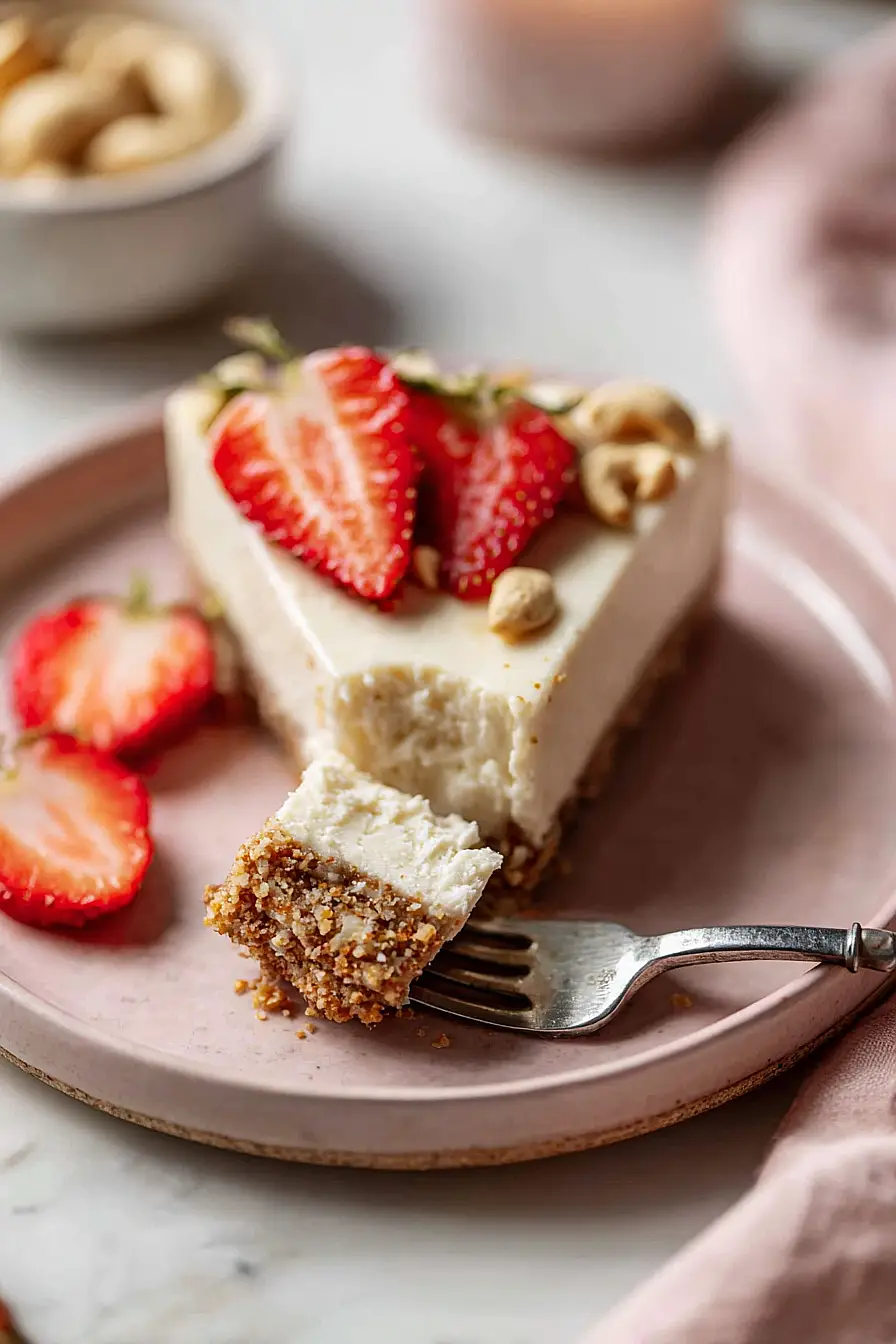
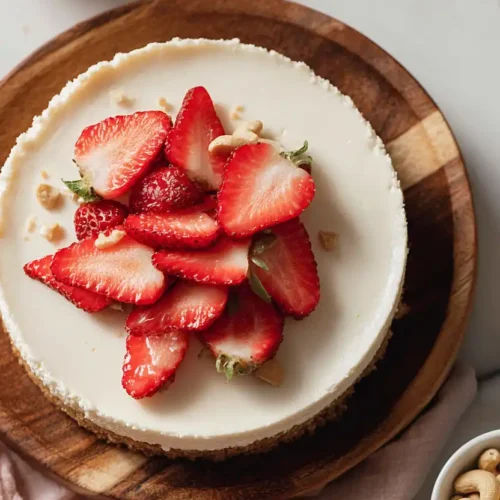
This cottage cheese cheesecake skips the oven entirely while still giving you that creamy, dreamy texture you want from a good cheesecake. The crust is packed with walnuts, almonds, and dates that get blended into a naturally sweet base.
The filling combines cottage cheese with soaked cashews for a smooth consistency that’s hard to beat. A little maple syrup, vanilla, and lemon juice bring everything together without any fuss.
It’s a simple dessert that feels fancy enough for company but easy enough to throw together on a weeknight.
Why You’ll Love This Cottage Cheese Cheesecake
- No baking required – Just blend, pour, and chill. No need to turn on your oven or worry about cracking the top.
- High-protein dessert – Thanks to the cottage cheese and cashews, you’re getting a good amount of protein in your sweet treat, making it a bit more satisfying than traditional cheesecake.
- Naturally sweetened – With dates and maple syrup doing the sweetening, you can feel good about skipping the refined sugar without sacrificing flavor.
- Simple ingredients – You probably have most of these pantry staples and nuts on hand already, making this an easy dessert to whip up when the craving hits.
What Kind of Cottage Cheese Should I Use?
For this no-bake cheesecake, you’ll want to use a good quality cottage cheese that’s as smooth as possible. Small curd cottage cheese is your best bet here since it blends more easily into a creamy filling, but if you only have large curd on hand, just make sure to blend it really well. Full-fat cottage cheese will give you the richest, creamiest texture, though low-fat versions can work if that’s what you prefer. The key is to blend your cottage cheese thoroughly with the other filling ingredients until it’s completely smooth – nobody wants lumpy cheesecake!
Options for Substitutions
This no-bake cheesecake is pretty forgiving when it comes to swaps:
- Walnuts and almonds: You can mix and match any nuts you have on hand for the crust – pecans, hazelnuts, or even all walnuts or all almonds work great. Just keep the total amount at 1 cup.
- Dates: If your dates are dry, soak them in warm water for 10 minutes before using. You can also substitute with dried figs or prunes, though the flavor will be slightly different.
- Cottage cheese: This is the star ingredient and really shouldn’t be substituted, as it gives this cheesecake its unique texture and protein boost. Make sure to use full-fat cottage cheese for the creamiest results.
- Cashews: Cashews create that smooth, creamy texture, so they’re pretty important here. If you have a nut allergy, you could try soaked sunflower seeds, but the taste will be different. Make sure to soak the cashews in hot water for at least 2 hours or overnight for the smoothest filling.
- Oat milk: Any plant-based milk works here – almond, soy, or regular dairy milk are all fine substitutes.
- Maple syrup: You can use honey, agave nectar, or even date syrup instead. Start with a bit less and adjust to taste, as sweetness levels vary.
- Lemon juice: Fresh lemon juice is best, but bottled works too. In a pinch, lime juice will give you that tangy flavor, just with a slightly different taste.
Watch Out for These Mistakes While Making
The biggest mistake with no-bake cheesecakes is not soaking your cashews long enough, which leads to a grainy filling instead of a smooth, creamy texture – soak them in hot water for at least 2 hours or overnight in cold water for best results.
Another common error is not blending the filling long enough, so make sure to blend for a full minute or even longer until it’s completely smooth with no visible cashew pieces.
Cutting into the cheesecake too soon will cause it to fall apart, so resist the temptation and give it the full 4 hours in the freezer, then let it sit at room temperature for those crucial 5-10 minutes to soften slightly.
If your crust isn’t sticking together well, add an extra tablespoon of maple syrup or a splash of water to help bind the nut and date mixture before pressing it into the pan.
What to Serve With Cottage Cheese Cheesecake?
This no bake cheesecake is pretty rich on its own, so I like to keep the sides simple and fresh. A handful of mixed berries like strawberries, blueberries, or raspberries on top adds a nice tart contrast to the sweet, creamy filling. You could also drizzle some extra maple syrup or a berry compote over each slice if you want to make it feel a bit more special. Since it’s already got nuts in the crust, I usually skip heavy sides and just serve it with a cup of coffee or tea for a relaxed dessert moment.
Storage Instructions
Store: This no bake cheesecake needs to stay chilled in the fridge to keep its creamy texture. Cover it with plastic wrap or keep it in an airtight container for up to 5 days. The flavors actually get better after a day or two as everything settles together.
Freeze: You can totally freeze this cheesecake for later! Wrap individual slices in plastic wrap and then place them in a freezer-safe container for up to 2 months. It’s great to have a slice ready whenever you’re craving something sweet.
Serve: Let frozen slices thaw in the fridge for a few hours or overnight before eating. If you’re in a hurry, you can leave it at room temperature for about 30 minutes, but it tastes best when it’s nice and cold from the fridge.
| Preparation Time | 30-40 minutes |
| Cooking Time | 0 minutes |
| Total Time | 270-280 minutes |
| Level of Difficulty | Easy |
| Servings | 8 slices |
Estimated Nutrition
Estimated nutrition for the whole recipe (without optional ingredients):
- Calories: 1750-1950
- Protein: 40-48 g
- Fat: 110-124 g
- Carbohydrates: 170-190 g
Ingredients
For the crust:
- 3/4 cup walnuts (I like Diamond of California walnuts for their freshness)
- 1/2 cup almonds
- 1/2 cup dates (pitted and soaked in warm water for 10 minutes to soften)
- 2 tbsp maple syrup
- 1/4 tsp salt
- 1/4 tsp ground cinnamon
For the filling:
- 1 1/2 cups cottage cheese (I use Good Culture low-fat for a thicker texture)
- 1 1/2 cups cashews (soaked for at least 4 hours for a silky smooth consistency)
- 2 tbsp oat milk
- 2 tbsp lemon juice
- 1/2 cup maple syrup
- 1 tbsp vanilla
- 1/8 tsp salt
Step 1: Prepare the Crust Base
- 3/4 cup walnuts
- 1/2 cup almonds
- 1/2 cup dates
- 2 tbsp maple syrup
- 1/4 tsp salt
- 1/4 tsp ground cinnamon
Start by soaking your pitted dates in warm water for 10 minutes to soften them—this makes them blend smoothly into the crust and creates a natural binder.
While the dates soak, add the walnuts, almonds, maple syrup, salt, and cinnamon to a food processor.
Once the dates are soft, drain them well and add to the processor.
Pulse everything together until the mixture is evenly combined with a sand-like texture that holds together when squeezed.
This should take about 1-2 minutes of pulsing.
Step 2: Form and Chill the Crust
- nut and date mixture from Step 1
Grease an 8-inch springform pan or pie pan lightly with oil or cooking spray.
Transfer the nut mixture from Step 1 into the prepared pan and press it firmly and evenly across the bottom, creating an even layer about 1/4-inch thick.
Use the bottom of a measuring cup or your fingers to pack it down well so it holds together.
Place the pan in the freezer while you prepare the filling—at least 15 minutes is ideal.
Step 3: Prepare the Cashew Filling
- 1 1/2 cups cashews
- 1 1/2 cups cottage cheese
- 2 tbsp oat milk
- 2 tbsp lemon juice
- 1/2 cup maple syrup
- 1 tbsp vanilla
- 1/8 tsp salt
Make sure your cashews have been soaked in water for at least 4 hours (or overnight)—this is essential for achieving that silky smooth texture.
Drain the soaked cashews completely and add them to your food processor along with the cottage cheese, oat milk, lemon juice, maple syrup, vanilla, and salt.
Blend for about 1 minute, stopping to scrape down the sides as needed.
I like to blend until it’s completely smooth and creamy with no grainy texture—this usually takes a full minute of continuous blending.
If the filling seems too thick, add a splash more oat milk and blend again.
Step 4: Assemble and Freeze
- crust from Step 2
- filling from Step 3
Remove the chilled crust from the freezer and pour the smooth cashew filling from Step 3 evenly over it.
Use a spatula to spread it level, ensuring it covers the entire crust.
Place the cheesecake back in the freezer and let it freeze for at least 4 hours, or until firm enough to slice cleanly.
For best results, freeze overnight.
Step 5: Serve
Remove the cheesecake from the freezer and let it sit at room temperature for 5-10 minutes before cutting.
This brief temper makes slicing much easier and ensures each slice has a creamy, custard-like texture rather than being rock-hard.
Use a warm, wet knife (wiping it between each cut) for the cleanest slices.
Irresistible No Bake Cottage Cheese Cheesecake
Ingredients
For the crust::
- 3/4 cup walnuts (I like Diamond of California walnuts for their freshness)
- 1/2 cup almonds
- 1/2 cup dates (pitted and soaked in warm water for 10 minutes to soften)
- 2 tbsp maple syrup
- 1/4 tsp salt
- 1/4 tsp ground cinnamon
For the filling::
- 1 1/2 cups cottage cheese (I use Good Culture low-fat for a thicker texture)
- 1 1/2 cups cashews (soaked for at least 4 hours for a silky smooth consistency)
- 2 tbsp oat milk
- 2 tbsp lemon juice
- 1/2 cup maple syrup
- 1 tbsp vanilla
- 1/8 tsp salt
Instructions
- Start by soaking your pitted dates in warm water for 10 minutes to soften them—this makes them blend smoothly into the crust and creates a natural binder. While the dates soak, add the walnuts, almonds, maple syrup, salt, and cinnamon to a food processor. Once the dates are soft, drain them well and add to the processor. Pulse everything together until the mixture is evenly combined with a sand-like texture that holds together when squeezed. This should take about 1-2 minutes of pulsing.
- Grease an 8-inch springform pan or pie pan lightly with oil or cooking spray. Transfer the nut mixture from Step 1 into the prepared pan and press it firmly and evenly across the bottom, creating an even layer about 1/4-inch thick. Use the bottom of a measuring cup or your fingers to pack it down well so it holds together. Place the pan in the freezer while you prepare the filling—at least 15 minutes is ideal.
- Make sure your cashews have been soaked in water for at least 4 hours (or overnight)—this is essential for achieving that silky smooth texture. Drain the soaked cashews completely and add them to your food processor along with the cottage cheese, oat milk, lemon juice, maple syrup, vanilla, and salt. Blend for about 1 minute, stopping to scrape down the sides as needed. I like to blend until it's completely smooth and creamy with no grainy texture—this usually takes a full minute of continuous blending. If the filling seems too thick, add a splash more oat milk and blend again.
- Remove the chilled crust from the freezer and pour the smooth cashew filling from Step 3 evenly over it. Use a spatula to spread it level, ensuring it covers the entire crust. Place the cheesecake back in the freezer and let it freeze for at least 4 hours, or until firm enough to slice cleanly. For best results, freeze overnight.
- Remove the cheesecake from the freezer and let it sit at room temperature for 5-10 minutes before cutting. This brief temper makes slicing much easier and ensures each slice has a creamy, custard-like texture rather than being rock-hard. Use a warm, wet knife (wiping it between each cut) for the cleanest slices.
