Finding a homemade gift that feels special without requiring expert-level baking skills can seem impossible, especially during the busy holiday season. Between work deadlines, family commitments, and endless to-do lists, most of us don’t have time to spend hours in the kitchen perfecting complicated confections.
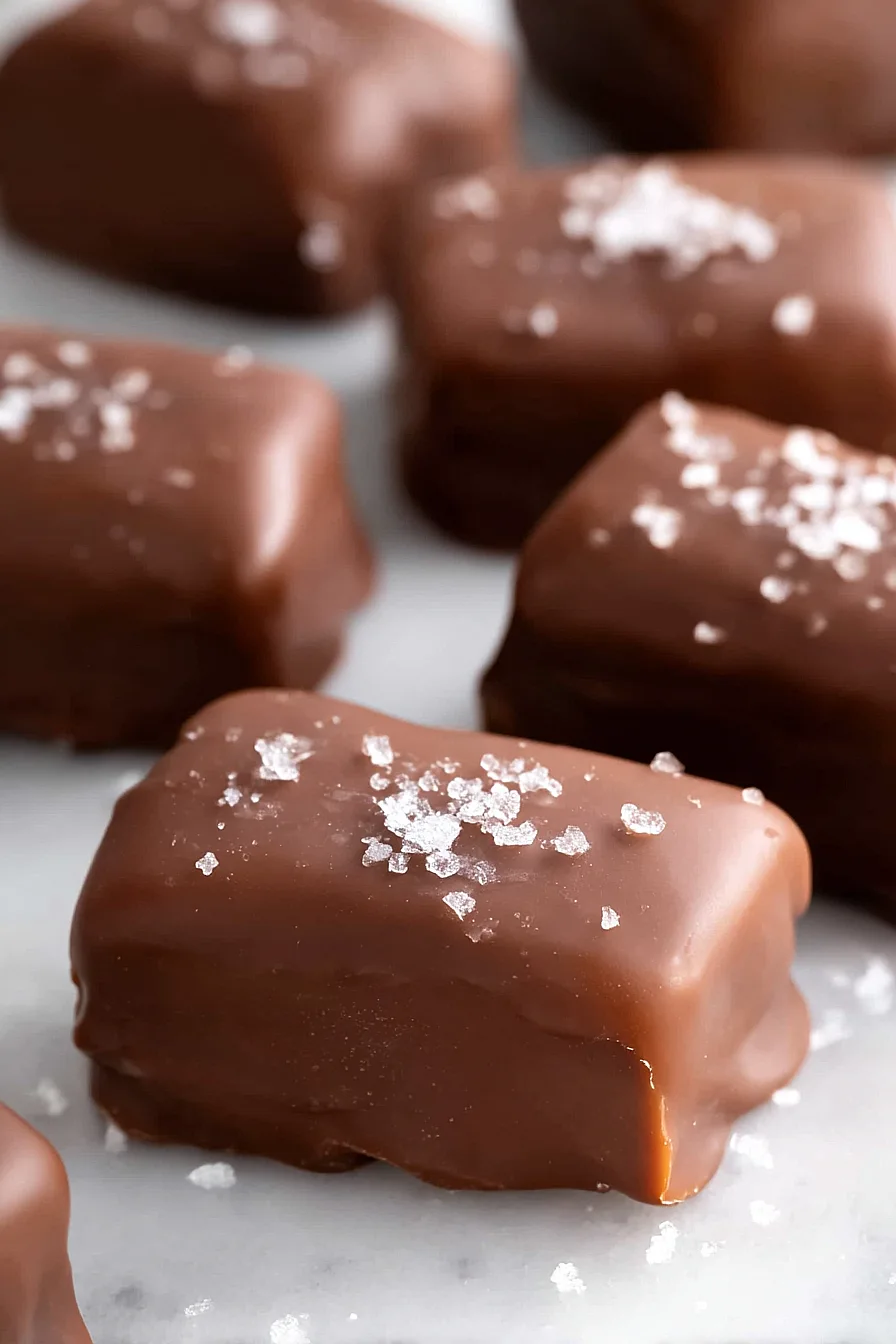
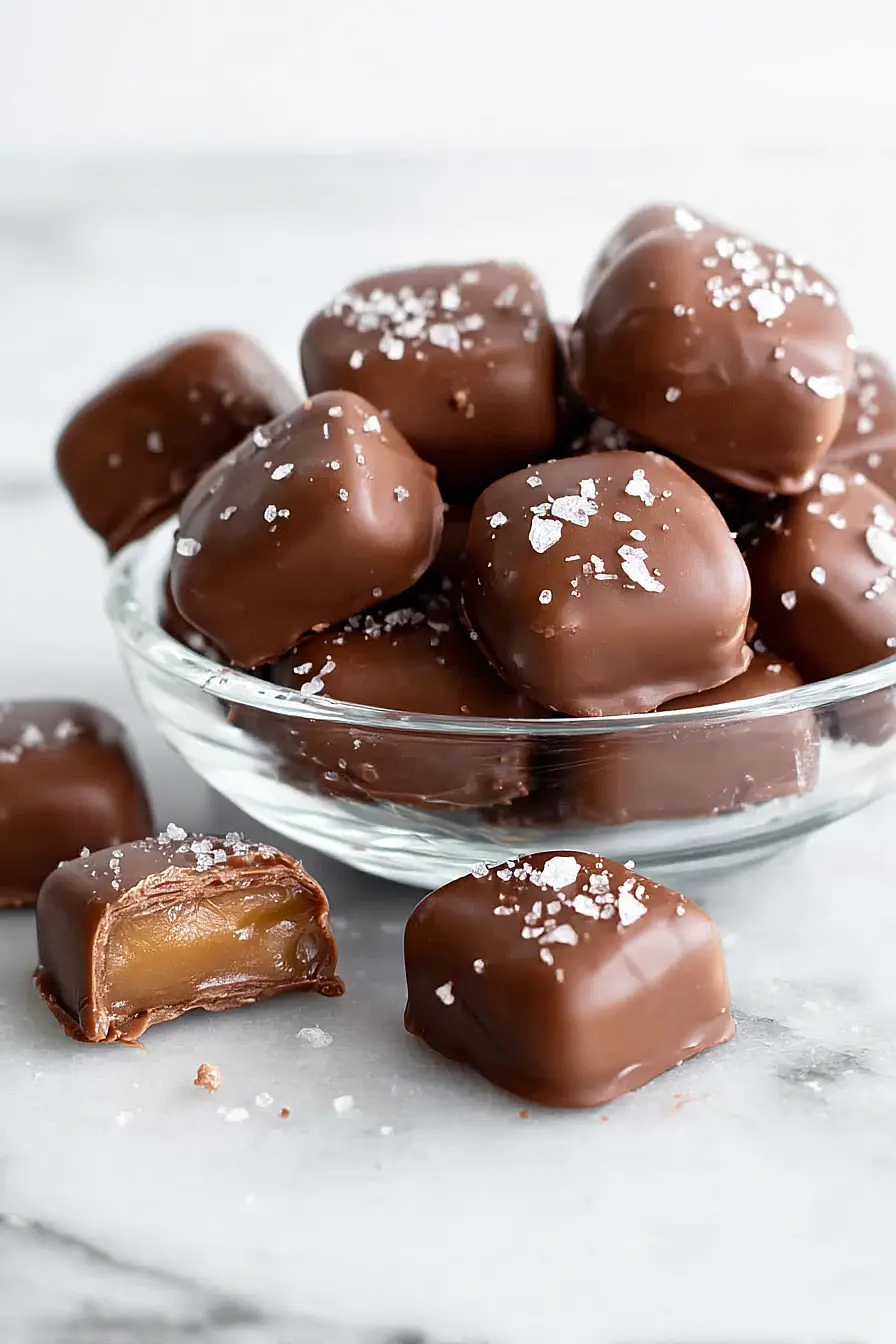
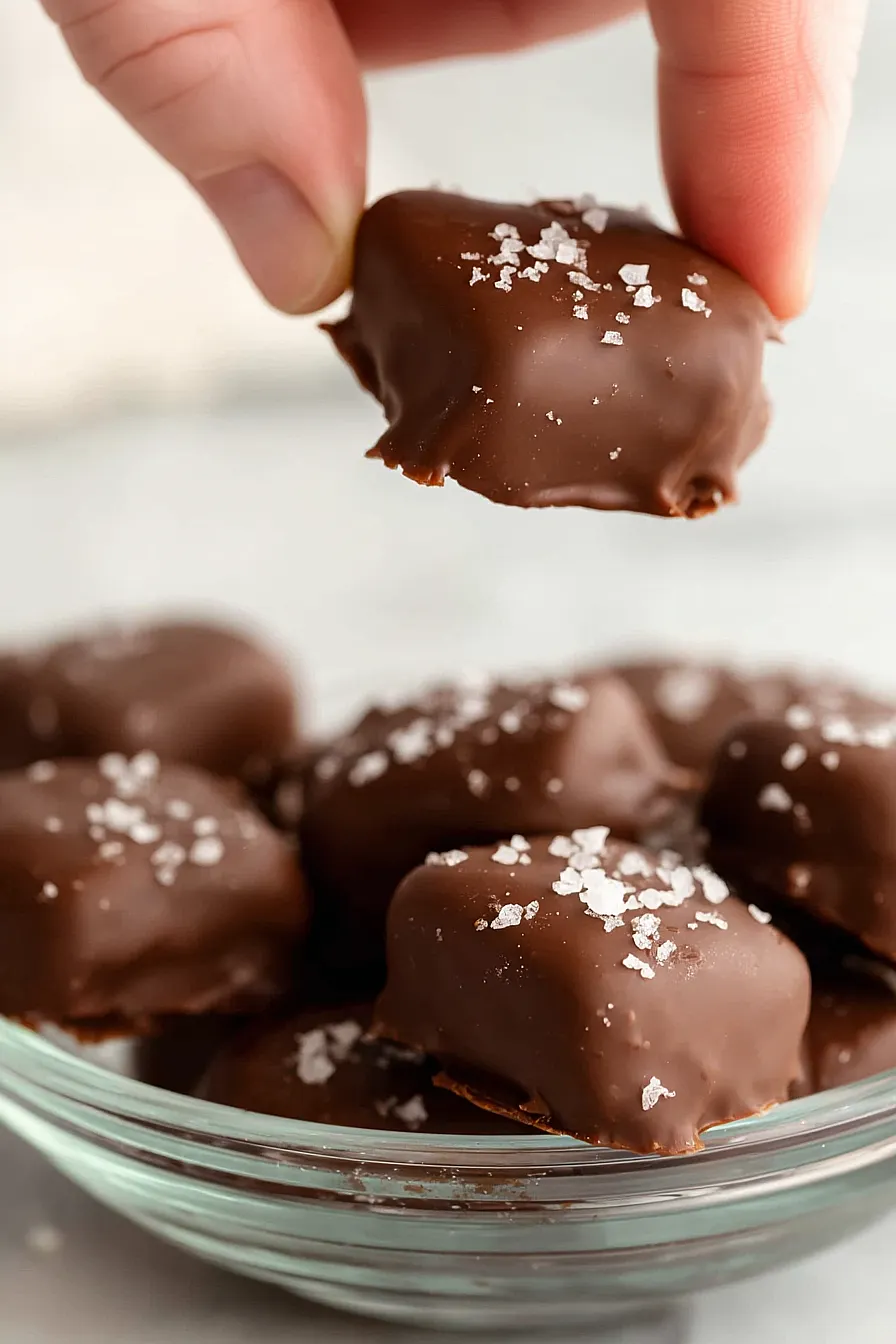
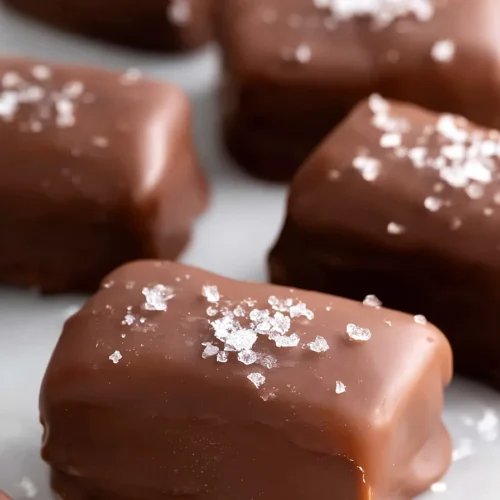
That’s exactly why these salted chocolate covered caramels are such a game-changer: they taste like they came from an expensive candy shop, use simple ingredients you probably already have, and come together in less time than you’d think. Plus, the combination of buttery caramel, rich chocolate, and flaked sea salt makes them absolutely irresistible to just about everyone.
Why You’ll Love These Salted Chocolate Covered Caramels
- Homemade gift-worthy treats – These caramels look and taste like they came from a fancy chocolate shop, making them perfect for holidays, parties, or giving to friends and family.
- Simple ingredients – You probably have most of these pantry staples at home already, and the recipe doesn’t require any special equipment or hard-to-find items.
- Perfect sweet and salty balance – The flaked sea salt on top cuts through the sweetness of the chocolate and caramel, creating that addictive flavor combination everyone loves.
- Customizable chocolate coating – Whether you prefer milk, dark, or white chocolate, you can make these caramels exactly how you like them.
- Make-ahead friendly – These caramels store well, so you can make a big batch ahead of time and have them ready whenever you need a sweet treat or last-minute gift.
What Kind of Chocolate Should I Use?
The chocolate you choose really comes down to personal preference – milk, dark, or even white chocolate all work great for coating these caramels. If you’re going with dark chocolate, look for something in the 60-70% cacao range so it’s not too bitter against the sweet caramel. The key is to use high-quality chocolate rather than chocolate chips, since real chocolate melts more smoothly and creates a better coating. You can find good coating chocolate at most grocery stores in the baking aisle, or splurge on a nice bar from a specialty shop if you want to make these extra special.
Options for Substitutions
While homemade caramels need a few key ingredients to work properly, there’s still some room for swaps:
- Heavy cream: This one’s pretty important for getting that smooth, creamy texture. You can use heavy whipping cream interchangeably, but avoid substituting with lighter creams as they won’t give you the right consistency.
- Light corn syrup: If you don’t have corn syrup, you can use golden syrup or honey instead. Keep in mind that honey will add its own flavor to the caramels, which might actually be a nice twist.
- Chocolate: The type of chocolate is totally up to you! Go with milk chocolate for a sweeter treat, dark chocolate for something more grown-up, or even mix different types. Just make sure it’s good quality since it’s the star of the show.
- Flaked sea salt: Any coarse salt works here – try Maldon, kosher salt, or even pink Himalayan salt. Just avoid regular table salt as it’s too fine and will dissolve into the chocolate rather than giving you those nice salty bursts.
- Butter: Stick with regular butter for this recipe. The two separate butter additions serve different purposes in the caramel-making process, so it’s best not to substitute with margarine or other spreads.
Watch Out for These Mistakes While Cooking
The biggest mistake when making caramels is not using a candy thermometer, which can lead to caramels that are either too soft and sticky or rock-hard – aim for exactly 245°F to 248°F for that perfect chewy texture.
Stirring the caramel too much once the sugar dissolves can cause crystallization and a grainy texture, so resist the urge to constantly mix and only stir occasionally once everything is combined.
When dipping your caramels in chocolate, make sure they’re completely cool and firm from the fridge, otherwise the warm chocolate will melt them and create a messy situation.
To get an even coating, use a fork to dip each caramel and gently tap off the excess chocolate before placing it on parchment paper, and don’t forget to sprinkle the sea salt on top right away before the chocolate sets.
What to Serve With Salted Chocolate Covered Caramels?
These caramels are pretty rich on their own, so they pair really well with a hot cup of coffee or espresso to balance out the sweetness. I love setting them out on a dessert board alongside fresh berries like strawberries or raspberries, which add a nice tart contrast to the chocolate and caramel. They’re also perfect with a glass of red wine for an after-dinner treat, or you can serve them with vanilla ice cream for an over-the-top dessert experience. If you’re putting together a gift box or party platter, consider adding some roasted nuts, dried fruit, or other homemade candies to create a nice variety.
Storage Instructions
Store: Keep your chocolate covered caramels in an airtight container at room temperature for up to 2 weeks, or in the fridge for up to a month. I like to place parchment paper between layers so they don’t stick together. Room temperature keeps them softer and chewier, while the fridge makes them a bit firmer.
Freeze: These caramels freeze really well for up to 3 months. Just wrap them individually in wax paper or place parchment between layers in a freezer-safe container. When you’re ready to eat them, let them thaw in the fridge overnight or at room temperature for about 30 minutes.
Gift Packaging: If you’re making these as gifts, store them in a cool, dry place away from direct sunlight. They’ll stay fresh in decorative boxes or tins for about a week at room temperature. Just remember that warmer weather can make the chocolate soften, so keep that in mind when giving them away.
| Preparation Time | 30-45 minutes |
| Cooking Time | 30-45 minutes |
| Total Time | 4-5 hours |
| Level of Difficulty | Medium |
Estimated Nutrition
Estimated nutrition for the whole recipe (without optional ingredients):
- Calories: 4200-4600
- Protein: 25-35 g
- Fat: 290-320 g
- Carbohydrates: 430-470 g
Ingredients
For the caramels:
- 1 cup sugar (granulated)
- 1/2 cup heavy cream
- 1/4 cup light corn syrup (I use Karo)
- 3 tbsp water
- 1/2 cup butter (room temperature)
For the chocolate coating:
- 2 tbsp butter (melted)
- 1/2 tsp flaked sea salt (I prefer Maldon for texture)
- 1 lb high-quality chocolate (chopped finely)
Step 1: Prepare Mise en Place for Caramel
- 1/2 cup heavy cream
- 1/2 cup butter
- 1 cup sugar
- 1/4 cup light corn syrup
- 3 tbsp water
First, line an 8×8 inch baking pan with parchment paper and lightly oil it for easy caramel removal later.
Then, in a heatproof bowl, combine the heavy cream and cubed room temperature butter; briefly warm this mixture in the microwave for 1-2 minutes until the butter is just melted and the cream is warm, stirring to combine.
Having all your ingredients prepped and ready before you start cooking sugar is crucial for success, I always say!
In a separate heavy-bottomed saucepan, combine the granulated sugar, light corn syrup, and water.
Stir just until the sugar is moistened.
Step 2: Cook Sugar to Hard Ball Stage and Incorporate Cream
Place the saucepan with the sugar mixture over medium heat.
Bring it to a boil, then cover with a lid for 1 minute; this steams down any sugar crystals on the side of the pan.
Remove the lid, attach a candy thermometer, and continue to cook without stirring until the mixture reaches 320°F (160°C).
Working carefully, slowly pour the warm butter and cream mixture into the hot sugar in about six equal additions, stirring thoroughly after each addition to fully incorporate.
Be mindful as the mixture will bubble up vigorously.
Step 3: Finish Caramel and Chill
Continue to cook the caramel, stirring constantly, until it reaches 240°F (115°C), which is the firm ball stage.
This process should take approximately 5-10 minutes, developing a rich amber color.
Immediately pour the cooked caramel into the prepared baking pan.
Allow it to cool at room temperature for at least 3.5 hours, or until fully set.
If for some reason it’s still a bit soft, I often pop it into the refrigerator for 30-45 minutes before attempting to cut it.
Step 4: Temper Chocolate and Coat Caramels
- 1 lb high-quality chocolate
- 2 tbsp butter
Once the caramel is firm, unmold it onto a cutting board and cut it into desired squares.
Line a baking sheet with parchment paper.
Chop the high-quality chocolate finely, reserving about 1/3 cup.
In a microwave-safe bowl, combine the majority of the chopped chocolate with the melted butter.
Microwave for 30-45 seconds, then stir until almost completely melted.
Stir in the reserved chopped chocolate until the mixture is smooth and fully melted; this helps temper the chocolate for a better finish.
Step 5: Garnish and Set
- 1/2 tsp flaked sea salt
Using two forks or a dipping tool, carefully dip each caramel square into the melted chocolate, allowing any excess to drip off.
Place the chocolate-covered caramels onto the parchment-lined baking sheet.
Immediately sprinkle each caramel with flaked sea salt.
I really prefer Maldon for its wonderful texture and briny crunch!
Let the chocolate set completely at room temperature, which helps maintain its shine and snap.
Irresistible Salted Chocolate Covered Caramels
Ingredients
For the caramels:
- 1 cup sugar (granulated)
- 1/2 cup heavy cream
- 1/4 cup light corn syrup (I use Karo)
- 3 tbsp water
- 1/2 cup butter (room temperature)
For the chocolate coating:
- 2 tbsp butter (melted)
- 1/2 tsp flaked sea salt (I prefer Maldon for texture)
- 1 lb high-quality chocolate (chopped finely)
Instructions
- First, line an 8x8 inch baking pan with parchment paper and lightly oil it for easy caramel removal later. Then, in a heatproof bowl, combine the heavy cream and cubed room temperature butter; briefly warm this mixture in the microwave for 1-2 minutes until the butter is just melted and the cream is warm, stirring to combine. Having all your ingredients prepped and ready before you start cooking sugar is crucial for success, I always say! In a separate heavy-bottomed saucepan, combine the granulated sugar, light corn syrup, and water. Stir just until the sugar is moistened.
- Place the saucepan with the sugar mixture over medium heat. Bring it to a boil, then cover with a lid for 1 minute; this steams down any sugar crystals on the side of the pan. Remove the lid, attach a candy thermometer, and continue to cook without stirring until the mixture reaches 320°F (160°C). Working carefully, slowly pour the warm butter and cream mixture into the hot sugar in about six equal additions, stirring thoroughly after each addition to fully incorporate. Be mindful as the mixture will bubble up vigorously.
- Continue to cook the caramel, stirring constantly, until it reaches 240°F (115°C), which is the firm ball stage. This process should take approximately 5-10 minutes, developing a rich amber color. Immediately pour the cooked caramel into the prepared baking pan. Allow it to cool at room temperature for at least 3.5 hours, or until fully set. If for some reason it's still a bit soft, I often pop it into the refrigerator for 30-45 minutes before attempting to cut it.
- Once the caramel is firm, unmold it onto a cutting board and cut it into desired squares. Line a baking sheet with parchment paper. Chop the high-quality chocolate finely, reserving about 1/3 cup. In a microwave-safe bowl, combine the majority of the chopped chocolate with the melted butter. Microwave for 30-45 seconds, then stir until almost completely melted. Stir in the reserved chopped chocolate until the mixture is smooth and fully melted; this helps temper the chocolate for a better finish.
- Using two forks or a dipping tool, carefully dip each caramel square into the melted chocolate, allowing any excess to drip off. Place the chocolate-covered caramels onto the parchment-lined baking sheet. Immediately sprinkle each caramel with flaked sea salt. I really prefer Maldon for its wonderful texture and briny crunch! Let the chocolate set completely at room temperature, which helps maintain its shine and snap.
