Growing up, I thought a good burger meant those thick, round patties my dad would grill in the backyard. They were fine, but always seemed to end up a bit dry and puffy in the middle. It wasn’t until I tried my first smash burger at a local diner that I realized what I’d been missing all those years.
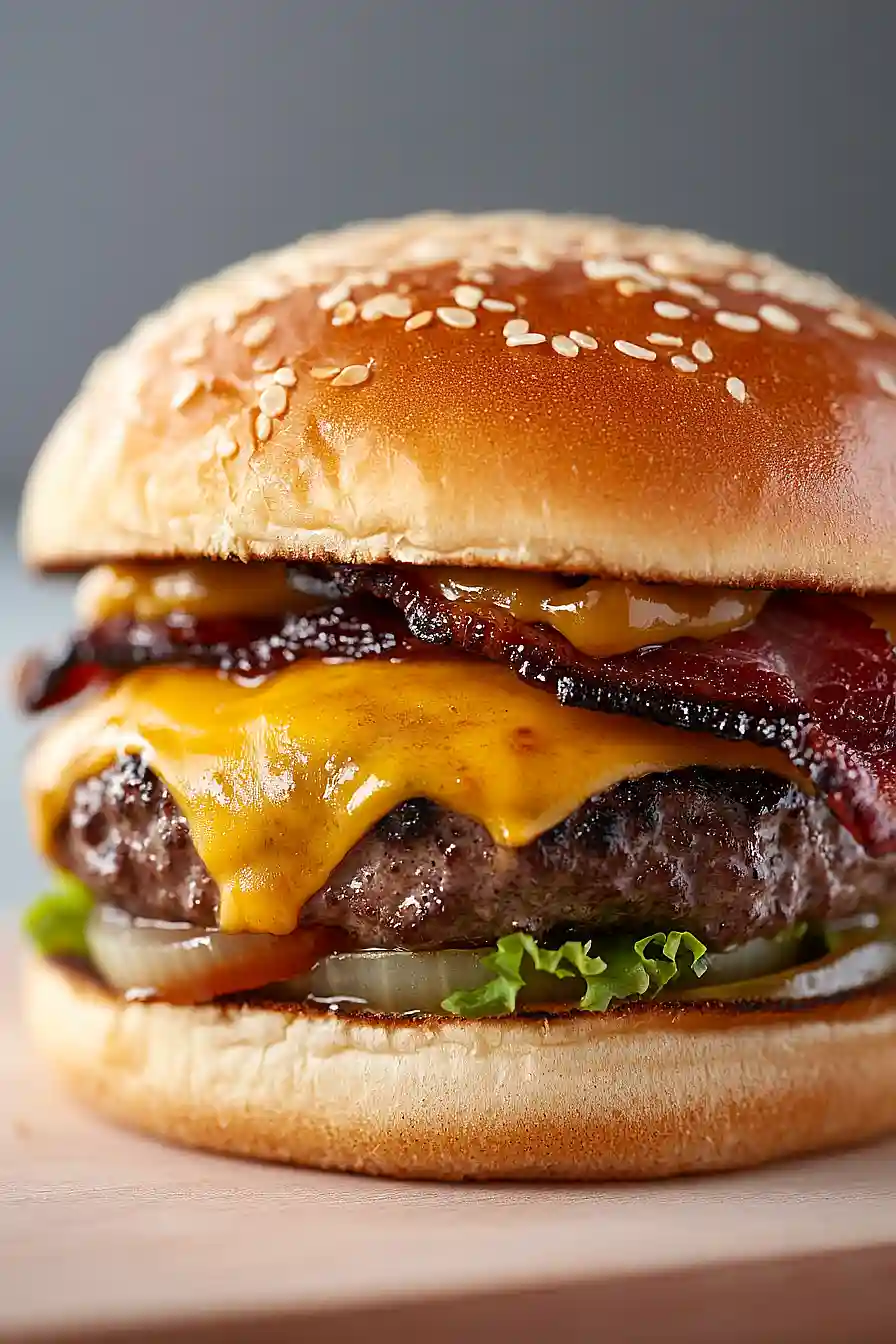
Here’s the thing about smash burgers – they break all the rules I learned about making patties. Instead of handling the meat gently and forming perfect circles, you actually press them down flat on a screaming hot griddle. The result? A burger with crispy, browned edges and a juicy center that puts those thick patties to shame.
Why You’ll Love These Smash Burgers
- Quick cooking time – These burgers cook in just minutes on a hot griddle or skillet, making them perfect for busy weeknight dinners or last-minute cravings.
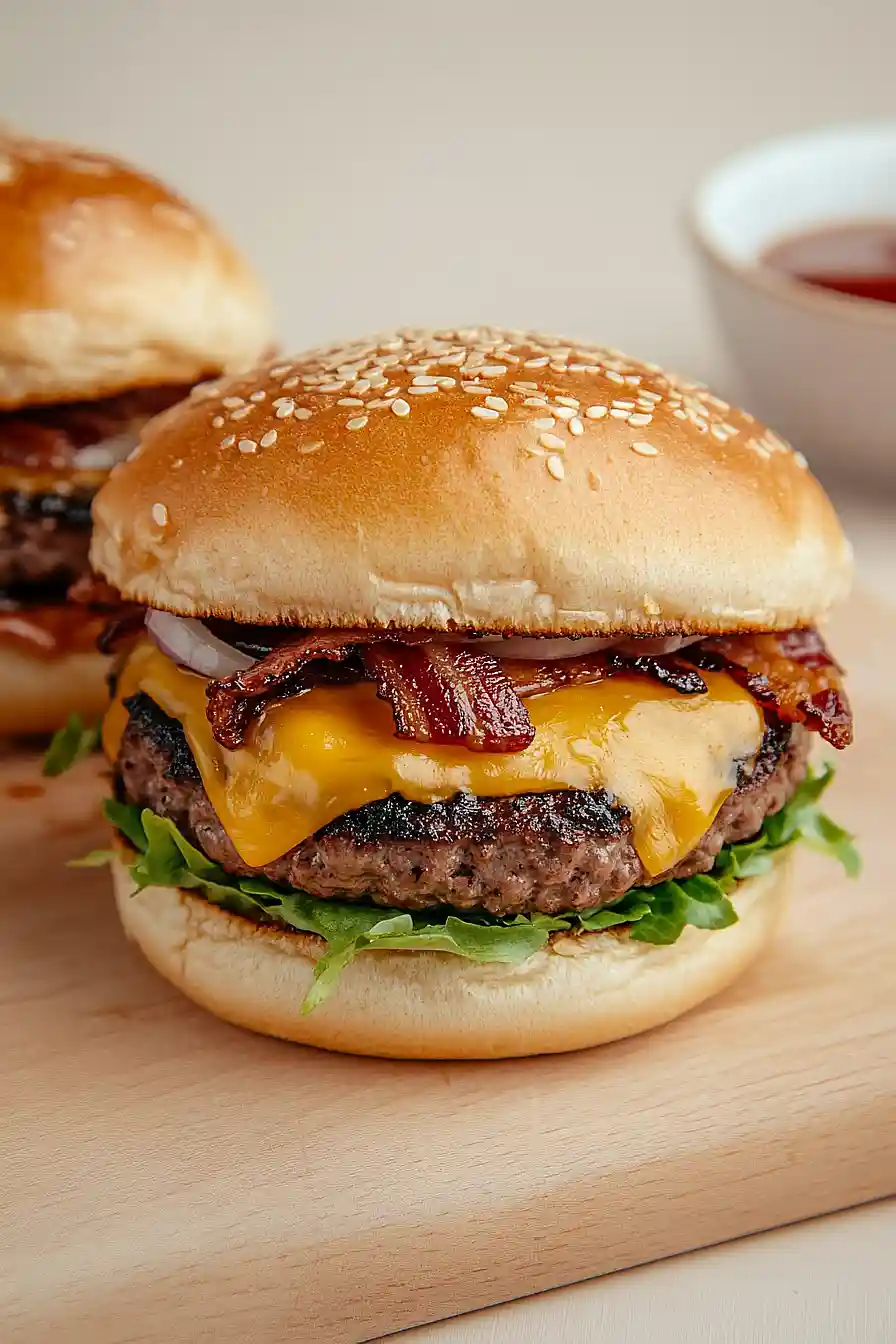
- Extra crispy edges – The smashing technique creates those sought-after crispy, caramelized edges that you can’t get with regular burgers – it’s what makes these burgers so special.
- Simple ingredients – You only need basic pantry seasonings and ground beef to make these restaurant-style burgers at home.
- Customizable toppings – Each person can dress their burger exactly how they like it, making this recipe perfect for feeding a family with different tastes.
- Budget-friendly – Making these at home costs a fraction of what you’d pay at a restaurant, and they taste just as good (if not better!).
What Kind of Ground Beef Should I Use?
For a truly great smash burger, 80/20 ground chuck is your best friend. This ratio means 80% lean meat and 20% fat, which gives you the perfect balance for a juicy, flavorful burger that develops those crispy, browned edges when smashed on the griddle. While you might be tempted to go with a leaner blend, the extra fat is what helps create that amazing crust and keeps your burger from drying out during cooking. If you can, ask your butcher to grind the meat fresh – it’ll make a noticeable difference in both texture and flavor. Just make sure to keep the meat cold until you’re ready to cook, and avoid overworking it when forming your patties.
Options for Substitutions
Let’s talk about what you can swap in this smash burger recipe while still keeping that classic taste:
- Ground chuck: While 80/20 ground chuck gives the best results, you can use regular ground beef. Just make sure it has at least 15-20% fat content – anything leaner will make your burgers too dry. Ground sirloin works too, but avoid extra lean meat.
- Cheddar cheese: Feel free to switch up the cheese! American cheese melts beautifully, or try Swiss, pepper jack, or provolone. Each brings its own flavor to the party.
- Vegetable oil: Any neutral oil with a high smoke point works here – canola, grapeseed, or even clarified butter (ghee) are good options. Avoid olive oil as it can burn at high temperatures.
- Mustard powder: No mustard powder? Use 1 teaspoon of prepared Dijon mustard instead. You’ll get the same tangy kick.
- Worcestershire sauce: You can swap this with soy sauce or even fish sauce for that umami flavor. Use the same amount as called for in the recipe.
- Hamburger buns: Any bread works here – potato rolls, brioche buns, or even English muffins make great alternatives. Just make sure they’re sturdy enough to hold up to a juicy burger!
Watch Out for These Mistakes While Cooking
The biggest mistake when making smash burgers is not getting your pan or griddle hot enough before cooking – you need screaming hot temperatures (around 400°F) to achieve that perfect crust and prevent the meat from sticking. Another common error is overworking the meat when forming the balls – handle the ground beef as little as possible and don’t pre-flatten the patties, as this prevents them from developing those crispy, lacy edges that make smash burgers so special. To avoid a dense, tough burger, don’t press the patty more than once during cooking – smash it firmly within the first 30 seconds of hitting the hot surface, then let it cook undisturbed for about 2-3 minutes until the edges are crispy. For the juiciest results, resist the urge to press down on the burger again while it’s cooking, and flip only once when the edges are deeply browned and crispy.

What to Serve With Smash Burgers?
When it comes to serving smash burgers, you really can’t go wrong with classic burger joint sides like crispy french fries or thick-cut potato wedges. If you’re feeling a bit more adventurous, try some onion rings or sweet potato fries for a nice change of pace. A cold, crunchy coleslaw or a simple green salad can help balance out the richness of these juicy burgers. For a casual backyard cookout vibe, throw some dill pickles on the plate and set out a bowl of potato chips – sometimes the simplest sides make the best meal companions!
Storage Instructions
Keep Fresh: If you’ve got leftover cooked smash burgers, wrap them well and pop them in the fridge for up to 3 days. I recommend storing the patties separately from the buns and toppings to keep everything fresh. The buns are best kept at room temperature in their original bag or wrapped in foil.
Freeze: You can freeze uncooked patties by placing wax paper between each one and storing them in a freezer bag for up to 3 months. For cooked patties, wrap them individually in foil, then place in a freezer bag – they’ll keep for about 2 months. Just remember to label them with the date!
Reheat: To bring back that fresh-off-the-griddle taste, warm up your smash burger in a skillet over medium heat for 2-3 minutes per side. If you’re in a hurry, you can use the microwave, but the texture won’t be quite the same. Add the cheese during the last minute of reheating so it gets nice and melty again.
| Preparation Time | 15-30 minutes |
| Cooking Time | 10-15 minutes |
| Total Time | 25-45 minutes |
| Level of Difficulty | Easy |
Estimated Nutrition
Estimated nutrition for the whole recipe (without optional ingredients):
- Calories: 1600-1800
- Protein: 100-110 g
- Fat: 100-110 g
- Carbohydrates: 100-120 g
Ingredients
- 1.25 lb ground chuck (80% lean beef for optimal juiciness)
- 0.5 tsp garlic powder
- 1 tsp Worcestershire sauce (I use Lea & Perrins)
- 0.5 tsp mustard powder
- 0.5 tsp onion powder
- 0.5 tbsp vegetable oil (or any neutral oil like canola)
- 4 hamburger buns (toasted for improved texture)
- 4 slices cheddar cheese
- 0.75 tsp kosher salt
- Preferred burger toppings (lettuce, tomato, onion, pickles)
- 0.5 tsp black pepper (freshly ground for best flavor)
Step 1: Prepare the Burger Mixture
In a large bowl, combine the ground beef with pepper, garlic powder, onion powder, ground mustard, and Worcestershire sauce.
Remember, do not add salt to the mixture yet; it will be added later.
Use your hands to mix the ingredients until they are evenly combined.
Shape the meat into 4 large meatballs, about 4½ ounces each.
Pat each meatball into a 1-inch-thick disc, smoothing the edges as best as you can for even cooking.
Place the patties in the refrigerator for at least 15 minutes, or cover them and store them for up to 24 hours if you plan to cook them later.
Step 2: Prepare the Cooking Surface
When you’re ready to cook, turn on your kitchen exhaust fan and heat a 12-inch cast-iron or nonstick skillet over medium-high heat.
Ensure it’s thoroughly preheated before proceeding.
Once the skillet is hot, remove the patties from the refrigerator and season them all over with salt.
Step 3: Cook the Burgers
Coat the hot pan with oil evenly.
Place the burgers on the skillet one at a time.
Firmly smash each patty flat with a metal spatula until they are about ¼-inch thick.
Once all the patties are flattened, let them cook for about 2 minutes until they are nicely browned and have a crusty bottom.
Flip the burgers and top each with cheese.
Cook for about 2 more minutes for medium-rare to medium burgers or 3 minutes for medium to medium-well, allowing the cheese to melt.
Step 4: Serve the Burgers
After cooking, transfer the burgers to buns and serve them hot with your choice of toppings.
Enjoy your delicious, homemade burgers!
Step 5: Freezer Instructions
If you wish to freeze uncooked burgers, form them and freeze them on a baking sheet or plate until their shape sets, then transfer to a sealable plastic bag for easy storage.
The uncooked burgers can be frozen for up to three months.
When ready to cook, defrost the burgers overnight in the refrigerator and follow the cooking instructions as directed.
