There’s something so comforting about a warm, homemade cherry cobbler. I’ve tried plenty of recipes over the years, but this cake mix version has become my go-to when I need a quick dessert that still tastes like I spent hours in the kitchen. It’s the kind of recipe I reach for when the kids have friends over or when I promised to bring something to the neighborhood potluck.
What I love most about this cobbler is how simple it is to put together. No measuring cups scattered across the counter or complicated steps to follow. Just a few ingredients, one pan, and about 5 minutes of prep time. The cake mix does all the heavy lifting, creating that perfect sweet topping that pairs so well with the cherries underneath.
And let’s be honest – sometimes we all need those shortcuts that make life a little easier. Whether you’re short on time or just don’t feel like pulling out every baking tool you own, this cherry cobbler has your back. Trust me, nobody will guess how easy it really was to make.
Why You’ll Love This Cherry Cobbler
- 3-ingredient recipe – With just cake mix, cherry pie filling, and butter, this dessert couldn’t be simpler to throw together – perfect for last-minute guests or when you’re craving something sweet.
- Quick prep time – You’ll only need 5 minutes to assemble this cobbler before it goes into the oven. No mixing bowls or special equipment needed!
- Foolproof results – This recipe is nearly impossible to mess up, making it perfect for beginner bakers or kids helping in the kitchen.
- Budget-friendly dessert – Using pantry staples and canned ingredients keeps the cost low while still delivering that homemade taste everyone loves.
What Kind of Cherry Pie Filling Should I Use?
When it comes to cherry pie filling, you’ve got some tasty options for this cobbler. Regular canned cherry pie filling works perfectly fine and is what most people use – you’ll find it easily in any grocery store, usually with either sweet or tart cherries. If you prefer a less sweet dessert, look for the tart cherry variety, which has a nice balance of sweet and sour flavors. While homemade cherry pie filling is always an option, the canned version is a real time-saver and gives consistent results every time. Just make sure to check that your cans aren’t dented or bulging when you buy them, and give the filling a quick stir before adding it to your cobbler.
Options for Substitutions
This simple cobbler recipe is super adaptable! Here are some easy swaps you can try:
- Cherry pie filling: While cherries make this cobbler amazing, you can easily swap in any other pie filling like apple, peach, blueberry, or mixed berry. The amount stays the same – just use two 21-ounce cans of whatever filling you prefer.
- White cake mix: Feel free to experiment with different cake mix flavors! Yellow cake mix works great, or try vanilla, french vanilla, or even chocolate cake mix for a black forest-inspired twist. Just make sure to use the same size box (15.25 oz).
- Butter: You can use margarine instead of butter, though butter gives the best flavor. For a dairy-free version, coconut oil works well too – just use the same amount. If using salted butter instead of unsalted, that’s totally fine in this recipe.
Watch Out for These Mistakes While Baking
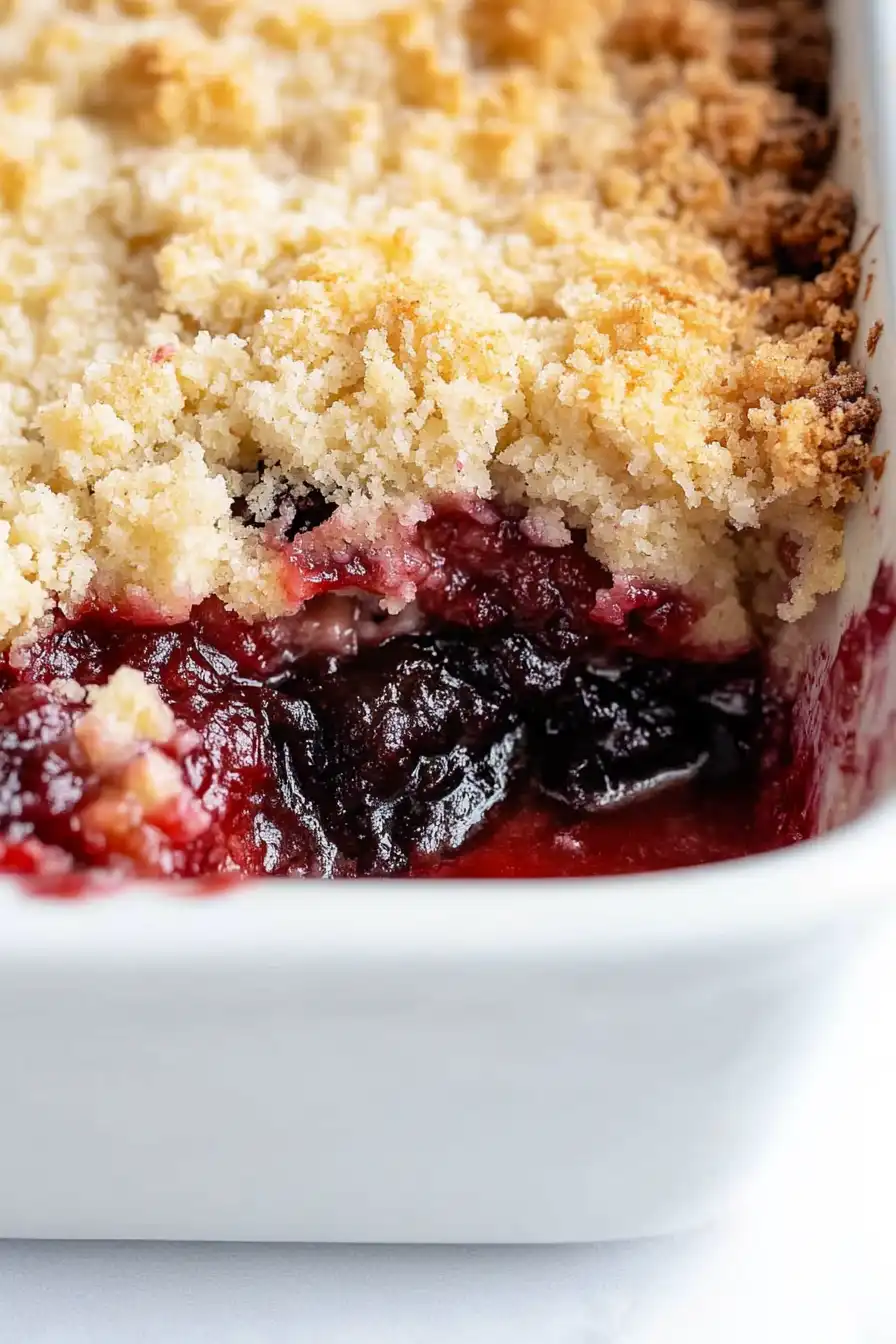
The biggest mistake when making this cherry cobbler is pouring the melted butter unevenly over the cake mix, which can leave you with dry, powdery patches on top – instead, drizzle the butter in a zigzag pattern and use a fork to gently spread it across the surface.
Another common error is stirring the cake mix into the cherries, when you actually want to create distinct layers by sprinkling the dry mix evenly over the fruit filling.
The timing can be tricky too – while the recipe is simple, you’ll want to watch for golden-brown spots on top rather than relying solely on the clock, and remember that the filling should be bubbling around the edges before you take it out of the oven.
For an extra-special touch, try warming your cherry filling slightly before adding it to the baking dish – this helps it spread more evenly and ensures the cobbler heats through completely while baking.
What to Serve With Cherry Cobbler?
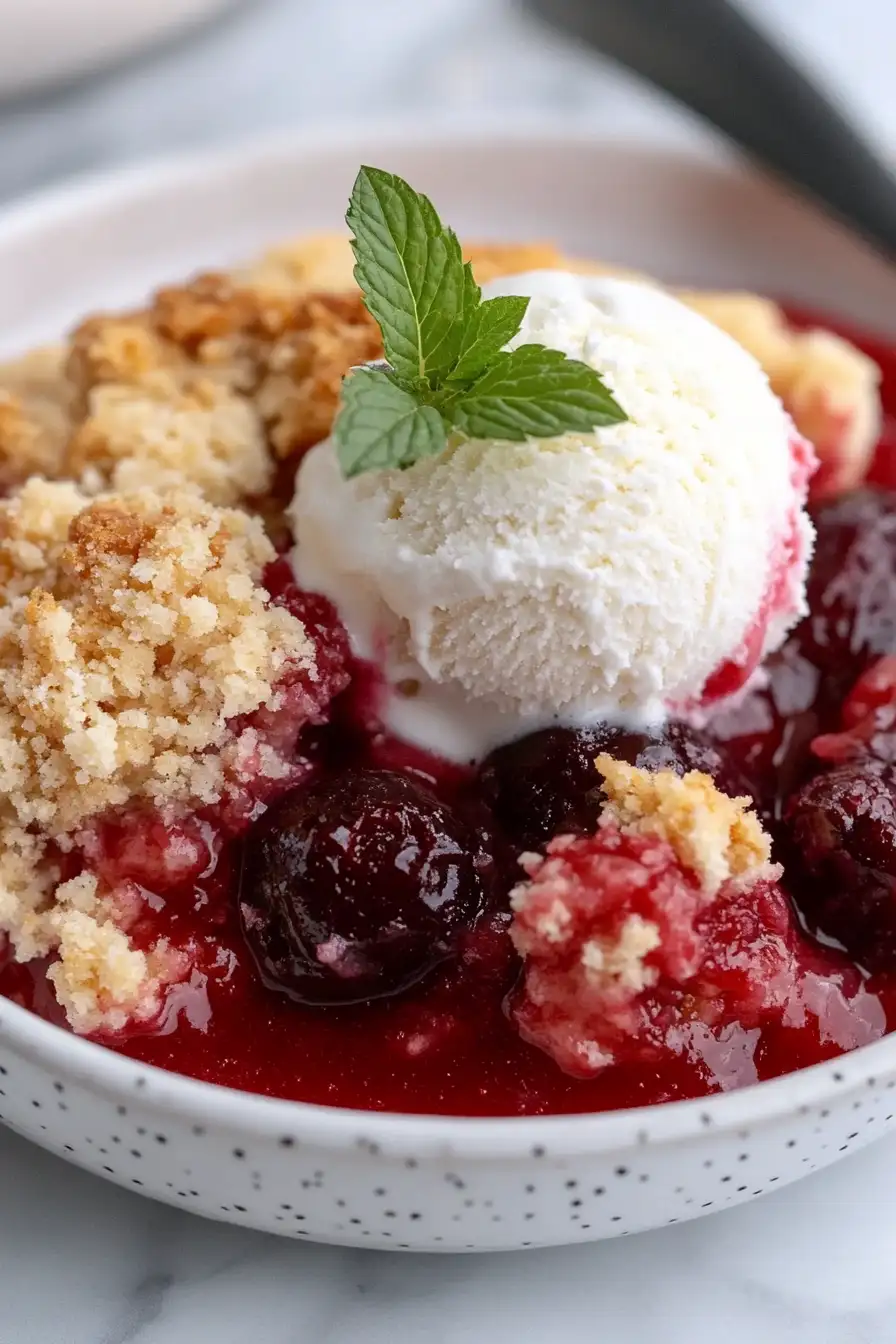
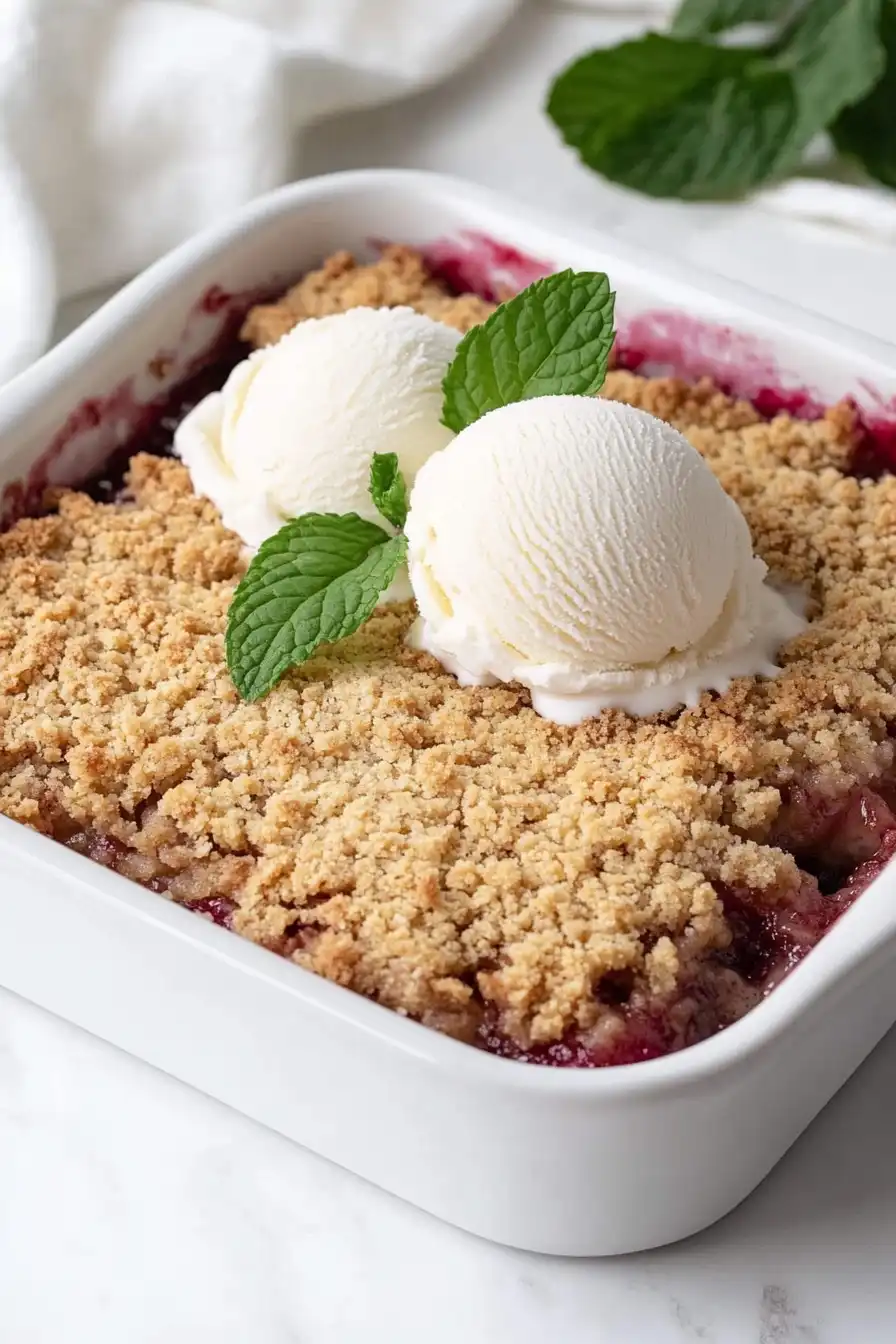
This warm and sweet cherry cobbler practically begs for a scoop of vanilla ice cream on top! The contrast between the warm cobbler and cold ice cream creates that perfect comfort dessert experience everyone loves. If you’re not in the mood for ice cream, a dollop of fresh whipped cream or even a pour of cold heavy cream works beautifully too. For a special breakfast treat, serve it with your morning coffee or add a spoonful of Greek yogurt on top – trust me, I won’t tell anyone you’re having dessert for breakfast!
Storage Instructions
Keep Fresh: Once your cherry cobbler has cooled down completely, cover it with plastic wrap or aluminum foil. You can keep it at room temperature for up to 2 days, but I prefer storing it in the fridge where it stays good for up to 5 days. The fruit filling keeps the cobbler nice and moist!
Freeze: This cobbler is perfect for freezing! Let it cool completely, then wrap it tightly in plastic wrap and aluminum foil. Pop it in the freezer where it’ll keep well for up to 3 months. You can freeze individual portions too – perfect for when you need a quick dessert fix!
Warm Up: To enjoy your cobbler warm, heat individual portions in the microwave for about 30 seconds. If you’re reheating a larger portion from the freezer, let it thaw overnight in the fridge first, then warm it in a 350°F oven for about 20 minutes. A scoop of vanilla ice cream on top is always a good idea!
| Preparation Time | 10-15 minutes |
| Cooking Time | 30-35 minutes |
| Total Time | 40-50 minutes |
| Level of Difficulty | Easy |
Estimated Nutrition
Estimated nutrition for the whole recipe (without optional ingredients):
- Calories: 2500-2800
- Protein: 20-30 g
- Fat: 100-120 g
- Carbohydrates: 400-450 g
Ingredients
For the filling:
- 2 cans cherry pie filling (I prefer Lucky Leaf brand)
For the topping:
- 1/2 cup melted butter (cooled slightly)
- 1 box white cake mix (any brand you like)
Step 1: Preheat Oven and Prepare Baking Dish
Start by preheating your oven to 375°F (190°C).
While the oven is heating, take an 8×8 inch baking dish and spray it with non-stick cooking spray to ensure easy removal of the dessert later on.
Step 2: Prepare Cherry Filling
Open both cans of cherry pie filling and evenly spread the cherry filling into the prepared baking dish.
Make sure the cherries are evenly distributed across the bottom of the dish for consistent flavor in every bite.
Step 3: Prepare the Cake Topping
In a large mixing bowl, add the cake mix from one box.
Gradually pour in 1/2 cup of cooled butter while whisking the mixture until it turns crumbly.
This will form the crumb topping for the cherry filling.
Step 4: Assemble and Bake
Spread the crumbly cake topping evenly over the cherry pie filling in the baking dish.
Place the dish in the preheated oven and bake for 30 to 35 minutes or until the topping is golden brown and cooked through.
Step 5: Serve
Once baked, remove the dish from the oven and let it cool slightly before serving.
Enjoy the warm, fruity delight on its own, or pair it with a scoop of vanilla ice cream for an extra treat.
