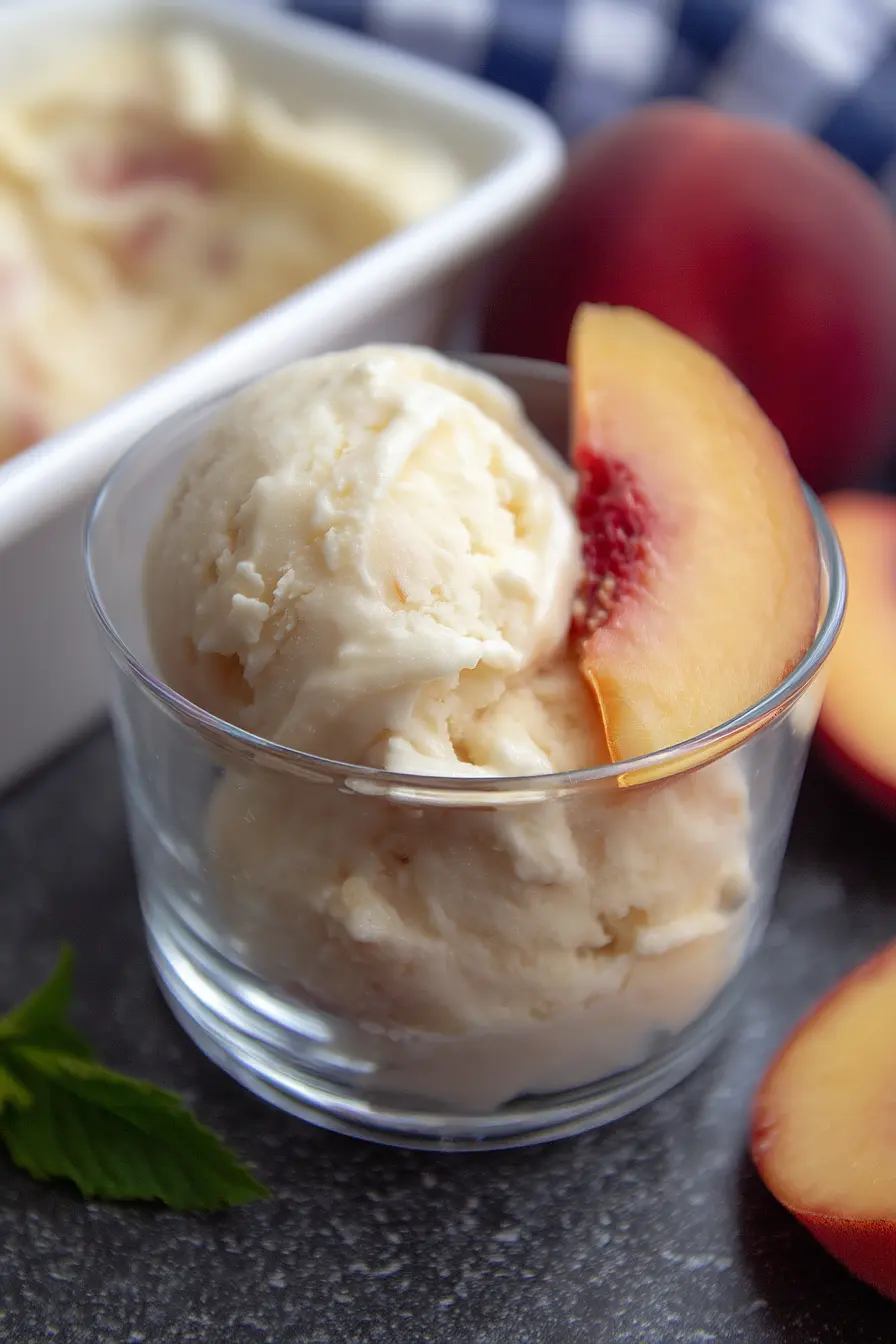
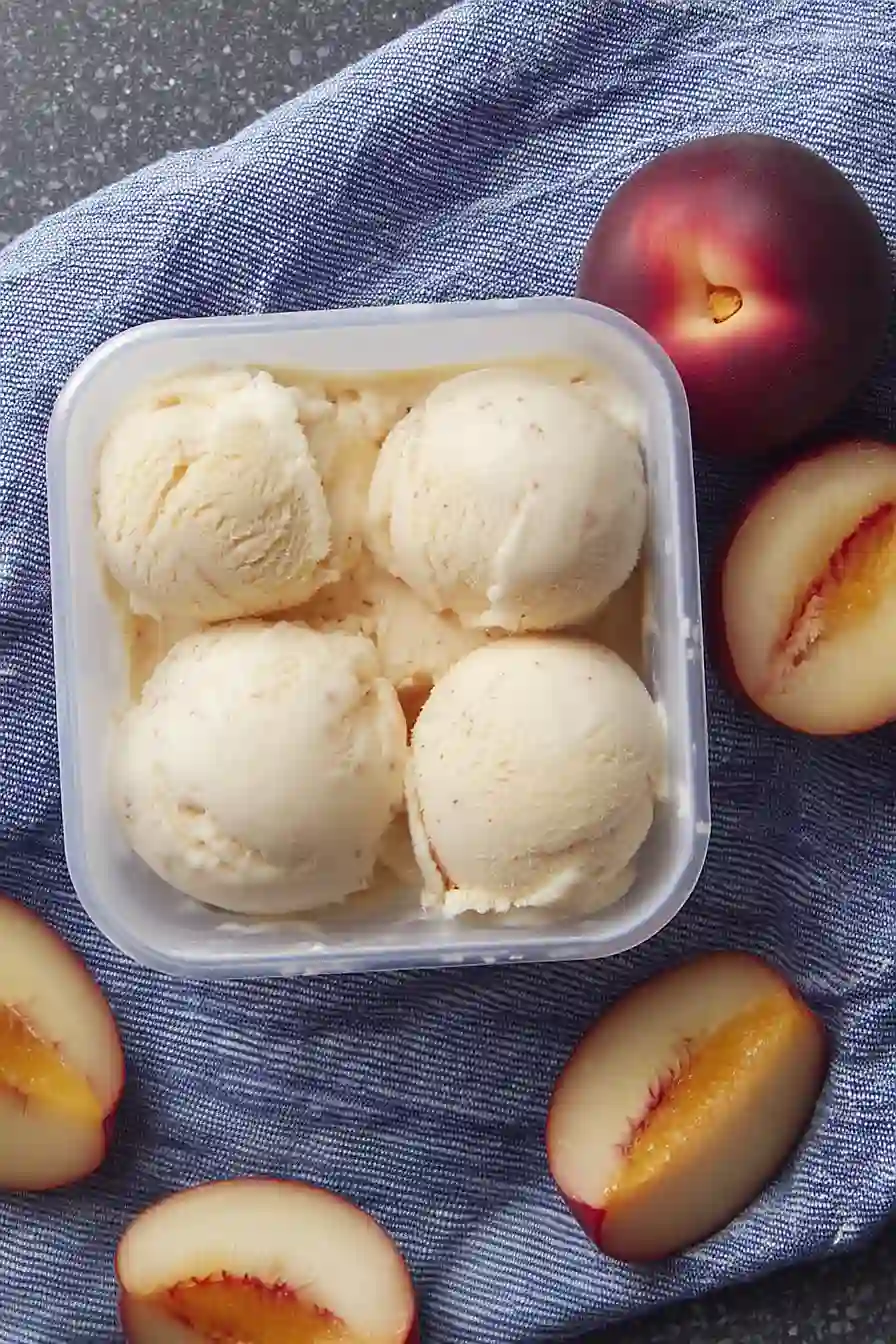
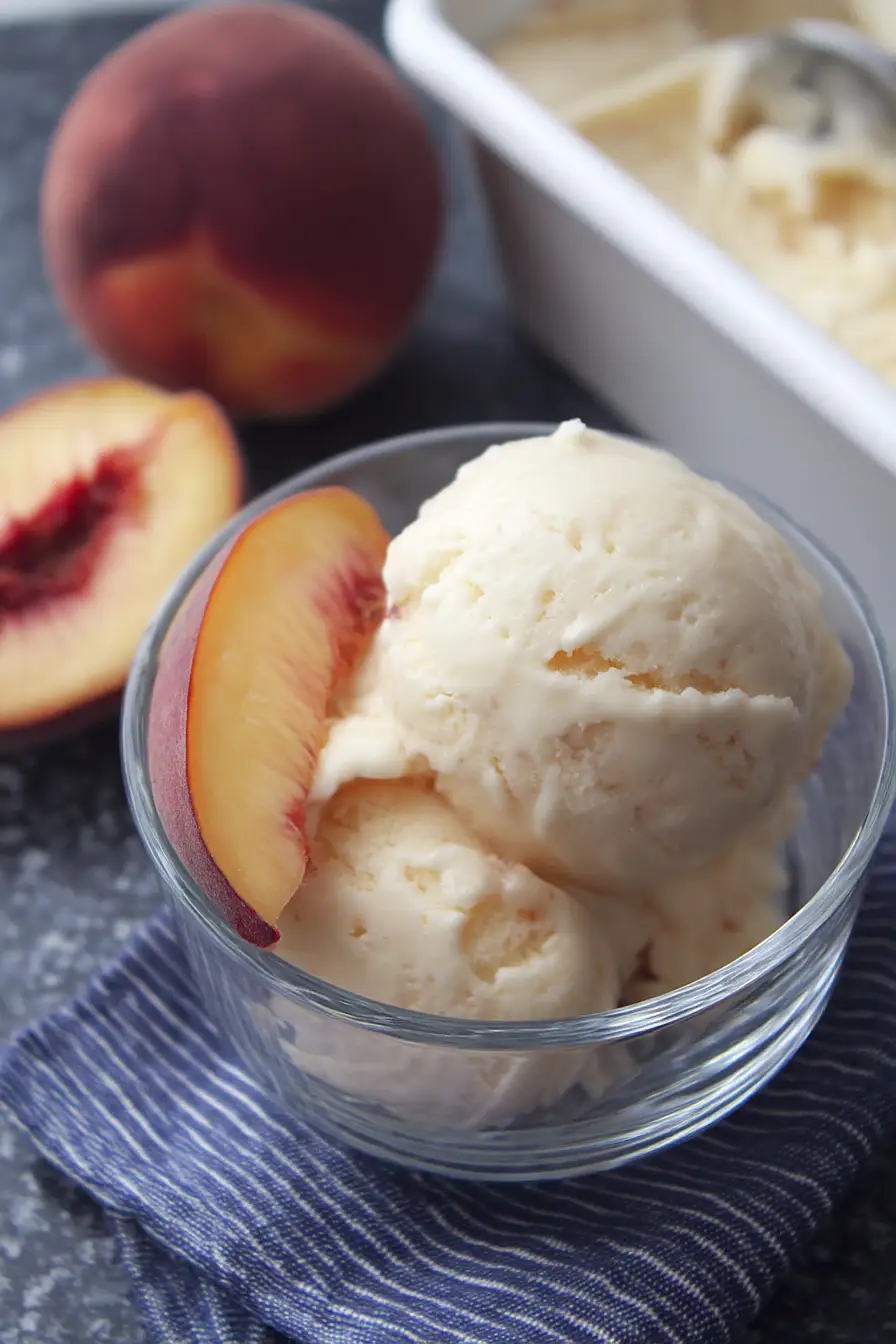
If you ask me, homemade nectarine ice cream is one of summer’s simple pleasures.
This creamy, fruity dessert brings together fresh, ripe nectarines and classic vanilla ice cream base in the most wonderful way. The natural sweetness of the fruit shines through in every spoonful, while the smooth texture makes it impossible to resist.
I love how the nectarines add little bursts of flavor throughout the ice cream, creating something that’s way better than anything you can get at the store. Plus, it’s such a nice change from the usual strawberry or peach versions.
It’s a sweet and refreshing treat that’s perfect for those hot summer afternoons when you need something cool and satisfying.
Why You’ll Love This Nectarine Ice Cream
- Just 4 ingredients – This recipe keeps things simple with only nectarines, cream, condensed milk, and a touch of brown sugar – no fancy ingredients needed.
- No ice cream machine needed – You can make this creamy dessert without any special equipment – perfect for anyone who doesn’t own an ice cream maker.
- Fresh fruit flavor – Using ripe nectarines gives this ice cream a natural sweetness and genuine fruit taste that store-bought versions just can’t match.
- Make-ahead friendly – You can prepare this ice cream days in advance and keep it frozen until you’re ready to serve, making it perfect for summer entertaining.
What Kind of Nectarines Should I Use?
For ice cream, you’ll want to pick nectarines that are fully ripe and fragrant – they should give slightly when you press them gently with your thumb. Yellow nectarines tend to be a bit sweeter and more traditional for desserts, while white nectarines have a more delicate, floral sweetness that’s also lovely in ice cream. If your nectarines aren’t quite ripe when you buy them, let them sit on the counter for a few days until they soften up. Just avoid using hard or underripe nectarines, as they won’t blend well and won’t give you that rich, sweet fruit flavor you’re looking for in your ice cream.
Options for Substitutions
This simple ice cream recipe can be adapted with several easy swaps:
- Nectarines: If you can’t find nectarines, peaches work perfectly as they’re close cousins. You could also try apricots or plums – just make sure they’re nice and ripe. If using peaches, you might want to peel them first since their skin is fuzzier than nectarines.
- Brown sugar: Regular white sugar works fine here, or you could use honey or maple syrup. Just start with a smaller amount (about 2 teaspoons) since these liquid sweeteners are more concentrated than brown sugar.
- Thick cream: Heavy cream or whipping cream are perfect substitutes. If you’re looking for a lighter option, you could use half-and-half, but your ice cream won’t be quite as creamy.
- Condensed milk: This is pretty important for the texture and sweetness of no-churn ice cream, but if you’re in a pinch, you can use evaporated milk mixed with 3 tablespoons of sugar. Just know that the texture might be slightly less creamy.
Watch Out for These Mistakes While Making
The biggest challenge when making nectarine ice cream is using underripe fruit, which lacks natural sweetness and can make your ice cream taste bland – always choose nectarines that yield slightly when pressed and have a strong, sweet aroma.
Temperature control is crucial: letting your cream mixture get too warm before freezing can lead to ice crystals, so make sure all ingredients are well-chilled before mixing, and freeze your ice cream container at least 24 hours in advance.
Another common mistake is not properly puréeing the nectarines, which can leave unpleasant stringy bits in your ice cream – blend them thoroughly until completely smooth, and consider straining the purée through a fine-mesh sieve for the silkiest texture.
To prevent freezer burn, store your ice cream in an airtight container with a piece of plastic wrap pressed directly onto the surface before putting the lid on.
What to Serve With Nectarine Ice Cream?
This fruity ice cream is perfect on its own, but there are some simple ways to make it even more special! A warm slice of pound cake or butter cake makes an excellent base for a scoop or two, creating a nice contrast between warm and cold. I love adding some fresh nectarine slices on top for extra fruitiness, or sprinkling on some crushed amaretti cookies for a bit of crunch. You can also serve this alongside a fruit cobbler or crisp during summer gatherings – it’s especially good with peach or berry desserts.
Storage Instructions
Keep Frozen: Your homemade nectarine ice cream needs to stay in the freezer to maintain its creamy texture. Place it in a freezer-safe container with a tight-fitting lid – I like using a metal loaf pan covered with plastic wrap and foil for extra protection against freezer burn.
Duration: This ice cream will keep well in the freezer for up to 2 weeks. After that, ice crystals might start forming and affect the smooth texture we worked so hard to achieve. Though honestly, it’s so good it rarely lasts that long in my house!
Serving: Take the ice cream out of the freezer about 5-10 minutes before serving to soften slightly – this makes it easier to scoop and brings out the sweet nectarine flavor. If it’s too hard, let it sit on the counter for a few extra minutes.
| Preparation Time | 20-30 minutes |
| Cooking Time | 15-20 minutes |
| Total Time | 240-360 minutes |
| Level of Difficulty | Medium |
Estimated Nutrition
Estimated nutrition for the whole recipe (without optional ingredients):
- Calories: 800-900
- Protein: 10-15 g
- Fat: 50-60 g
- Carbohydrates: 90-100 g
Ingredients
- 1/2 cup sweetened condensed milk
- 2/3 cup heavy cream (I use Organic Valley Heavy Whipping Cream)
- 1 tbsp brown sugar
- 12 oz ripe nectarines (sliced thin for easy blending)
Step 1: Prepare and Roast the Nectarines
Start by preheating your oven to 400°F (200°C).
Halve the nectarines and remove the stones, then cut the nectarines into chunks.
Place the chunks in a roasting dish and sprinkle brown sugar over them.
Roast in the oven for approximately 15-20 minutes, until the nectarines are soft and begin to caramelize slightly on top.
Once done, remove the dish from the oven and allow the nectarines to cool.
This step can be done the day before if you prefer.
Step 2: Blend the Nectarines
After the roasted nectarines have cooled, remove the skins from the chunks.
Place the peeled nectarine pieces in a food processor or blender and blend until relatively smooth.
It’s fine if there are smaller chunks remaining for texture.
Step 3: Whip the Cream
In a separate bowl, whip the cream until it reaches medium-firm peaks.
This means the cream should hold its shape well when the beaters are lifted but still have a slight curve at the peaks.
Step 4: Combine Ingredients
Carefully fold the blended nectarine puree and sweetened condensed milk into the whipped cream.
Use a gentle folding motion to combine the ingredients without deflating the whipped cream.
Ensure there are no white streaks in the mixture for an even texture.
Step 5: Freeze the Mixture
Pour the combined mixture into a plastic container or a loaf tin.
Cover the container and transfer it to the freezer.
Let it freeze for a minimum of 4 hours for a soft-serve consistency, or ideally, leave it overnight for the best results.
Enjoy your homemade nectarine ice cream!
