I’ve always enjoyed making Japanese food at home, but sometimes those fancy restaurant dishes can seem a bit intimidating. That’s why these Japanese chicken thighs have become my go-to dinner option. They’re simple enough for a weeknight meal but still have that authentic flavor I love.
What makes these chicken thighs special is how they combine everyday ingredients with a few Japanese pantry staples. I usually start marinating them when I’m cleaning up after lunch, and by dinner time, they’re ready to cook. The best part? You don’t need any special equipment or hard-to-find ingredients.
If you’re new to cooking Japanese food, this recipe is a perfect place to start. My kids ask for these chicken thighs at least once a week now, and I’m not complaining – they’re just as easy to make for two people as they are for a hungry family of four.
Why You’ll Love This Japanese Chicken
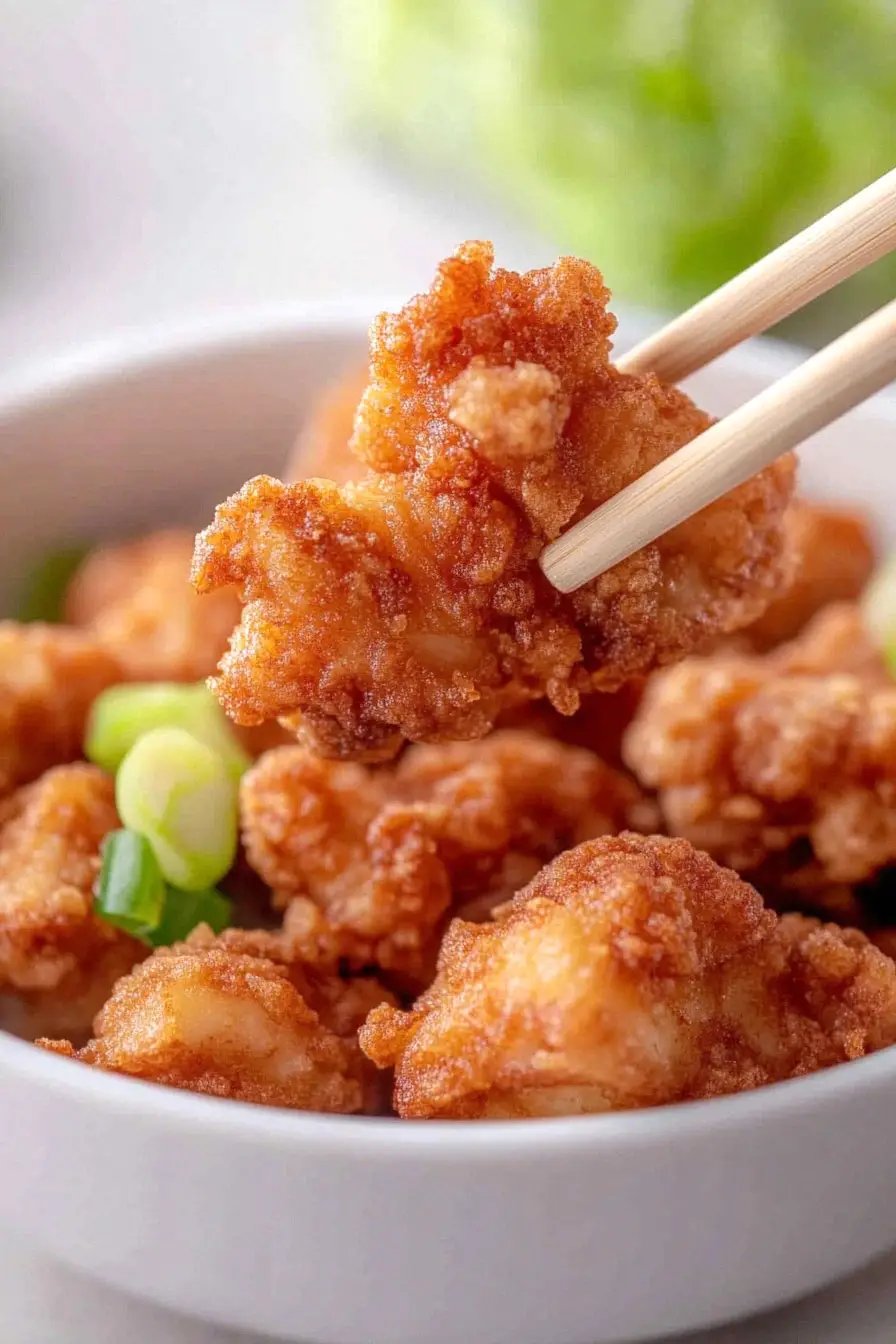
- Crispy exterior – The cornflour coating creates perfectly crispy chicken pieces that stay crunchy even after being tossed in the sauce.
- Authentic flavors – The combination of soy sauce, sake, and mirin brings real Japanese restaurant taste right to your kitchen, without any hard-to-find ingredients.
- Simple ingredients – Most of these ingredients are pantry staples or easy to find at your local grocery store, making this an accessible weeknight dinner option.
- Quick preparation – With just a handful of ingredients and straightforward steps, you can have this dish ready in under an hour – perfect for busy evenings.
What Kind of Chicken Thighs Should I Use?
For this Japanese recipe, boneless, skinless chicken thighs are your best bet since they stay juicy and tender during frying. While you could use chicken breast, thighs have more flavor and are more forgiving if you cook them a little longer than intended. Fresh chicken thighs from the meat counter are ideal, but if you’re using frozen ones, just make sure they’re completely thawed and patted dry before cooking. When shopping, look for thighs with a pink color and avoid any that have a gray tinge or feel slimy to the touch.

Options for Substitutions
Need to make some swaps? Here are some practical substitutions for this Japanese chicken recipe:
- Chicken thighs: While chicken thighs give the best flavor and stay juicy, you can use chicken breast if you prefer. Just be careful not to overcook it as it can dry out more easily.
- Cornflour: Regular all-purpose flour or potato starch work well here. If using all-purpose flour, the coating might be slightly less crispy.
- Sake: If you can’t find cooking sake, use dry white wine or rice wine vinegar mixed with an equal amount of water. In a pinch, you can use chicken broth with a splash of rice vinegar.
- Mirin: No mirin? Mix 1 teaspoon of honey or sugar with 1 tablespoon of rice vinegar or white wine vinegar.
- Shredded lettuce/cabbage: These are interchangeable – use what you have. You can also try mixed salad greens or even coleslaw mix.
- Parsley: Feel free to use cilantro or green onions instead for garnish, or skip it altogether.
Watch Out for These Mistakes While Cooking
The biggest challenge when making Japanese chicken thighs is achieving that perfect crispy exterior while keeping the meat juicy inside – the secret lies in maintaining your oil at a steady 350°F (175°C) throughout the frying process, as temperature fluctuations can lead to either greasy or dry chicken.
A common mistake is overcrowding the pan, which causes the oil temperature to drop dramatically and results in soggy coating, so work in small batches even if it takes a bit longer.
When coating the chicken, make sure to shake off excess cornflour before frying, as too much coating can create a thick, gummy layer instead of that light, crispy crust we’re after.
For the most flavorful results, let the chicken marinate in the soy sauce mixture for at least 15 minutes (but no longer than 2 hours, as the acid can start to break down the meat), and always pat the chicken pieces dry before coating them in cornflour to ensure the coating sticks properly.

What to Serve With Japanese Chicken Thighs?
These crispy, flavorful Japanese chicken thighs pair perfectly with steamed white rice or fluffy jasmine rice to soak up all that tasty sauce. For a complete meal, I like to add some simple sides like steamed edamame or a quick cucumber salad with rice vinegar dressing. If you want to make it even more filling, try serving it alongside some miso soup or adding a side of stir-fried vegetables like broccoli or snap peas – these sides keep things light while still matching the Japanese flavors of the chicken. A sprinkle of sesame seeds and some pickled ginger on the side can add nice extra touches to round out your meal.
Storage Instructions
Keep Fresh: These Japanese chicken thighs are best enjoyed right after cooking when they’re nice and crispy. If you have leftovers, place them in an airtight container and keep them in the fridge for up to 3 days. The coating might lose some of its crispiness, but the flavor will still be great!
Make Ahead: You can prep the marinade and chicken mixture up to 24 hours in advance – just keep it covered in the fridge. This actually lets the flavors develop even more! The cornflour coating should only be added right before cooking though, to ensure the best texture.
Warm Up: To bring back some crispiness to leftover chicken, pop them in a preheated oven at 350°F (175°C) for about 8-10 minutes. Avoid using the microwave as it’ll make the coating soggy. The shredded lettuce or cabbage should always be prepared fresh when serving.
| Preparation Time | 30-60 minutes |
| Cooking Time | 10-20 minutes |
| Total Time | 40-80 minutes |
| Level of Difficulty | Medium |
Estimated Nutrition
Estimated nutrition for the whole recipe (without optional ingredients):
- Calories: 800-900
- Protein: 60-70 g
- Fat: 40-50 g
- Carbohydrates: 40-50 g
Ingredients
For the chicken:
- 12.3 oz chicken thigh fillets (boneless and skinless for best results)
For the marinade:
- 1 tbsp sake (dry sake works well here)
- 1/2 tsp mirin (sweet rice wine)
- 1 tbsp soy sauce
- 2 tsp grated ginger with juice (freshly grated for best flavor)
For the coating and frying:
- vegetable oil for deep frying (like canola or sunflower oil)
- 0.7 oz cornflour (cornstarch)
For the garnish:
- shredded lettuce or cabbage (for freshness and crunch)
- parsley sprigs
Step 1: Prepare and Marinate the Chicken
Pat the chicken pieces dry with a paper towel to remove any excess moisture.
Transfer the chicken and your marinade ingredients into a ziplock bag or a bowl.
Massage the bag or stir well to ensure all the chicken pieces are evenly coated with the marinade.
Allow the chicken to marinate for 30 minutes to an hour, letting the flavors infuse.
Step 2: Prepare for Frying
Heat enough oil in a deep pot or pan to reach a temperature of 160°C/320°F.
Ensure the oil depth is about 3-4cm (1¼-1½ inches).
While the oil is heating, drain any excess marinade from the chicken pieces.
Place them on paper towels to further remove any excess liquid, then transfer them to a bowl.
Step 3: Coat the Chicken
Sprinkle corn flour over the chicken pieces in the bowl.
Turn each piece to ensure they are thoroughly coated with the corn flour.
This will help create a crispy texture when frying.
Step 4: First Frying
Add several chicken pieces to the hot oil one by one, frying them in batches.
Fry each batch for about 2.5-3 minutes.
Move the chicken pieces around gently to prevent them from sticking to the pot or pan.
Once done, remove the pieces and let them rest for at least 3-4 minutes on paper towels to drain excess oil.
Repeat this process with the remaining chicken pieces.
Step 5: Second Frying for Crispiness
After the initial frying, skim any flour crumbs from the oil, if necessary, and increase the oil temperature to 190-200°C/374-392°F.
Return the chicken pieces to the oil in batches, frying for an additional 30 seconds to 1 minute until they are golden brown and crunchy.
Repeat this step with all the chicken pieces, ensuring they reach the desired crispiness.
Step 6: Serve and Enjoy
Serve the freshly fried chicken immediately for the best taste and texture.
You may wish to include shredded lettuce and parsley as a garnish for added flavor and presentation.
Enjoy your crispy and delicious chicken!
