Finding a reliable dinner recipe that delivers on both flavor and satisfaction can feel like searching for a needle in a haystack. Between juggling work deadlines, after-school activities, and the usual evening rush, most of us don’t have time to spend hours in the kitchen preparing an elaborate meal.
That’s where this teriyaki pork belly recipe comes to the rescue: it’s straightforward to prepare, rich in flavor, and practically foolproof. Plus, the hands-off cooking time means you can help with homework or tackle other tasks while dinner practically makes itself.
Why You’ll Love This Teriyaki Pork Belly
- Melt-in-your-mouth texture – The slow cooking process turns the pork belly incredibly tender, while the fat renders down to create meat that literally melts in your mouth.
- Rich flavor profile – The combination of soy sauce, brown sugar, and cooking wine creates a perfect balance of sweet and savory that coats every piece of meat.
- Simple ingredients – Most of these ingredients are pantry staples in Asian cooking, and I’ve included easy substitutions if you can’t find specific items.
- Make-ahead friendly – This dish actually tastes better the next day, making it perfect for meal prep or when you’re planning to entertain guests.
- Customizable recipe – You can adjust the sweetness, skip the eggs if you prefer, or add different vegetables to make it your own.
What Kind of Pork Belly Should I Use?
For teriyaki pork belly, you’ll want to look for a piece that has a good balance of meat and fat layers – ideally with 3-4 distinct stripes of each when you look at it from the side. Fresh pork belly is usually available at Asian markets or your local butcher, and it’s best to get it with the skin on since this helps keep the meat moist during cooking. If you can only find skinless pork belly, that’s okay too – just keep a closer eye on it while cooking to prevent it from drying out. When selecting your piece, look for one that’s firm to the touch and has a pink-gray color, avoiding any that have dark spots or strong odors.
Options for Substitutions
While some ingredients in this teriyaki pork belly recipe are key for authentic flavor, there are several substitutions you can try:
- Pork belly: Pork belly is really the star here and hard to substitute, but if you must, you could use pork shoulder (though it won’t be as rich and the texture will be different).
- Shaoxing wine: If you can’t find Shaoxing wine, use Japanese sake as mentioned. In a pinch, dry sherry or even a mix of rice vinegar and water (2:1 ratio) can work too.
- Quail eggs: As noted in the recipe, you can easily swap quail eggs for chicken eggs. If using chicken eggs, cut them into quarters after cooking.
- Light soy sauce: Regular soy sauce works fine here, but reduce the amount by about 1 tablespoon and add a splash of water to avoid it being too salty.
- Dark soy sauce: If you can’t find dark soy sauce, use regular soy sauce plus a tiny drop of molasses for color. The dish won’t have quite the same deep color, but will still taste good.
- Brown sugar: You can swap brown sugar with honey or maple syrup – just use about 3 tablespoons instead of 1/4 cup since they’re sweeter.
Watch Out for These Mistakes While Cooking
The biggest challenge when cooking pork belly is rushing the cooking process – this cut needs time to break down its tough fibers and render the fat properly, so plan for at least 1-1.5 hours of gentle simmering.
A common mistake is skipping the blanching step, which helps remove impurities and excess fat – make sure to start with cold water, bring it to a boil with the pork belly, and cook for 3-4 minutes before draining and rinsing.
The sauce can become too thick or burn easily if you’re not watching the heat level, so maintain a gentle simmer and stir occasionally, especially after adding the brown sugar.
For the most tender results, resist the urge to stir the meat too frequently while braising, and always slice the pork belly against the grain when serving to ensure each piece is easy to bite through.
What to Serve With Teriyaki Pork Belly?
This rich and savory pork belly pairs perfectly with plain steamed rice, which helps balance out the bold flavors and soak up all that delicious sauce. If you want to add some freshness to your meal, try serving it with quick-pickled cucumbers or a simple Asian-style slaw with shredded cabbage and carrots. For a complete meal, you could also add some stir-fried bok choy or steamed broccoli on the side – the green vegetables provide a nice contrast to the rich meat. And if you’re feeling extra hungry, a bowl of miso soup makes a great starter to round out your meal.
Storage Instructions
Keep: This teriyaki pork belly stays good in the fridge for up to 4 days when stored in an airtight container. The flavors actually get better after a day or two as the meat continues to soak up all that yummy sauce! Just make sure to let it cool completely before putting it away.
Freeze: You can freeze portions of this dish for up to 3 months in freezer-safe containers. The sauce might separate a bit, but don’t worry – that’s totally normal. Just remember to leave some space in your container as the sauce can expand when frozen.
Warm Up: To enjoy your leftover pork belly, gently warm it up in a pan over medium-low heat. Add a splash of water if the sauce seems too thick. You can also use the microwave – just heat in 30-second intervals, stirring in between, until it’s heated through. The meat might be even more tender the next day!
| Preparation Time | 20-30 minutes |
| Cooking Time | 80-90 minutes |
| Total Time | 100-120 minutes |
| Level of Difficulty | Medium |
Estimated Nutrition
Estimated nutrition for the whole recipe (without optional ingredients):
- Calories: 1500-1700
- Protein: 100-120 g
- Fat: 120-140 g
- Carbohydrates: 30-40 g
Ingredients
For the pork belly preparation:
- 2 green onions
- 3 slices ginger (freshly cut)
- 1.5 lb pork belly (cut into 1-inch cubes)
For the braising sauce:
- 3 slices ginger
- hot water
- 2 green onions
- 1/4 cup light soy sauce
- 1/4 cup Shaoxing cooking wine
- 1 tbsp dark soy sauce
- 1/4 cup brown sugar (packed well)
For the eggs (optional):
- 16 quail eggs
Step 1: Prepare and Boil Quail Eggs
Place 16 quail eggs in a small saucepan and cover with cold water by about an inch.
Bring the water to a boil.
Once boiling, reduce to a simmer over medium-low heat and cook for 7 minutes.
Transfer the hard-boiled quail eggs to a bowl of iced water and leave them in the ice bath for 5 minutes to facilitate easy peeling.
After cooling, peel the quail eggs and set them aside.
Step 2: Prepare and Boil Pork Belly
Cut the pork belly into 1-inch cubes and place them in a pot.
Fill the pot with cold water and bring to a boil over high heat.
Skim off any froth.
Add 2 green onions and 3 slices of ginger to the pot.
Cover with a lid and simmer on low heat for 30 minutes.
This extra simmering makes the pork belly less oily and tenderer, following the secret technique from my grandpa’s recipe!
Step 3: Pan Fry the Pork Belly
Drain the pork belly and pat dry with kitchen towels.
Layer the pork belly cubes in a frying pan.
Pan fry over medium heat until each side turns golden brown and a bit crispy.
Do not add any oil, as the pork will release its own fat during this process.
Step 4: Simmer with Sauce Ingredients
Transfer the pan-fried pork belly cubes to a Dutch oven pot.
In the same pot, add 2 more green onions, 3 slices of ginger, ¼ cup brown sugar, ¼ cup cooking wine (Shaoxing wine), ¼ cup light soy sauce, and 1 tablespoon dark soy sauce.
Add hot water until it just barely covers the pork belly cubes.
Cook over medium-high heat until it boils.
Cover with a lid and reduce to medium-low heat to simmer for 1 hour.
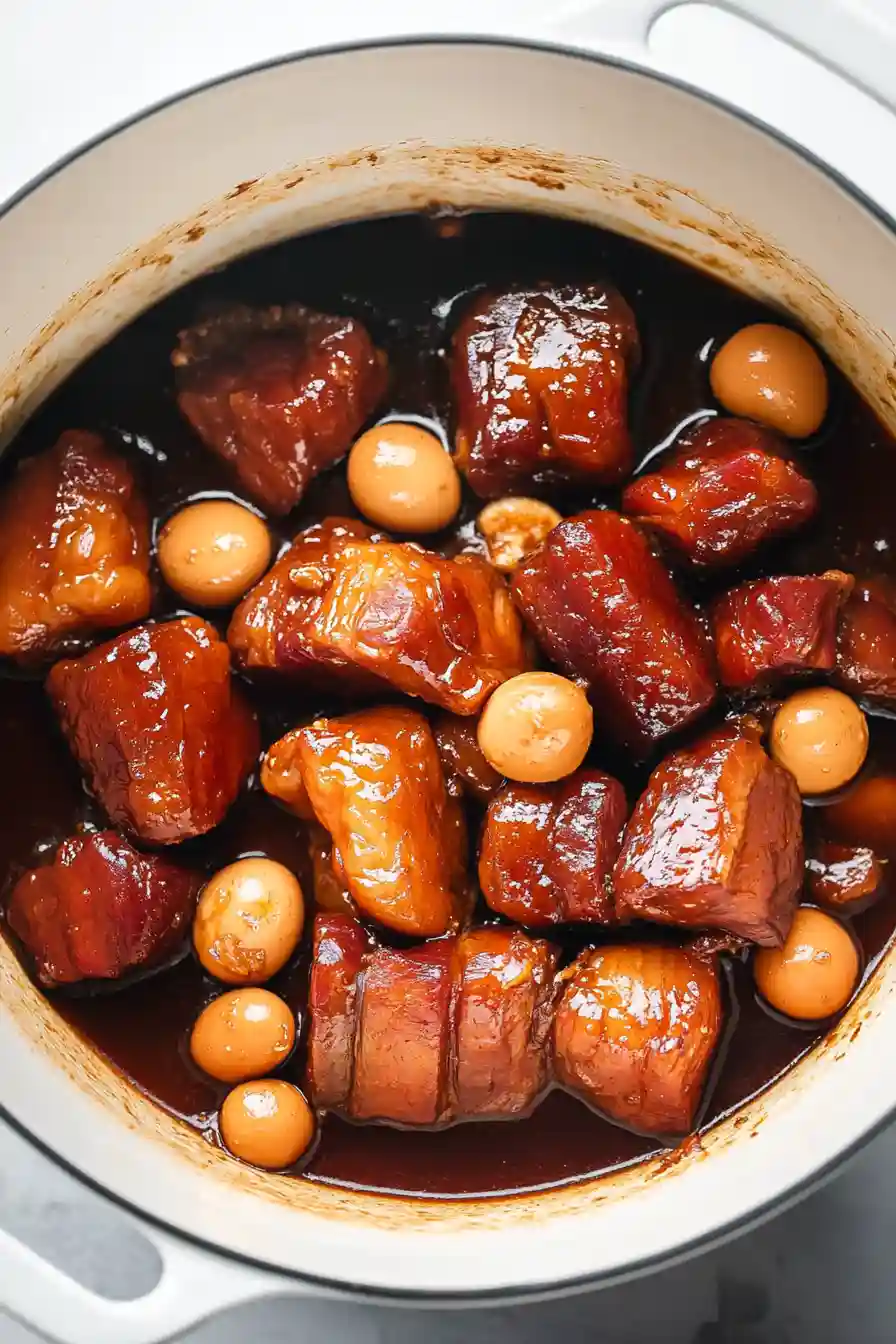
Step 5: Combine with Quail Eggs and Thicken the Sauce
Remove the lid and add the peeled quail eggs to the pot, stirring them to ensure they are evenly covered with the sauce.
Keep the pot uncovered and use medium heat to thicken the sauce for 10-15 minutes.
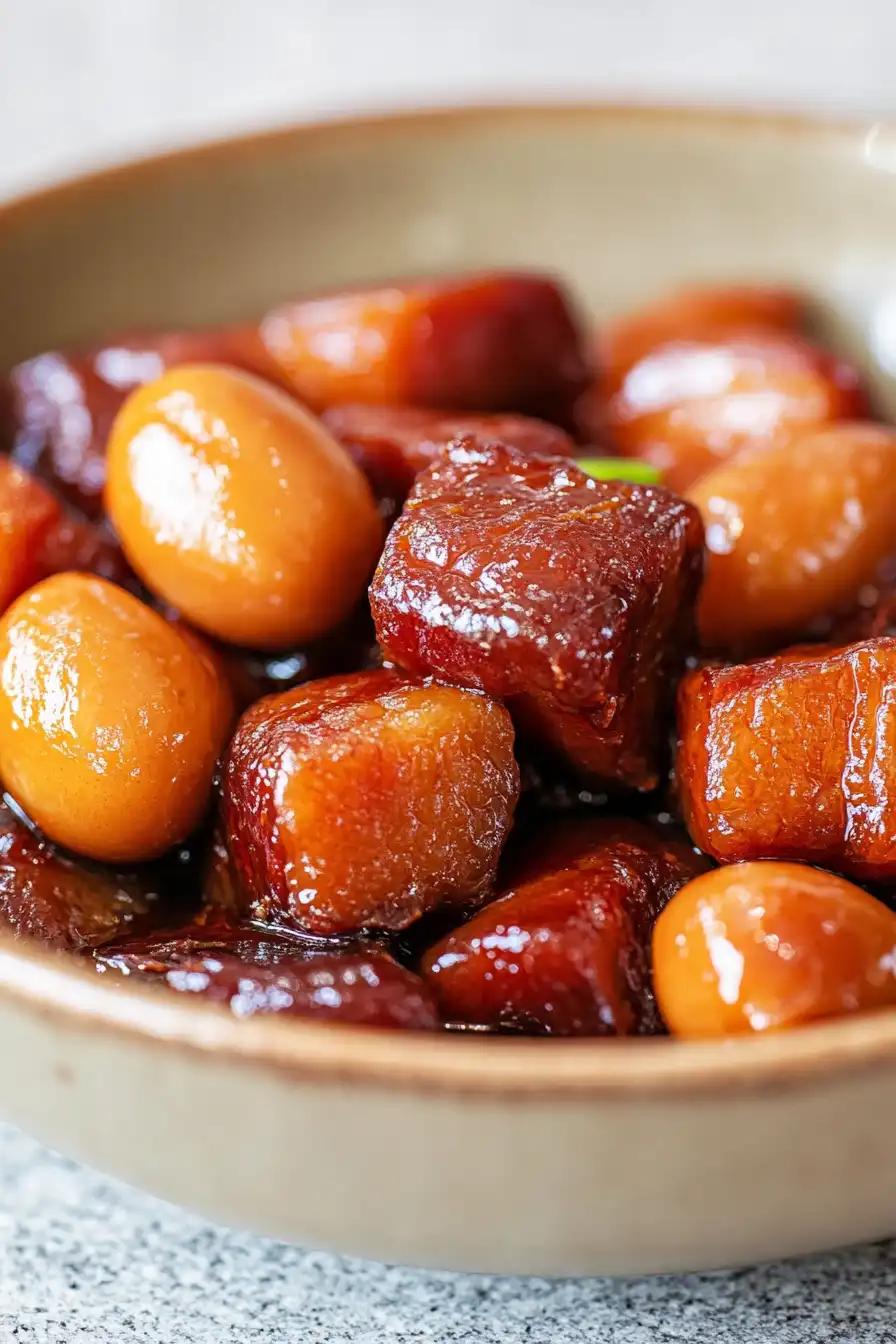
Cook until the pork belly cubes and eggs are coated in a glossy sauce, with minimal liquid remaining at the bottom of the pot.
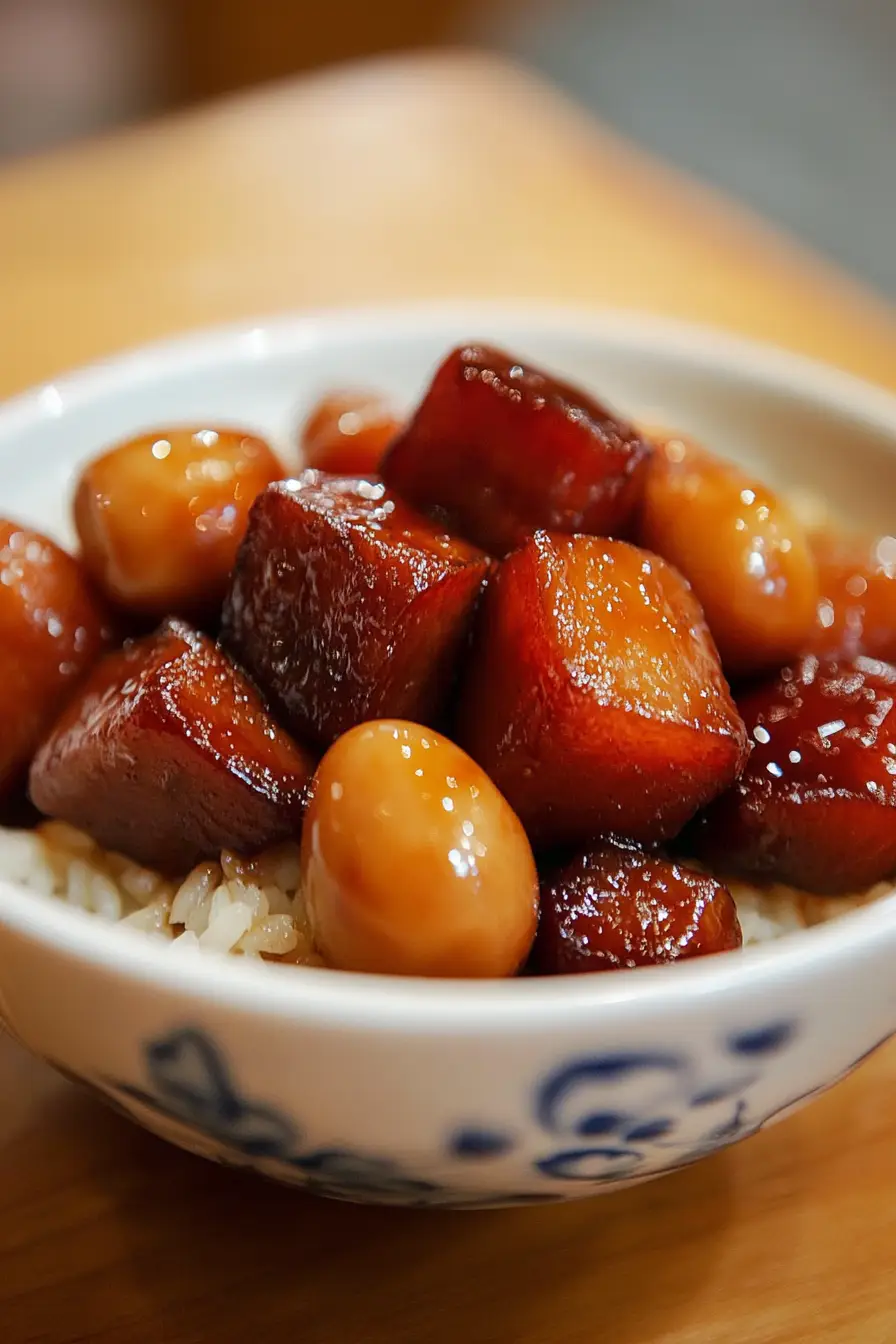
Step 6: Serve and Enjoy
Serve the richly flavored pork belly and quail eggs with steamed rice and your choice of vegetables for a satisfying and savory meal.
