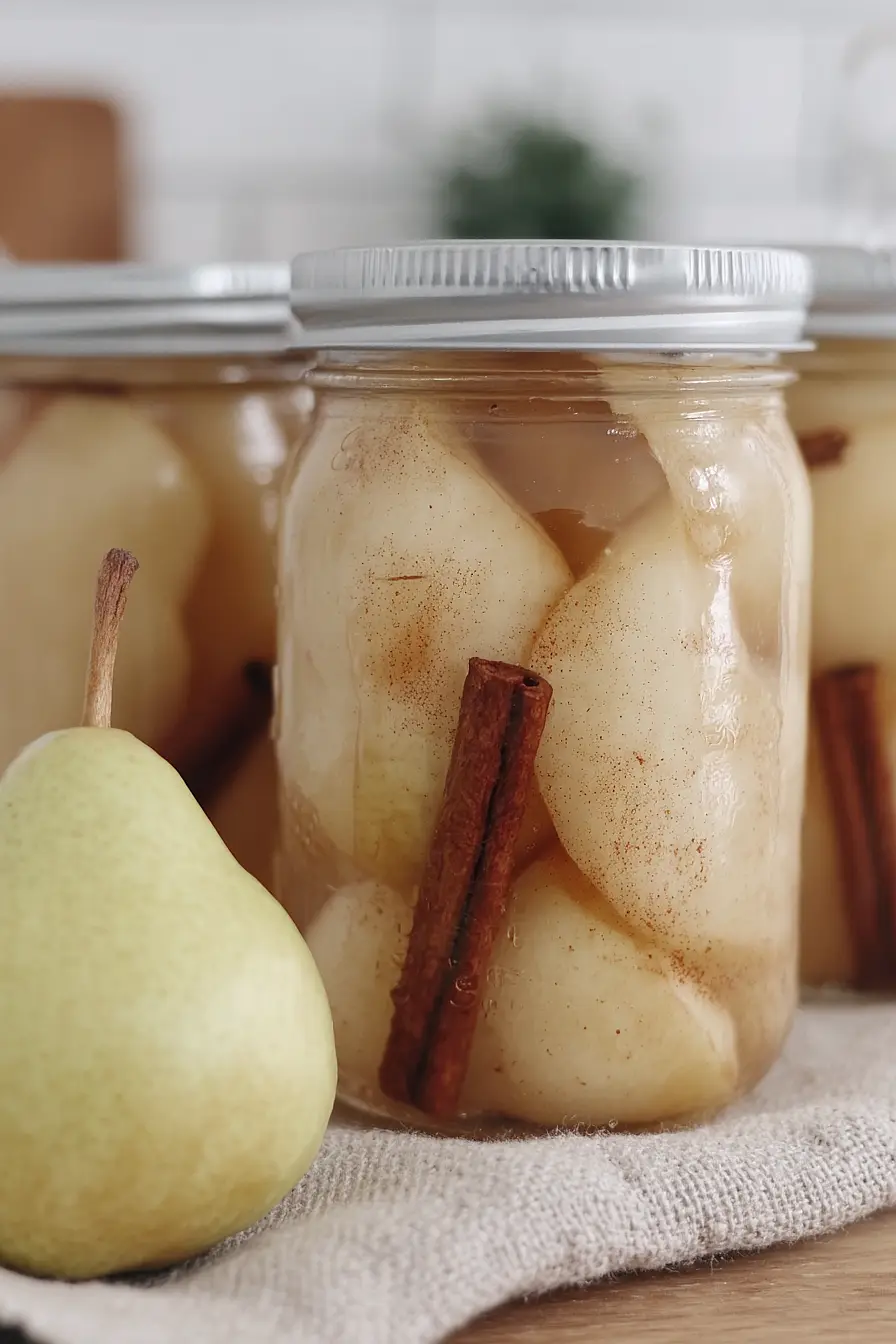
I grew up thinking canned pears only came from the grocery store in those little metal cans with the syrup that was way too sweet. My mom would open them up and serve them as dessert, and I thought that was just how pears were supposed to taste.
It wasn’t until I moved to Portland and saw all the pear trees around here that I realized I could make my own. Canning cinnamon pears at home means you control the sweetness, and that warm cinnamon makes them taste like fall in a jar. Plus, when you make them yourself, you know exactly what’s going into them—no weird preservatives or corn syrup.
Why You’ll Love This Canning Cinnamon Pears
- Simple ingredients – With just pears, cinnamon sticks, and apple juice, you probably already have everything you need to make this recipe.
- No added sugar – Using unsweetened apple juice instead of heavy syrup keeps these pears naturally sweet and healthier than store-bought versions.
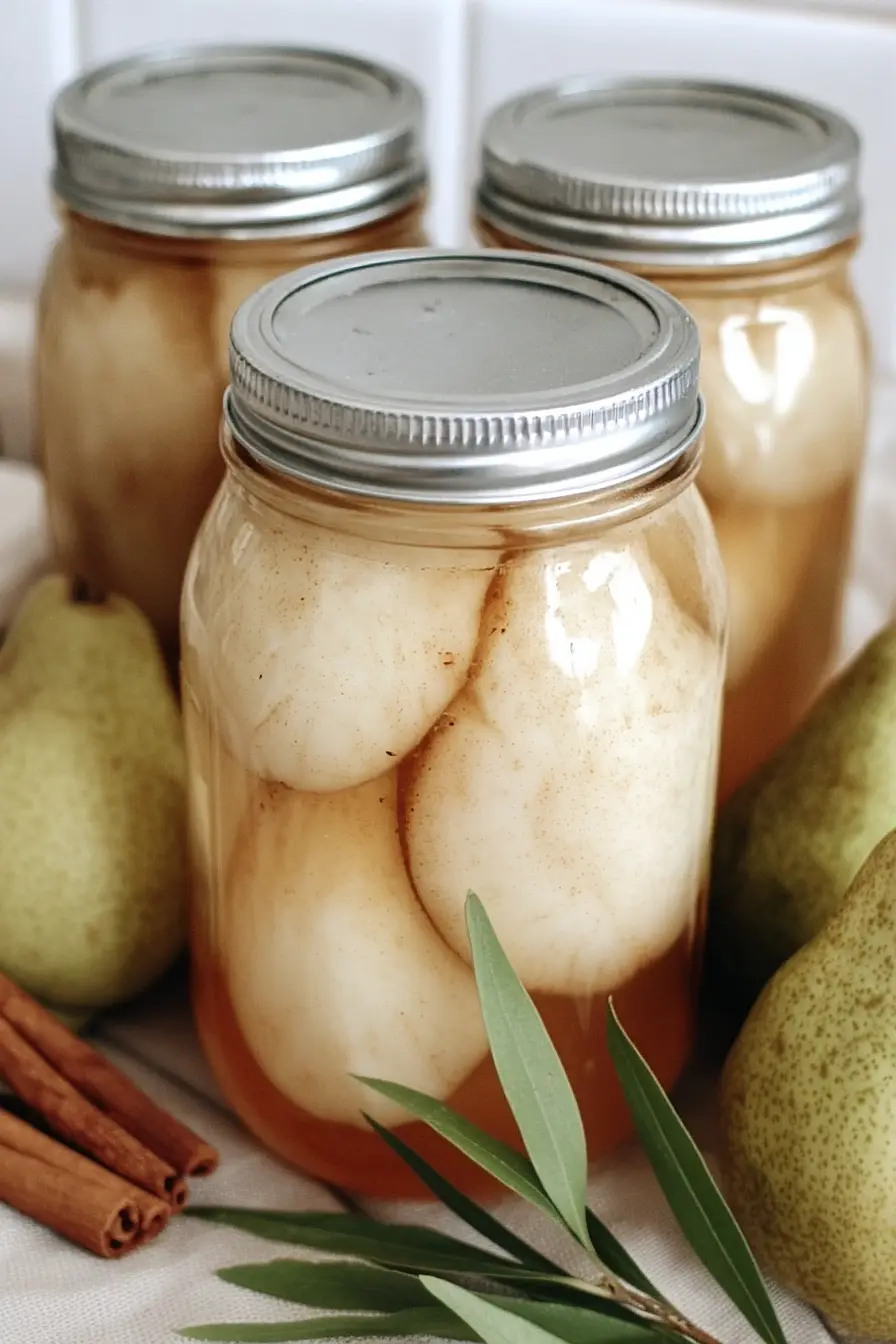
- Long-term storage – Once canned, these pears will keep in your pantry for up to a year, giving you homemade goodness whenever you want it.
- Perfect for beginners – This straightforward canning recipe is a great way to start preserving your own food without complicated steps or special equipment.
- Cozy fall flavors – The warm cinnamon makes these pears taste like autumn in a jar, perfect for holiday meals or winter desserts.
What Kind of Pears Should I Use?
For canning, you’ll want to choose pears that are firm and just barely ripe – they should give slightly to pressure but not be soft or mushy. Bartlett pears are a popular choice because they hold their shape well during the canning process, but Anjou and Bosc varieties also work great. Avoid overripe pears since they’ll turn to mush once they’re processed in the canner. When selecting your pears, look for ones that are free of bruises or soft spots, and try to choose pears that are similar in size so they’ll cook evenly.
Options for Substitutions
While this simple canning recipe doesn’t have many ingredients, here are a few swaps you can make:
- Pears: Bartlett and Anjou pears work best for canning, but you can use Bosc or Asian pears too. Just make sure they’re ripe but still firm – overly soft pears will turn mushy during processing.
- Cinnamon sticks: If you’re out of whole cinnamon sticks, you can use ¼ teaspoon ground cinnamon per pint, but the sticks give better flavor and won’t cloud your liquid. You could also try a whole clove or small piece of fresh ginger for a different spice note.
- Unsweetened apple juice: White grape juice or pear juice work as great substitutes. You can also use water with a splash of lemon juice, though the apple juice adds nice natural sweetness. Avoid using sweetened juices as they can make your pears too sugary.
Watch Out for These Mistakes While Canning
The biggest mistake when canning pears is choosing fruit that’s either too ripe or too hard – pears should be firm but yield slightly to pressure, as overripe ones will turn to mush and underripe ones won’t soften properly during processing. Another common error is not treating cut pears with lemon juice or ascorbic acid before packing, which leads to brown, unappetizing fruit that’s still safe to eat but looks terrible. Make sure to leave the proper headspace (usually 1/2 inch) when filling your jars, as too little space can prevent proper sealing while too much can cause the liquid to boil out during processing. Finally, don’t skip the hot pack method – heating your pears and apple juice together before jarring helps remove air bubbles and ensures better texture in your finished product.
What to Serve With Canned Cinnamon Pears?
These sweet and spiced pears are perfect spooned over vanilla ice cream or Greek yogurt for a simple dessert that feels fancy. I love serving them alongside pancakes or waffles for weekend breakfast – the cinnamon flavor pairs beautifully with maple syrup. They also make a great side dish for pork chops or roasted chicken since the sweetness balances out savory main courses. For a cozy fall treat, try warming them up and serving over oatmeal or mixing them into your morning granola bowl.
Storage Instructions
Pantry Storage: Once your canned cinnamon pears are properly sealed and cooled, they can sit pretty in your pantry for up to 2 years. Make sure to store them in a cool, dark place away from direct sunlight. I love having these on hand for quick desserts or breakfast toppings throughout the year.
After Opening: Once you crack open a jar, transfer any leftover pears to the refrigerator and use them within a week. The opened pears taste amazing over yogurt, oatmeal, or even as a side dish with pork chops.
Check Seals: Always check that your jar lids have sealed properly before storing – they should be firm and not pop when pressed in the center. If a jar didn’t seal correctly, just pop it straight into the fridge and enjoy those pears within a few days.
| Preparation Time | 30-45 minutes |
| Cooking Time | 20-30 minutes |
| Total Time | 50-75 minutes |
| Level of Difficulty | Medium |
Estimated Nutrition
Estimated nutrition for the whole recipe (without optional ingredients):
- Calories: 200-250
- Protein: 1-3 g
- Fat: 0-1 g
- Carbohydrates: 50-60 g
Ingredients
For the jarred pears:
- 1 to 1 1/2 lb ripe pears (about 3 to 5 medium pears)
- 1 cinnamon stick (I use Simply Organic brand)
For the canning liquid:
- Unsweetened apple juice (heated)
Step 1: Prepare the Canner and Sanitize Jars
Fill a water bath canner with enough water to cover jars by 1 to 2 inches and bring to a simmer.
Keep your jars in the hot (not boiling) water until you are ready to fill them.
Meanwhile, wash the lids and bands in warm, soapy water and set them aside.
This ensures that everything is properly sanitized for safe canning.
Step 2: Prepare the Pears
- 1 to 1 1/2 lb ripe pears (about 3 to 5 medium pears) per pint jar
Wash and drain the pears.
Peel, core, and cut them into halves.
If you like, you can treat the pears with a sprinkle of fruit fresh or a dash of lemon juice to prevent browning as you work.
This will keep the pears looking and tasting their best in the final jars.
Step 3: Heat the Pears and Apple Juice
- prepared pears from Step 2
- unsweetened apple juice, heated (enough to fill jars and cover pears)
In a pot, cook the prepared pear halves in water, one layer at a time, just until they are hot throughout.
At the same time, heat the unsweetened apple juice to a boil in a separate saucepan.
Make sure both the pears and juice are nice and hot before moving on to packing.
I always find that warming the pears gently keeps their shape and texture better in the jar.
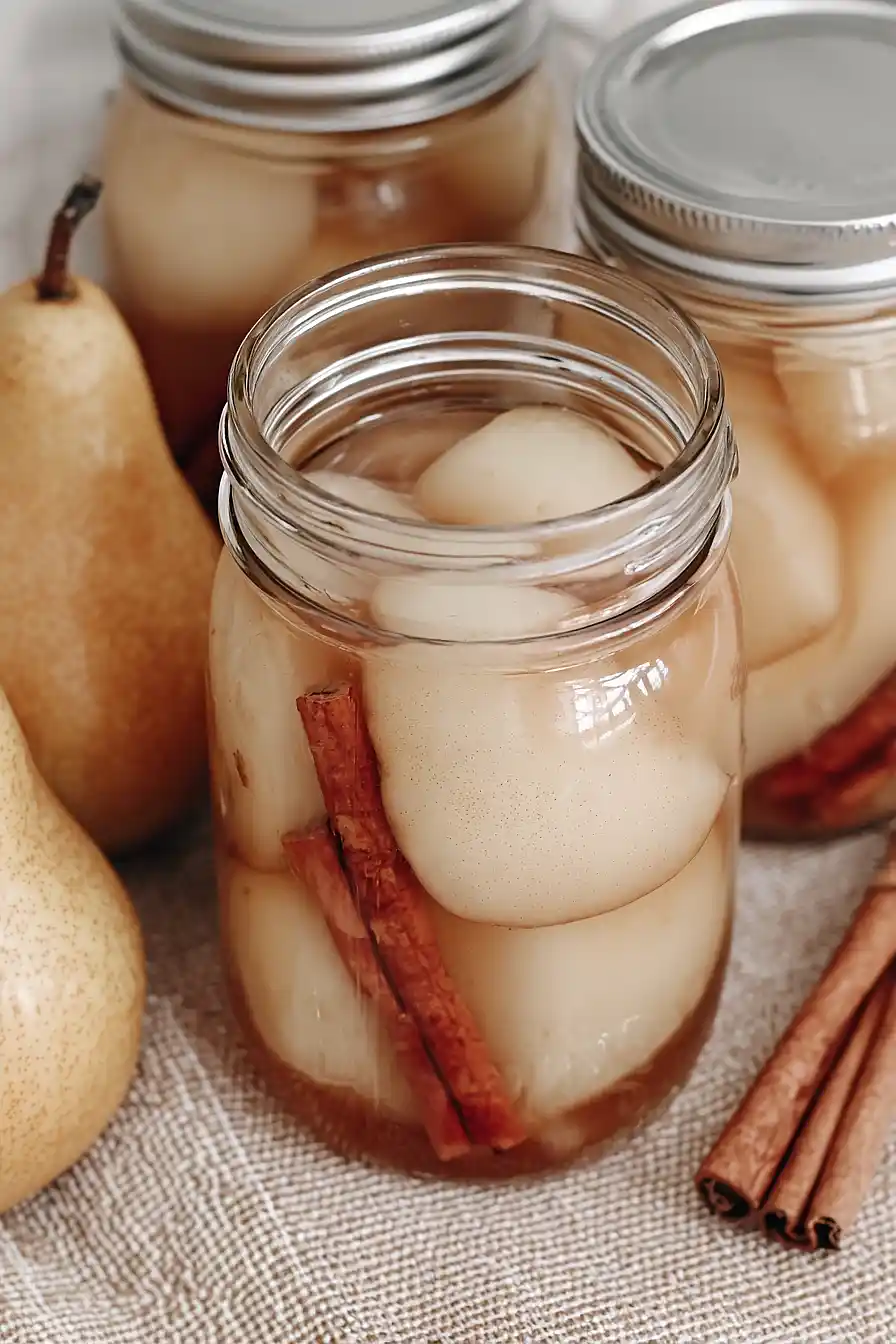
Step 4: Pack Jars with Pears and Cinnamon
- hot pears from Step 3
- 1 cinnamon stick per pint jar
Pack the hot pear halves, cavity side down, snugly into the hot jars, leaving 1/2-inch headspace at the top.
Slip one cinnamon stick into each jar alongside the pears for extra flavor.
Step 5: Add Hot Apple Juice and Remove Air Bubbles
- hot apple juice from Step 3
Ladle the boiling hot apple juice over the pears in each jar, maintaining 1/2-inch headspace.
Remove any trapped air bubbles using a bubble remover tool or a clean rubber spatula, rotating it around the jar a couple of times.
Fill one jar at a time to maintain proper temperature and control.
For the tastiest result, I always make sure to gently press the pears down so they’re well covered in juice.
Step 6: Seal and Process the Jars
Wipe the rims and threads of each jar with a damp cloth to remove residue.
Place the lid on and screw the band on until fingertip-tight.
Using a jar lifter, carefully place each jar into the simmering water in the canner, making sure they remain upright and that there is 1-2 inches of water above them.
Adjust the water level if needed.
Bring the canner to a rolling boil, then process the jars for 20 minutes, adjusting for altitude if necessary.
Step 7: Cool, Rest, and Test the Seal
When the processing time is complete, turn off the burner and remove the canner lid away from you to avoid steam burns.
Wait 5 minutes to help form a better vacuum seal, then remove jars with a jar lifter and place them on a towel or cutting board.
Leave them undisturbed for 12-24 hours.
After resting, check each lid for a proper vacuum seal by pressing the center—the lid should not flex up and down.
Any unsealed jars should be reprocessed.
I like to leave the jars overnight in a draft-free spot to ensure the perfect seal.
