If you ask me, cherry pie doesn’t need fresh cherries to be amazing.
This classic dessert comes together quickly using jarred cherries, making it possible to enjoy homemade pie any time of year. The sweet, juicy filling pairs perfectly with a buttery, flaky crust.
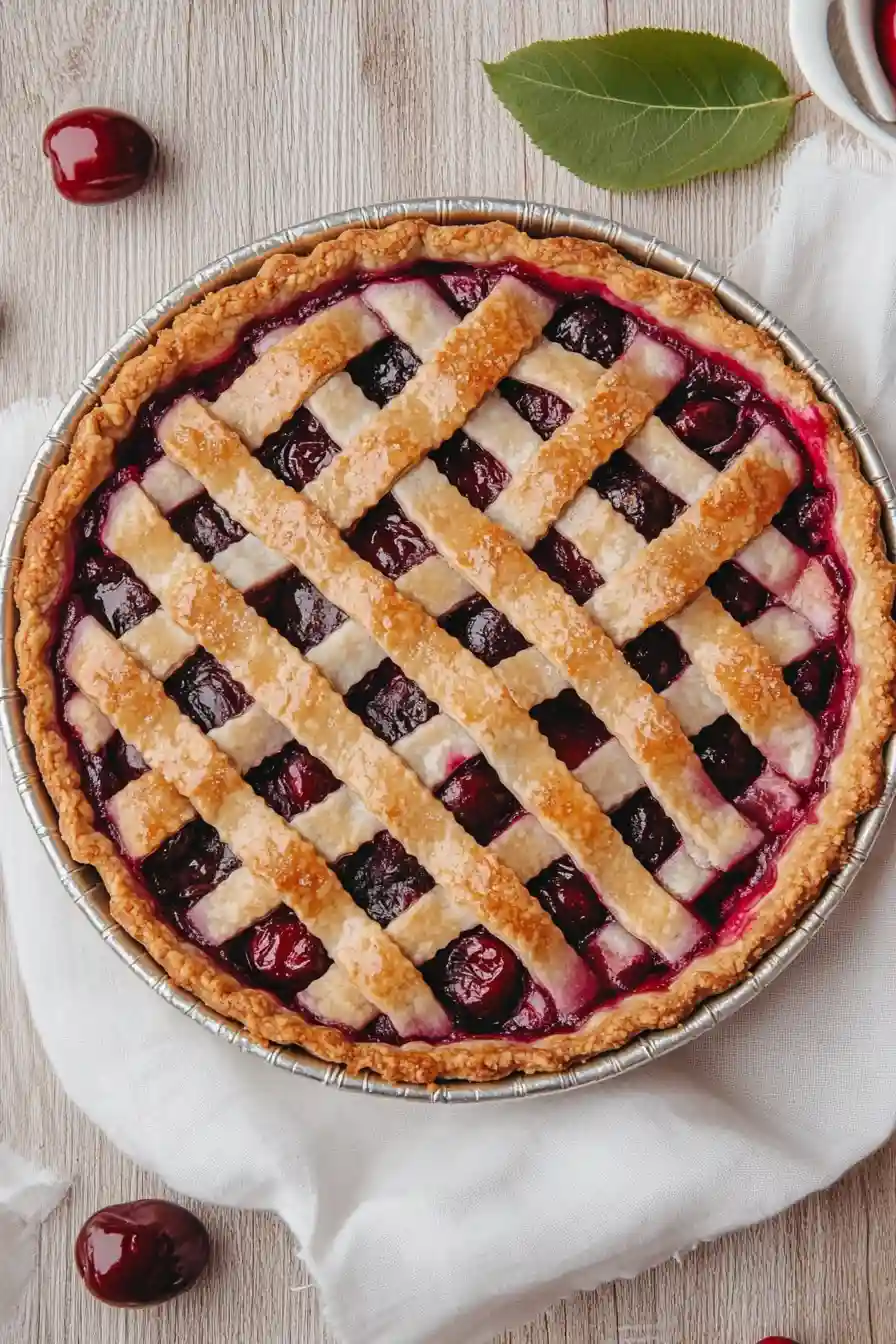
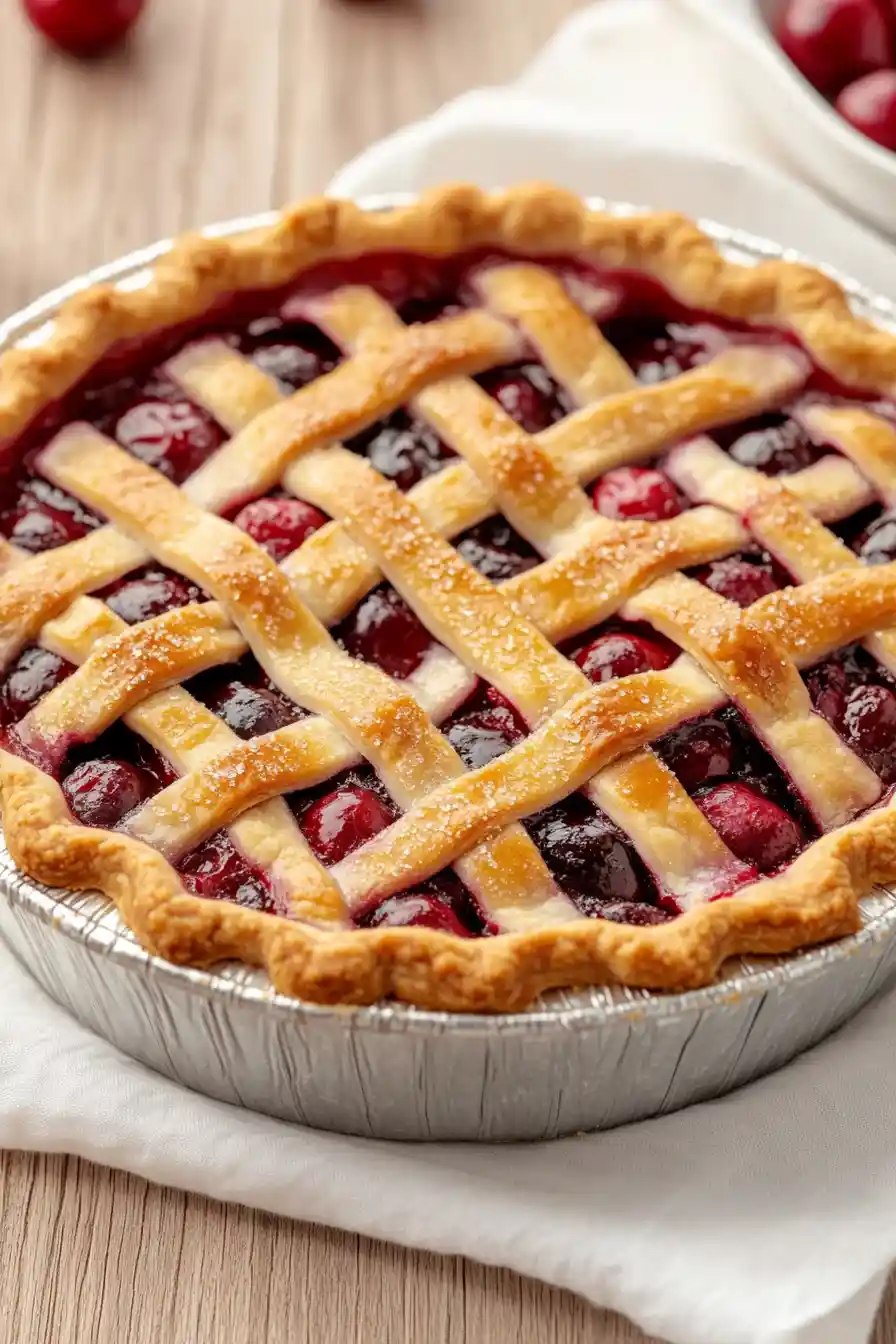
It’s made with store-bought cherries that are mixed with just the right amount of sugar and a touch of almond extract. A simple lattice top gives it that traditional look without any fuss.
It’s a family-favorite dessert that’s cozy and comforting, perfect for Sunday dinners or holiday gatherings.
Why You’ll Love This Cherry Pie
- Year-round availability – Using jarred cherries means you can make this classic pie any time of year, not just during cherry season.
- Time-saving preparation – No pitting cherries needed! The jarred cherries are ready to use, cutting down your prep time significantly.
- Foolproof filling – The pre-sweetened cherries and simple ingredient list make it nearly impossible to mess up the filling – it comes out perfect every time.
- Classic comfort dessert – This recipe creates that traditional cherry pie taste you remember from childhood, complete with the sweet-tart filling and flaky crust.
What Kind of Jarred Cherries Should I Use?
For a classic cherry pie, you’ll want to look for jarred sour cherries (also called tart cherries) rather than sweet cherries – they give the pie that perfect balance of sweet and tart flavors. Most grocery stores carry brands like Musselman’s or Oregon Fruit Products in their canning aisle. Since this recipe calls for sweetened sour cherries, check the label to make sure you’re not getting cherries packed in water alone, as you’ll need the sweetened variety. If you can only find unsweetened cherries, simply adjust the sugar in your recipe accordingly. Just be sure to drain them well while saving some juice for the filling, and give them a quick check for any remaining pits before using.
Options for Substitutions
Making this cherry pie and missing some ingredients? Here are some handy swaps you can try:
- Jarred cherries: If you can’t find jarred cherries, frozen cherries work great too – just thaw and drain them first. Fresh cherries are also an option when in season, but you’ll need to pit them and might want to add extra sugar since they’re not pre-sweetened.
- Cornflour (cornstarch): Regular all-purpose flour can work as a thickener, but you’ll need to use twice the amount. Instant tapioca is another good option – use the same amount as cornflour.
- Vanilla essence: Vanilla extract is actually better if you have it. You could also skip it or try almond extract (but use only 1/4 teaspoon as it’s stronger).
- Egg white: The egg white helps create a barrier to prevent a soggy bottom crust. If you want to skip it, you can brush the bottom crust with melted butter instead.
- Milk: For brushing the top crust, you can use beaten egg, cream, or even water in place of milk. Each will give slightly different levels of browning.
- White sugar: Brown sugar can be used instead of white sugar – it will add a slight caramel note to your filling. You can also try coconut sugar for a different flavor.
Watch Out for These Mistakes While Baking
The biggest challenge when making cherry pie with jarred cherries is dealing with excess moisture – draining the cherries properly and reserving just the right amount of juice is crucial to avoid a runny filling that makes your bottom crust soggy.
Temperature control matters more than you might think – starting with a hot oven (425°F for the first 20 minutes) helps create a crispy bottom crust, then reducing to 375°F allows the filling to cook evenly without burning the top.
One common mistake is skipping the cornstarch or not cooking it long enough – make sure to let your filling bubble for at least 3-5 minutes through the lattice holes to properly activate the thickening power of the cornstarch.
For the best results, let your pie cool completely (at least 3 hours) before cutting – rushing this step will result in a filling that runs everywhere instead of holding its shape, and don’t forget to cut steam vents in your top crust if you’re not doing a lattice design.
What to Serve With Cherry Pie?
Cherry pie is just begging to be served with a scoop of cold vanilla ice cream – the way the ice cream melts into the warm pie creates the perfect bite every time! If you’re not in the mood for ice cream, a dollop of fresh whipped cream or even a drizzle of heavy cream works great too. For a complete dessert spread at your next gathering, try serving smaller slices of cherry pie alongside some vanilla bean ice cream and maybe even a little dark chocolate sauce on the side. Some folks also love to pair their cherry pie with a cup of hot coffee or tea, which helps balance out the sweetness of the pie.
Storage Instructions
Counter Storage: Your freshly baked cherry pie can hang out on the counter for up to 2 days. Just cover it loosely with foil or pop it in a pie keeper if you have one. The crust stays crispier at room temperature than in the fridge!
Refrigerate: If you want your pie to last longer, keep it in the fridge for up to 5 days. Cover it well with plastic wrap or aluminum foil to prevent it from drying out or picking up other flavors from the fridge.
Freeze: This pie freezes really well! Once it’s completely cool, wrap it tightly in plastic wrap, then aluminum foil, and freeze for up to 4 months. When you’re ready to eat it, let it thaw overnight in the fridge.
Warm Up: Want to bring back that fresh-baked taste? Pop individual slices in the oven at 350°F for about 10 minutes. If you’re warming up a frozen slice, add a few extra minutes to the heating time.
| Preparation Time | 30-60 minutes |
| Cooking Time | 75-90 minutes |
| Total Time | 105-150 minutes |
| Level of Difficulty | Medium |
Estimated Nutrition
Estimated nutrition for the whole recipe (without optional ingredients):
- Calories: 800-900
- Protein: 6-8 g
- Fat: 30-35 g
- Carbohydrates: 120-130 g
Ingredients
For the filling:
- 1/2 cup cherry juice (from the jarred cherries)
- 1/2 tsp vanilla extract (I use Nielsen-Massey brand)
- 48 oz sweetened sour cherries (drained, liquid reserved)
- 1 tsp lemon juice (freshly squeezed for best flavor)
- 3 tbsp cornflour
- 1/4 tsp salt
- 3 tbsp sugar
For the crust:
- double pie crust dough (store-bought or homemade)
- sugar (for sprinkling on top)
- 1 egg white
- milk (for brushing the crust)
Step 1: Prepare the Pie Dough
Make the pie crust ahead of time and allow the dough to rest in the refrigerator.
Once rested, divide the dough into two equal disks.
This helps the gluten relax and makes the dough easier to roll out later.
Step 2: Preheat the Oven
Position a rack in the lower third of your oven and preheat it to 425°F (220°C).
This ensures the crust will bake evenly and develop a nice golden color.
Step 3: Make the Cherry Filling
Drain the sour cherries, saving ½ cup (120 ml) of the juice.
In a large bowl, mix together cornstarch, a pinch of salt, the cherries, sugar, lemon juice, the reserved cherry juice, and vanilla extract.
Stir gently until combined, ensuring the cherries are well coated.
Step 4: Roll Out and Assemble the Bottom Crust
Roll out one of the dough disks on a lightly floured surface to form a 12-inch (30 cm) round.
Carefully transfer the dough to a 9-inch (23 cm) pie dish, leaving about a ½-inch (1.3 cm) overhang.
If you wish to create a seal, brush the crust with egg white before adding the filling.
Step 5: Add Cherry Filling
Spoon your prepared cherry filling into the pie crust, slightly mounding it in the center.
The filling should touch the edge of the pie dish to support the top crust.
Step 6: Prepare and Add the Top Crust or Lattice
Roll out the second dough disk to another 12-inch (30 cm) round.
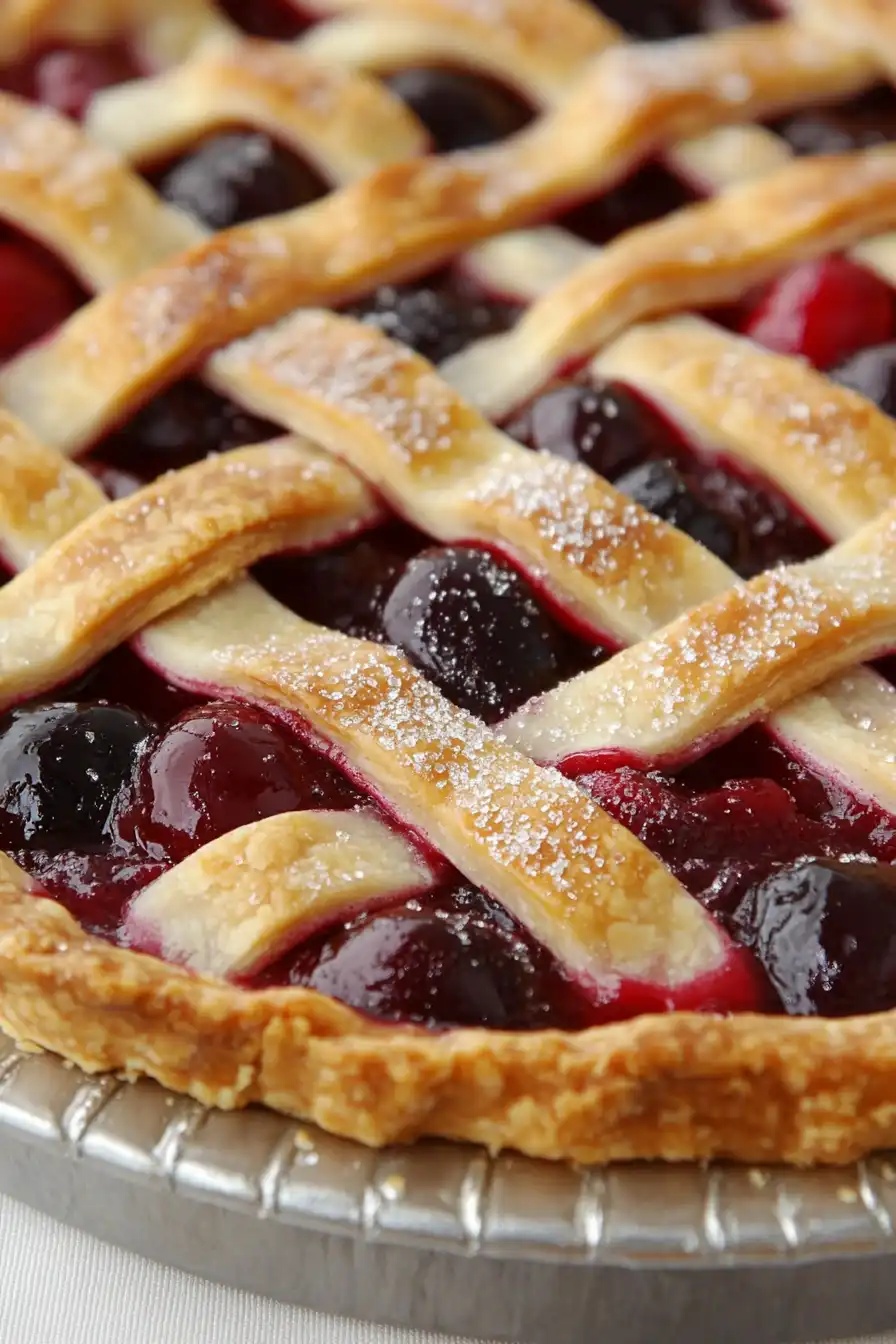
Optionally, you can cut ten ¾-inch-wide (2 cm) strips to lay across the filling in a lattice pattern.
Trim the overhang to ½ inch (1.3 cm) and fold the bottom crust over the lattice ends, crimping to seal.
Alternatively, lay the second dough disk as a full round over the filling.
Trim the edges, then seal and crimp the crust.
Use a knife to slash the crust decoratively, allowing steam to escape.
Step 7: Finish and Bake the Pie
Brush the top crust with milk and sprinkle with sugar for a shiny, sweet finish.
Place the pie on a rimmed baking sheet to catch any drips during baking.
Bake the pie at 425°F (220°C) for 15 minutes, then reduce the oven temperature to 375°F (190°C) and continue baking for about 1 hour, until the filling is bubbling and the crust is golden brown.
If the edges start browning too quickly, cover them with foil.
Step 8: Cool and Serve
Once baked, allow the pie to cool completely on a wire rack.
This will help the filling set, making it easier to slice.
Serve your delicious cherry pie and enjoy!
