If you ask me, Instant Pot honey garlic chicken is one of those game-changing weeknight dinners.
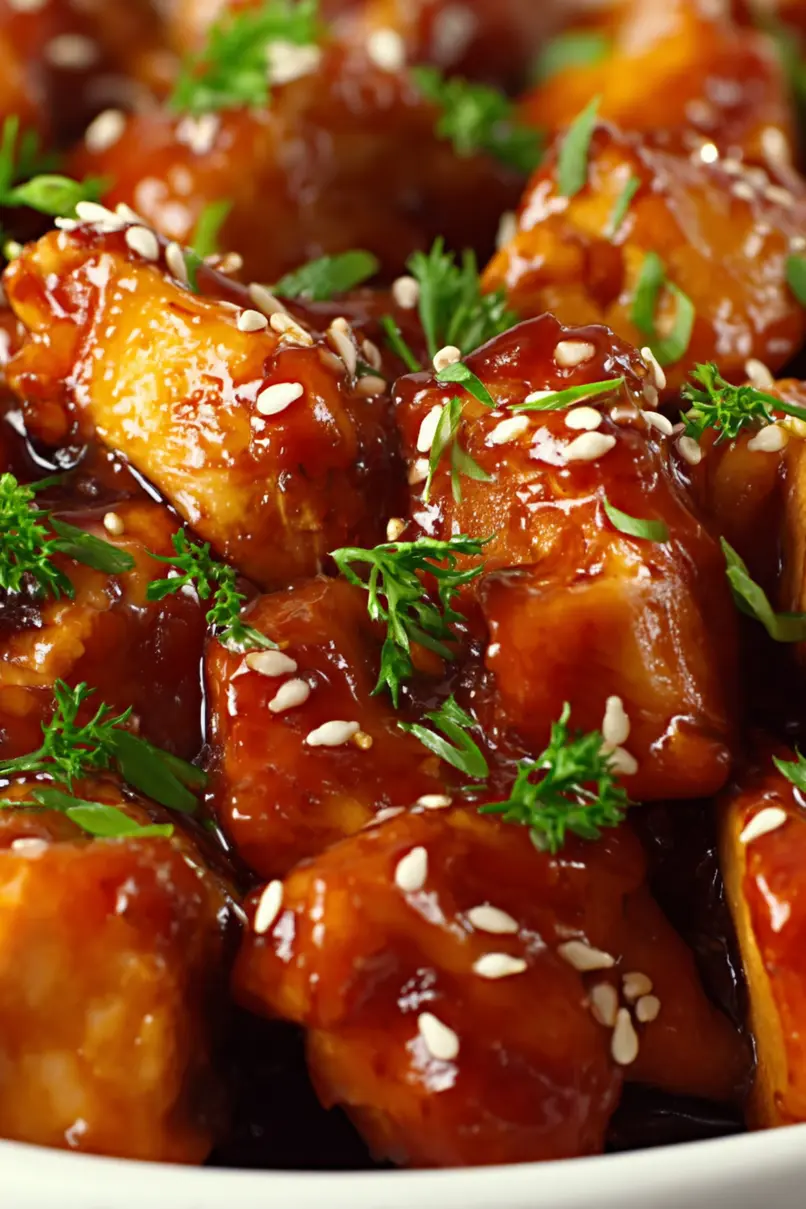
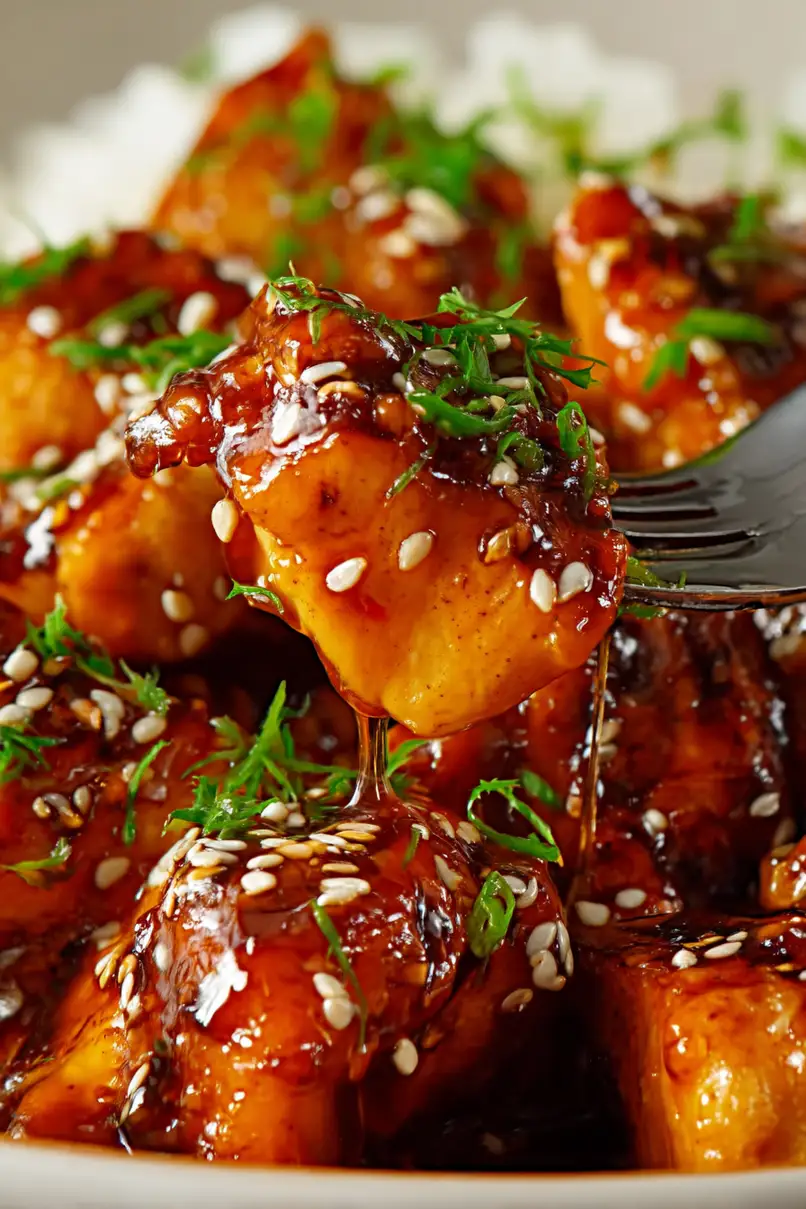
This Asian-inspired dish combines sweet honey and savory garlic in a sauce that coats tender, juicy chicken pieces. The pressure cooker works its magic to infuse the meat with flavor while keeping it moist and perfectly cooked.
It’s the kind of meal that comes together in a fraction of the time it would take in a regular pan, but tastes like it’s been simmering all day. The sticky sauce covers every bite of chicken, making it perfect over a bed of fluffy rice.
It’s a family-friendly recipe that hits all the right notes – sweet, savory, and satisfying – ideal for those busy evenings when you want something homemade but don’t have hours to spend in the kitchen.
Why You’ll Love This Honey Garlic Chicken
- Quick cooking time – Thanks to the Instant Pot, this takeout favorite comes together in just 30-40 minutes, perfect for those busy weeknights when you’re craving something tasty but short on time.
- Basic pantry ingredients – You probably already have most of these ingredients in your kitchen – honey, soy sauce, and garlic are common staples that create magic together.
- Restaurant-quality results – The pressure cooking method ensures tender, juicy chicken while the honey-garlic sauce reduces to a perfect sticky glaze that rivals your favorite Asian restaurant.
- Family-friendly recipe – The sweet and savory flavors are mild enough for kids but satisfying for adults, making this a dinner that everyone at the table will enjoy.
- Easy clean-up – Using just your Instant Pot means minimal dishes to wash – one pot for cooking means less time cleaning up after dinner.
What Kind of Chicken Should I Use?
Boneless, skinless chicken breasts are the star of this recipe, but you’ve got some flexibility here. While the recipe calls for chicken breasts, you could easily swap in boneless chicken thighs if you prefer darker meat – they’re actually more forgiving when it comes to pressure cooking and tend to stay juicier. For the best results, try to choose chicken pieces that are similar in size so they cook evenly. If your chicken breasts are particularly large, you might want to cut them in half horizontally to ensure they cook through properly and absorb more of that tasty honey garlic sauce.
Options for Substitutions
This recipe is pretty adaptable and you can make several swaps based on what you have in your kitchen:
- Chicken breast: You can easily swap chicken breasts for boneless chicken thighs – they’ll actually turn out even juicier! Just keep the cooking time the same.
- Honey: If you’re out of honey, try maple syrup or brown sugar (use 1/3 cup instead of 1/2 cup). The taste will be slightly different but still good!
- Soy sauce: Coconut aminos or tamari make great substitutes for soy sauce. If using coconut aminos, you might want to add a bit more salt since it’s typically less salty.
- Ketchup: No ketchup? Try tomato paste mixed with a tiny bit of vinegar and sugar, or even BBQ sauce (though this will change the flavor profile somewhat).
- Cornstarch: Arrowroot powder or flour work well as thickeners too. For flour, use 6 teaspoons mixed with water instead of 3.
- Garnishes: The sesame seeds and green onions are optional – you can skip them or use chopped regular onions, cilantro, or even crushed peanuts for crunch.
Watch Out for These Mistakes While Cooking
The biggest mistake when making Instant Pot honey garlic chicken is adding the cornstarch mixture at the beginning, which can cause the sauce to become lumpy and stick to the bottom – instead, stir it in only after the chicken is fully cooked. Another common error is overcrowding the pot when browning the chicken pieces, so work in batches if needed to get that perfect golden crust. The honey in this recipe can easily burn if added directly to the hot oil, so make sure to mix it with the soy sauce and other liquid ingredients before adding it to the pot. For the juiciest results, let the chicken rest for 5-10 minutes after cooking before slicing, and if your sauce is too thin, use the Instant Pot’s sauté function after cooking to reduce it to your desired consistency.

What to Serve With Honey Garlic Chicken?
While this sweet and savory chicken is perfect over a bed of white rice (which soaks up all that yummy sauce!), there are lots of other ways to round out your meal. A side of steamed broccoli or snap peas works great with the honey garlic flavors, and they’re simple enough to prepare while your chicken cooks in the Instant Pot. For something a bit different, try serving it with cauliflower rice or quinoa instead of regular rice, or add a fresh Asian-style slaw with shredded cabbage and carrots dressed in rice vinegar. You can also toss in some roasted vegetables like bell peppers or carrots to add more color and nutrition to your plate.
Storage Instructions
Keep Fresh: This honey garlic chicken is perfect for meal prep! Place it in an airtight container and keep it in the fridge for up to 4 days. I like to store the chicken and sauce separately from the rice to keep everything tasting its best.
Freeze: You can freeze this dish for up to 3 months in a freezer-safe container. The sauce might separate a bit, but don’t worry – it’ll come back together when reheated. Just skip freezing the garnishes and add fresh ones when serving.
Reheat: To warm up your honey garlic chicken, pop it in the microwave for 1-2 minutes, stirring halfway through. For best results on the stovetop, heat it over medium-low heat, adding a splash of water if the sauce needs thinning. The chicken stays nice and tender either way!
| Preparation Time | 10-15 minutes |
| Cooking Time | 20-25 minutes |
| Total Time | 30-40 minutes |
| Level of Difficulty | Easy |
Estimated Nutrition
Estimated nutrition for the whole recipe (without optional ingredients):
- Calories: 800-900
- Protein: 75-85 g
- Fat: 20-25 g
- Carbohydrates: 90-100 g
Ingredients
For the chicken:
- salt
- 3-4 boneless, skinless chicken breasts (about 1.5 lbs, cut into 1-inch chunks)
- pepper
For the sauce:
- 1/3 cup soy sauce (low sodium preferred)
- 4 cloves garlic (freshly minced for best flavor)
- 1/3 cup onion (finely chopped)
- 1/4 cup ketchup
- 2 tbsp cooking oil (like vegetable or canola oil)
- 1/2 cup honey (I use Sue Bee honey)
For the sauce thickening:
- 1/4 cup water (cold water helps prevent lumps)
- 3 tsp cornstarch
For serving:
- sliced green onion
- rice
- sesame seeds (toasted, for garnish)
Step 1: Prepare and Season the Chicken
Begin by placing the chicken in the bottom of your Instant Pot.
Season the chicken generously with salt and pepper to taste.
This will be the base flavor for your dish.
Step 2: Make the Sauce
In a small bowl, combine the honey, soy sauce, onion, ketchup, oil, and garlic.
Mix well to ensure all the ingredients are blended.
Pour this flavorful sauce mixture over the seasoned chicken in the Instant Pot.
Step 3: Cook the Chicken
Place the lid on your Instant Pot, ensuring it is set to seal.
Cook the chicken using the Meat setting, or on HIGH pressure if you’re using a non-Instant Pot, for 15 minutes.
Once the cooking is complete, perform a quick release to relieve the pressure.
Carefully remove the chicken from the pot, leaving the sauce behind.
Step 4: Thicken the Sauce
In a small bowl, dissolve 3 teaspoons of cornstarch in 1/4 cup of water.
Pour this cornstarch mixture into the Instant Pot with the remaining sauce.
Stir to combine thoroughly.
Press the Saute button and cook the sauce for about 5 minutes, or until it becomes slightly thickened, stirring occasionally.
Step 5: Finalize and Serve
Cut the cooked chicken into bite-sized pieces and return it to the Instant Pot.
Toss the chicken pieces with the thickened sauce to coat evenly.
Garnish with sesame seeds and chopped green onions for added flavor and texture.
Serve the chicken and sauce hot over a bed of rice.
