Here is my favorite Japanese braised pork belly recipe, with tender meat that melts in your mouth, a rich soy-based sauce, and simple aromatics like ginger and green onions that bring everything together.
This pork belly dish has become my go-to comfort food when I want something warm and satisfying. I always make extra because the leftovers taste even better the next day. Nothing beats having ready-made braised pork in the fridge for quick rice bowls, right?
Why You’ll Love This Braised Pork Belly
- Melt-in-your-mouth tender – The long, slow cooking process breaks down the tough meat fibers and renders the fat, creating incredibly tender pork belly that practically melts in your mouth.
- Rich umami flavor – The combination of dashi, sake, mirin, and soy sauce creates a deep, savory-sweet sauce that perfectly complements the pork.
- Make-ahead friendly – While it takes time to cook, you can make this dish a day ahead – it actually tastes even better the next day as the flavors continue to develop.
- Restaurant-quality dish – This homemade version of a Japanese classic gives you the same quality you’d find at a good restaurant, using simple ingredients you can find at most Asian grocery stores.
What Kind of Pork Belly Should I Use?
For Japanese braised pork belly, you’ll want to look for a piece that has a good balance of meat and fat layers – aim for pieces that show distinct striping when you look at the side. Fresh pork belly is better than smoked or cured (like bacon) for this dish, and you can find it at Asian markets or ask your local butcher. When selecting your piece, look for pork belly that’s pinkish-red in color with white fat, and avoid any that has dark spots or strong odors. If you’re buying a larger slab, you can always cut it into portions and freeze what you don’t need – just make sure to thaw it completely in the fridge before cooking.
Options for Substitutions
While some ingredients are key to keeping this dish authentic, there are several substitutions you can make if needed:
- Tokyo negi: Regular green onions or scallions work perfectly fine – use about 3-4 to replace one Tokyo negi. Leeks can also work in a pinch, just use the white and light green parts only.
- Dashi: This is pretty important for the authentic flavor, but if you can’t find it, you can use chicken stock mixed with a piece of kombu seaweed. As a last resort, use chicken stock with a splash of fish sauce.
- Sake: Chinese rice wine (Shaoxing) is the best substitute. If you need non-alcoholic options, use rice vinegar mixed with water (1:3 ratio) or just chicken stock.
- Mirin: Mix 1 tablespoon rice vinegar with 1 tablespoon sugar for every 1/4 cup of mirin needed. Or use sweet marsala wine if available.
- Pork belly: This is really the star here and hard to substitute, but if needed, you could use pork shoulder (though the dish won’t be as rich). Just make sure to get a cut with good fat content.
- Shichimi togarashi: You can skip it or make a simple mix of red pepper flakes with a pinch of ground ginger and orange zest.
Watch Out for These Mistakes While Cooking
The biggest mistake when making Japanese braised pork belly is rushing the cooking process – this cut needs time to break down properly, so plan for at least 2-3 hours of gentle simmering to achieve that melt-in-your-mouth texture. A common error is skipping the initial browning step, but taking time to sear the pork belly on all sides creates a deeper flavor base and better color in the final dish. To prevent tough, chewy meat, make sure to keep the liquid at a gentle simmer rather than a rolling boil, and resist the urge to stir too frequently – this can break apart the tender meat. For the best results, let the pork belly rest in the cooking liquid overnight in the refrigerator, which allows the flavors to develop further and makes it easier to slice the meat cleanly the next day.
What to Serve With Japanese Braised Pork Belly?
This rich and savory pork belly pairs perfectly with steamed white rice, which helps soak up all that delicious braising sauce. I like to add some simple Japanese sides to round out the meal – try quick-pickled cucumbers or a small bowl of miso soup for balance. Since the pork belly is pretty rich, a side of blanched greens like spinach or bok choy dressed with a little sesame oil works great to cut through the richness. You can also serve it with some basic Japanese staples like steamed edamame or a simple seaweed salad to keep things traditional.
Storage Instructions
Keep Fresh: This Japanese braised pork belly tastes even better the next day! Place it in an airtight container with some of its cooking liquid and pop it in the fridge for up to 4 days. The flavors will continue to develop and deepen over time, making it perfect for meal prep.
Freeze: Good news – this dish freezes really well! Let it cool completely, then transfer to a freezer-safe container with some of the braising liquid to keep the meat moist. It’ll stay good for up to 3 months. Just remember to skip freezing any garnishes like snap peas, as they’re best added fresh.
Warm Up: To enjoy your leftover pork belly, gently warm it in a pot on the stove with its braising liquid over low heat until heated through. If frozen, thaw overnight in the fridge first. The low and slow approach helps maintain the meat’s tender texture and prevents it from drying out.
| Preparation Time | 30-45 minutes |
| Cooking Time | 180-240 minutes |
| Total Time | 210-285 minutes |
| Level of Difficulty | Medium |
Estimated Nutrition
Estimated nutrition for the whole recipe (without optional ingredients):
- Calories: 2500-2900
- Protein: 150-170 g
- Fat: 200-220 g
- Carbohydrates: 150-170 g
Ingredients
For the pork belly:
- 1.66 lb pork belly (skin on or off, as preferred)
- 0.5 tbsp neutral oil (like grapeseed or canola)
- 1 (2 inch) piece ginger
- 0.25 cup sake
- 1 tokyo negi (or 4 green onions)
For the braising liquid:
- 0.25 cup sake
- 2.5 cups dashi (homemade is best for flavor)
- 1 dried red chili pepper (for a hint of warmth)
- 0.25 cup soy sauce
- 0.25 cup sugar
- 0.25 cup mirin (I use Kikkoman Aji-Mirin)
For the optional accompaniments and garnish:
- shichimi togarashi
- 4 large eggs
- 5 snap peas (blanched until tender-crisp)
Step 1: Prepare Ingredients and Pork Belly
Gather all your ingredients and make a quick dashi using a dashi packet; it takes only 3 minutes.
Keep the eggs in the refrigerator until you need them.
Cut the Tokyo negi (long green onion), separating the green and white parts.
Dice the green part into 2-inch pieces and save the white part for garnishing later.
Slice a ginger knob thinly and set half aside for slow-cooking the pork, the other half for braising.
Cut 1⅔ lb pork belly strips into shorter blocks if needed.
Step 2: Sear the Pork Belly
Heat a heavy skillet over medium-high heat and add ½ tablespoon of neutral oil.
Place the pork belly, fat side down, in the skillet.
Sear until all sides are browned, about 2–3 minutes per side.
Work in batches if necessary.
Transfer the seared pork belly pieces to a large pot, arranging them in a single layer.
Step 3: Slow-Cook the Pork Belly
In the pot, add ¼ cup sake and enough water to cover the meat, starting with 1.5 QT of water.
Add the green negi pieces and half of the ginger slices.
Bring to a boil, skim the scum, and then simmer gently with an otoshibuta (drop lid) on top for 3 hours, uncovered.
Make sure the meat stays submerged, adding hot water as needed.
Step 4: Prepare the Eggs and Snap Peas
Boil water in a medium saucepan for the eggs.
Remove 4 large eggs from the refrigerator and gently lower them into boiling water.
Soft-boil them for 6½–7 minutes.
Transfer to an iced water bowl and peel once cooled.
Blanch snap peas until tender, then set aside.
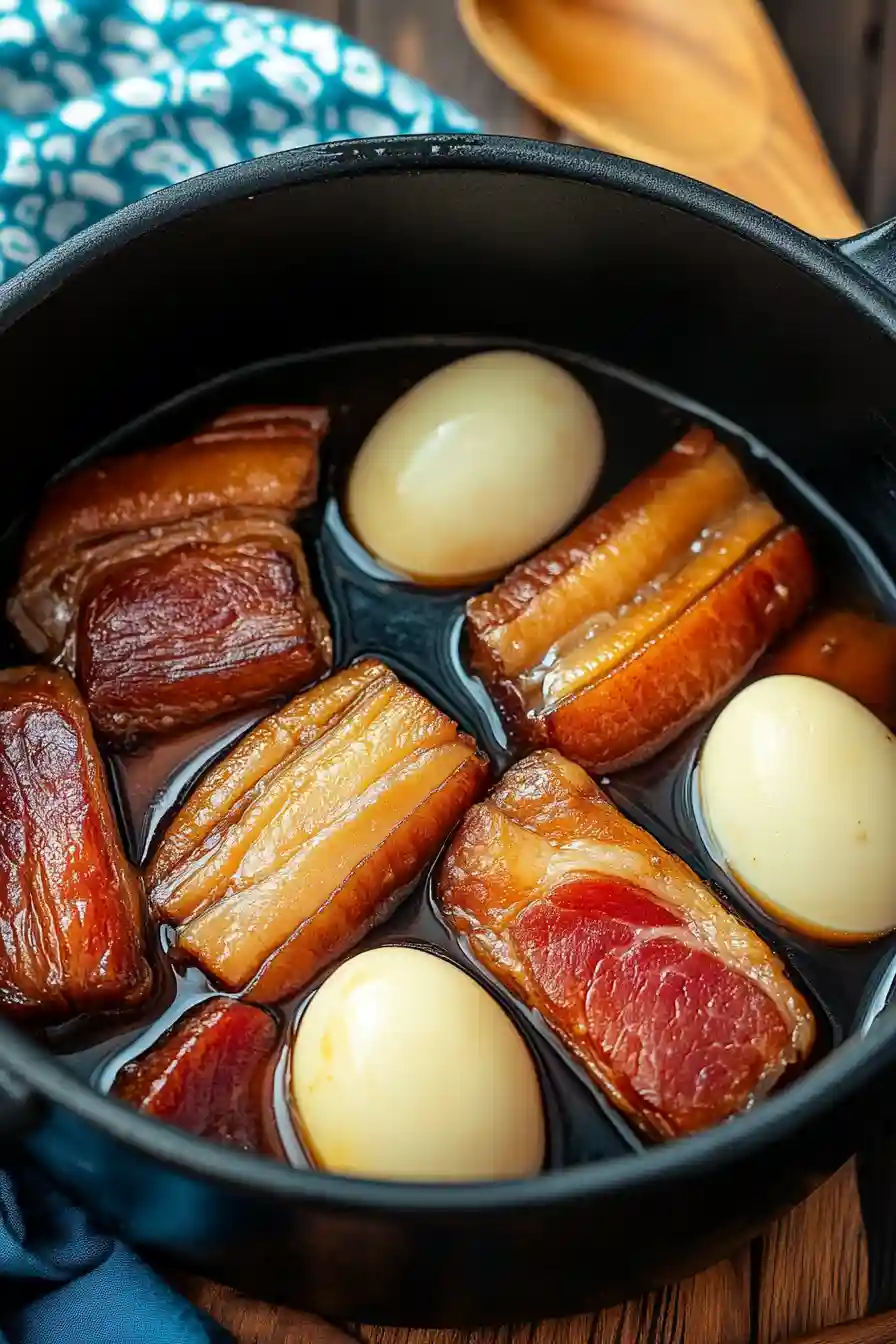
Step 5: Braise the Pork Belly
After 3 hours of cooking, remove the pork, and cut it into 2-inch pieces.
Place them in a medium pot.
Add 2½ cups dashi, ¼ cup sake, ¼ cup mirin, ¼ cup sugar, dried red chili pepper (optional), and the rest of the ginger slices.
Cook on a gentle simmer for 1 hour without the pot lid but with an otoshibuta.
At 30 minutes, add ¼ cup soy sauce and peeled eggs.
Keep simmering, making sure there’s enough liquid to prevent burning.
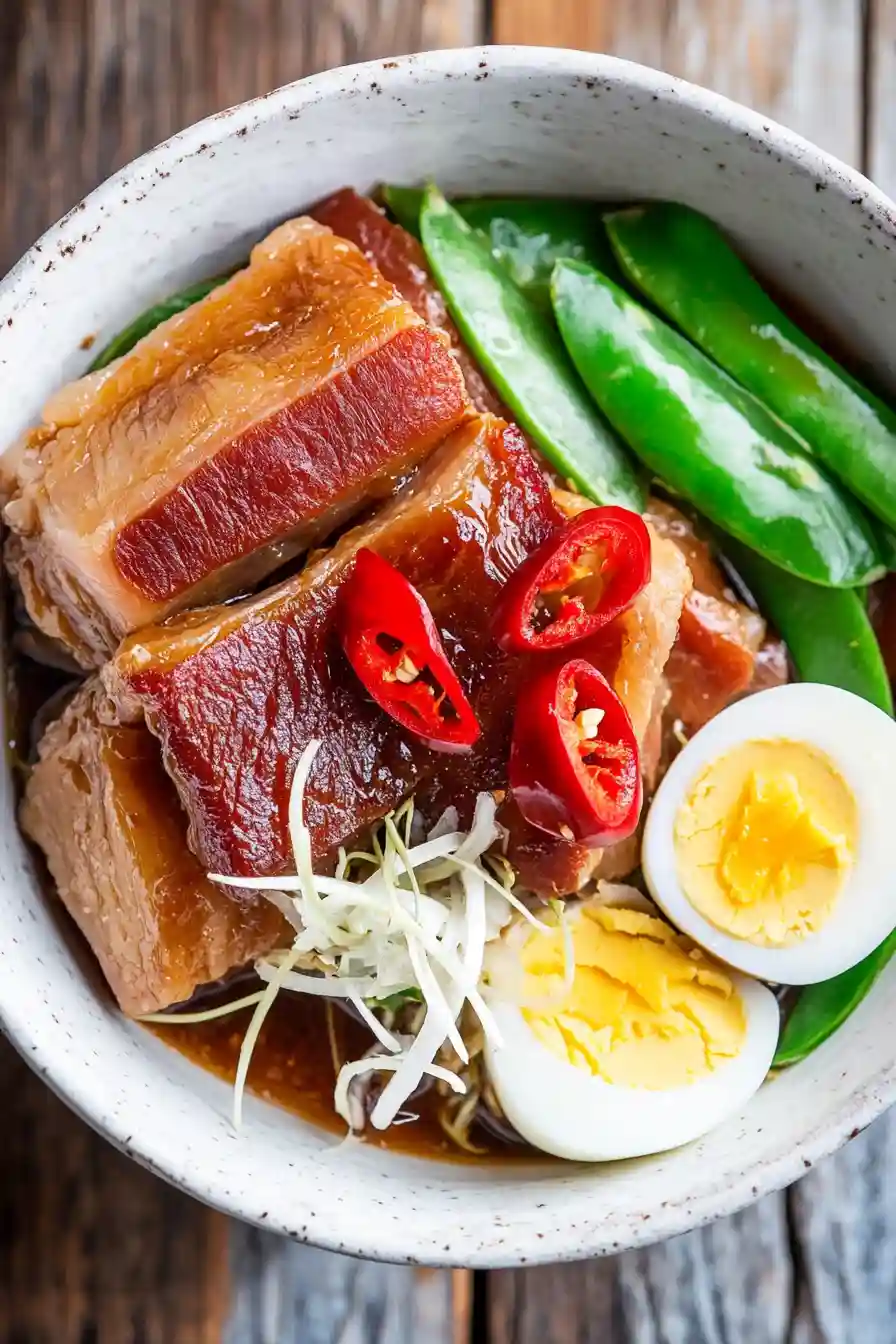
Step 6: Prepare Shiraga Negi and Serve
Use the white negi part to make shiraga negi by cutting into 3-inch lengths, removing the soft core, slicing into thin strips, and soaking in iced water for 5–10 minutes.
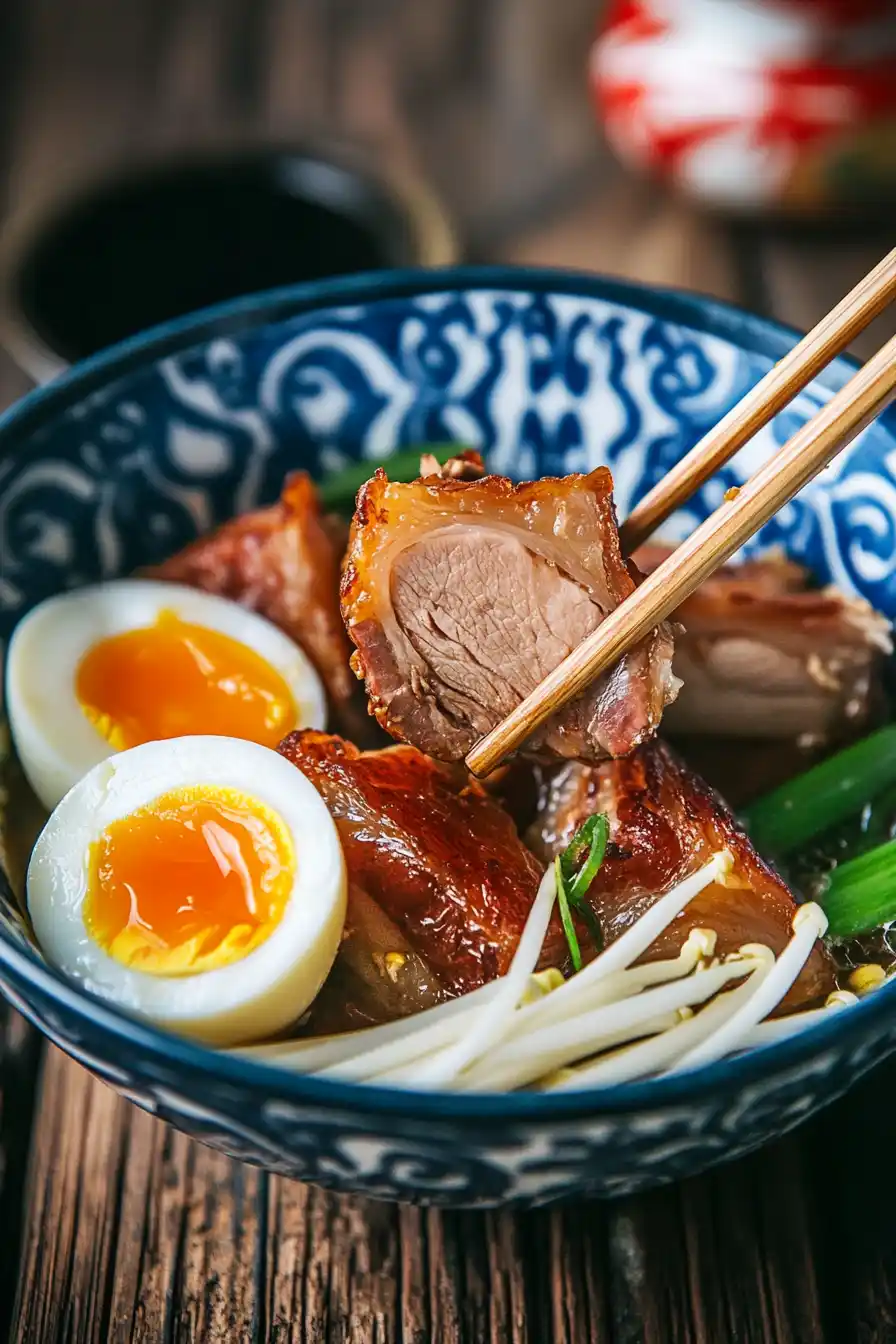
Serve Kakuni, eggs, and snap peas in bowls, drizzle with braising liquid, and garnish with shiraga negi.
Optionally season with shichimi togarashi.
For enhanced flavor, let Kakuni cool in the liquid, then reheat when ready to serve.
Store leftovers in an airtight container in the fridge for 3–4 days or freeze for up to a month.
“`
