I’ve always been a fan of homemade ice cream, but let’s be honest – those old-school ice cream makers were such a hassle. That’s why I got pretty excited when I discovered I could make smooth, creamy ice cream in my Ninja Creami. And this vanilla pudding ice cream? It’s become a regular in my freezer.
What I love most about this recipe is how simple it is to put together. Just mix up some instant pudding, pop it in the freezer, and let the Ninja Creami do its thing. No rock salt, no hour-long churning, and definitely no arm workout required. Plus, starting with pudding mix gives you that rich, creamy texture that’s sometimes hard to get at home.
The best part? My kids can help make it, and we can change up the flavors whenever we want. Sometimes we’ll throw in some cookies or chocolate chips, but honestly, this vanilla version is good enough to eat all on its own.
Why You’ll Love This Pudding Ice Cream
- 4-ingredient recipe – With just instant pudding mix, milk, cream, and vanilla, you can create a creamy frozen treat without any complicated ingredients or techniques.
- No-cook preparation – Skip the hassle of making custard bases or tempering eggs – this recipe requires zero cooking and just simple mixing.
- Creamy texture – The combination of pudding mix and whipping cream creates an extra smooth and rich ice cream that’s perfectly scoopable.
- Customizable base – Once you master this basic vanilla version, you can experiment with different pudding flavors or mix-ins to create your own unique combinations.
What Kind of Instant Pudding Mix Should I Use?
Regular vanilla instant pudding mix from brands like Jell-O or store brands will work perfectly fine for this ice cream recipe. While you might be tempted to use cook-and-serve pudding mix, stick with the instant variety since it’s specifically formulated to thicken without heat. The regular version (not sugar-free) tends to give the best results, as sugar-free pudding mixes can sometimes affect the final texture of your ice cream. If you’re looking to change things up, you can also try other flavors like French vanilla or white chocolate pudding mix – just make sure whatever you choose is the instant variety to maintain the right consistency.

Options for Substitutions
Making this Ninja Creami ice cream is pretty straightforward, but here are some helpful substitution tips if you need them:
- Vanilla instant pudding mix: You can use other pudding flavors like chocolate, butterscotch, or banana for different ice cream varieties. Just make sure to use instant pudding mix, not the cooking kind, as it affects the texture.
- Whipping cream: Heavy cream works perfectly here too. For a lighter version, you could use half-and-half, but keep in mind your ice cream won’t be quite as creamy.
- Milk: While whole milk gives the best results, you can use 2% milk. I wouldn’t recommend skim milk as it makes the ice cream too icy. For non-dairy options, full-fat coconut milk works well, but avoid thin plant milks like almond or rice milk.
- Vanilla essence: Vanilla extract is actually better if you have it! You can also use vanilla bean paste, or skip it if your pudding mix is already strongly flavored.
Watch Out for These Mistakes While Making
The biggest challenge when making Ninja Creami ice cream is getting the right consistency, which often fails when the pudding mixture isn’t completely set before freezing – make sure to let your pudding mixture chill in the fridge for at least 4 hours, or ideally overnight.
Temperature control is crucial, so avoid taking shortcuts with freezing time – your mixture needs a full 24 hours in the freezer at 0°F or below to achieve that perfect, scoopable texture.
If your ice cream turns out grainy after the first spin, don’t worry – simply use the Re-Spin function on your Ninja Creami, and if needed, add a splash (1-2 teaspoons) of milk to help achieve that smooth, creamy texture.
For the creamiest results, let your pint sit at room temperature for 1-2 minutes before processing, and always ensure your pudding is completely dissolved in the milk to avoid any powdery patches in your final product.

What to Serve With Vanilla Pudding Ice Cream?
This homemade ice cream is perfect for dressing up with all your favorite sundae toppings! A drizzle of warm chocolate sauce or caramel makes it extra special, while fresh berries add a nice pop of flavor and color. I love serving this ice cream alongside a warm slice of apple pie or brownie – the contrast between hot and cold is just perfect. For a fun family dessert night, set out bowls of chopped nuts, sprinkles, and crushed cookies so everyone can create their own custom sundae.
Storage Instructions
Keep Frozen: Your homemade Ninja Creami vanilla pudding ice cream needs to stay in the freezer to maintain its creamy texture. Keep it in the Ninja Creami pint container or transfer it to a freezer-safe container with a tight-fitting lid. It’ll stay fresh and tasty for up to 2 weeks.
Prevent Freezer Burn: To keep ice crystals from forming, press a piece of plastic wrap directly onto the surface of the ice cream before putting the lid on. This helps prevent that pesky freezer burn that can affect the texture and taste.
Serving Tips: When you’re ready to enjoy your ice cream, let it sit at room temperature for about 5 minutes to soften slightly. If it’s too hard, you can always re-spin it in your Ninja Creami to bring back that perfectly smooth, creamy texture.
| Preparation Time | 10-15 minutes |
| Cooking Time | 10-15 minutes |
| Total Time | 24 hours and 20-30 minutes |
| Level of Difficulty | Easy |
Estimated Nutrition
Estimated nutrition for the whole recipe (without optional ingredients):
- Calories: 700-800
- Protein: 10-15 g
- Fat: 40-50 g
- Carbohydrates: 60-70 g
Ingredients
- 1 1/2 cups milk (whole milk for best creaminess)
- 4 tbsp vanilla instant pudding mix (French vanilla for richer flavor)
- 1/2 cup whipping cream
- 1 tsp vanilla extract (Rodelle vanilla for superior taste)
Step 1: Prepare the Pudding Base
In a small mixing bowl or a large liquid measuring cup, combine the instant pudding mix and milk.
Whisk these ingredients together until the pudding mix is fully dissolved in the milk.
Once dissolved, add the heavy cream and vanilla extract, whisking just until everything is combined into a uniform mixture.
Step 2: Freeze the Mixture
Carefully transfer the prepared mixture to a Ninja Creami pint, making sure not to exceed the max fill line indicated on the pint.
Securely close the lid on the pint and place it on a level surface in your freezer.
Allow it to freeze for at least 24 hours to ensure it solidifies properly for ice cream making.
Step 3: Process in the Ninja Creami
After 24 hours, remove the pint from the freezer and take off the lid.
Place the pint into the outer bowl apparatus and close the outer bowl lid.
Lock the outer bowl into your Ninja Creami machine, then select the Ice Cream function.
Allow the machine to complete its cycle.
Step 4: Adjust Texture if Necessary
Once the ice cream cycle is complete, remove the pint from the machine and inspect the texture.
If the ice cream appears crumbly, place the pint back into the machine and use the Re-spin function to process it again.
If it remains crumbly after another spin, add a tablespoon of milk to the pint and perform another re-spin to achieve a creamier texture.
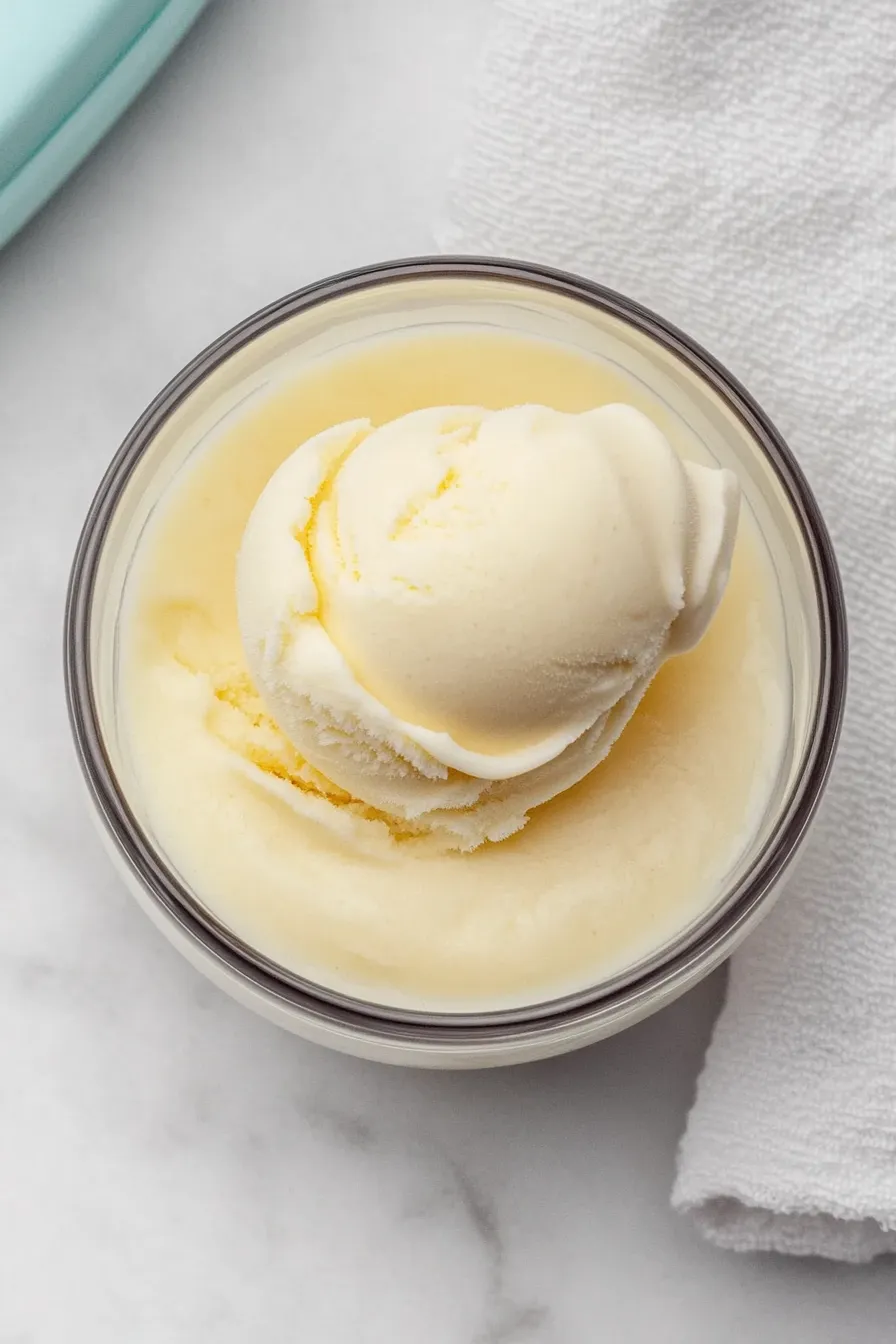
Step 5: Serve and Enjoy
Once the ice cream reaches your desired consistency, scoop it out of the pint and serve immediately.
Enjoy your homemade Ninja Creami ice cream!
Store any leftovers in the freezer and re-spin before serving again if necessary.
