There’s something so comforting about a good dessert mousse. I’ve always loved how it feels like you’re eating a cloud – light and fluffy, with just the right amount of sweetness. White chocolate has been my go-to when I want to make something special without spending hours in the kitchen. When you add a touch of vanilla, it takes this simple treat to a whole new level.
For years, I worried about making mousse at home, thinking it was too fancy or complicated. But once I started making this vanilla white chocolate version, I realized it’s actually pretty straightforward. You don’t need any special equipment or hard-to-find ingredients. Just a few simple steps, and you’ve got a dessert that makes everyone at the table smile.
What I really like about this recipe is how you can make it ahead of time. When friends come over for dinner, I’ll whip this up the night before and let it chill in the fridge. That way, I can focus on enjoying time with my guests instead of rushing around in the kitchen after the main course.
Why You’ll Love This White Chocolate Mousse
- Make-ahead dessert – You can prepare this mousse up to 24 hours in advance, making it perfect for dinner parties or when you want to plan ahead.
- Simple ingredients – With just 5 basic ingredients, this recipe proves that sometimes less is more – especially when it comes to elegant desserts.
- No baking required – This is a completely no-bake dessert that doesn’t require turning on your oven, perfect for warm summer days.
- Creamy texture – The combination of melted white chocolate and whipped cream creates a silky-smooth mousse that melts in your mouth.
- Customizable serving options – Serve it plain, topped with fresh berries, or use it as a filling for cakes and pastries – it’s wonderfully adaptable.
What Kind of White Chocolate Should I Use?
For mousse, you’ll want to stick with real white chocolate that lists cocoa butter as one of its main ingredients. Skip the white chocolate chips or “white baking morsels” since these often contain palm oil instead of cocoa butter and won’t melt as smoothly. Good quality white chocolate bars from brands like Ghirardelli, Lindt, or Callebaut will give you the best results. If you’re buying from the baking aisle, look for “white baking chocolate” rather than coating chocolate or almond bark. Just remember to chop your chocolate into small, even pieces before melting – this helps it melt more evenly and prevents it from seizing up when combined with the cream.
Options for Substitutions
While this mousse recipe is pretty straightforward, here are some helpful substitution tips:
- White chocolate: This is the star ingredient and can’t be substituted with white chocolate chips as they won’t melt properly. However, you can use milk chocolate or dark chocolate for a different flavor profile – just make sure it’s good quality baking chocolate.
- Heavy cream: Heavy cream is essential for the right texture and can’t be replaced with half-and-half or milk. However, you can use whipping cream (36% fat) instead of heavy cream (38% fat) – the difference is minimal.
- Vanilla essence: Feel free to swap vanilla essence with vanilla bean paste (same amount) or pure vanilla extract. You could also try other flavors like almond extract or orange extract for a twist.
- Powdered sugar: If you’re out of powdered sugar, blend regular granulated sugar in a food processor until fine and powdery. Use the same amount.
- Fresh berries: Any fruit works great here! Try sliced peaches, mangoes, or even a drizzle of caramel sauce. You can also skip the topping entirely – the mousse is great on its own.
Watch Out for These Mistakes While Making
The biggest challenge when making white chocolate mousse is temperature control – if your melted chocolate is too hot when combined with the cream, it can seize up and become grainy, so always let it cool until just warm to the touch before folding it in.
Another common mistake is overwhipping the cream – you want soft peaks that gently fold into the chocolate, not stiff peaks that make your mousse heavy and butter-like, so stop whipping as soon as the cream holds its shape when you lift the beater.
When melting the white chocolate, using direct heat or microwaving it too long can cause it to burn and become unusable, so it’s best to use a double boiler or microwave in 20-second intervals, stirring between each burst.
For the smoothest texture, make sure all your ingredients are at room temperature before starting, and fold the mixture gently rather than stirring vigorously – this keeps air bubbles intact and gives you that perfect light, airy consistency.
What to Serve With White Chocolate Mousse?
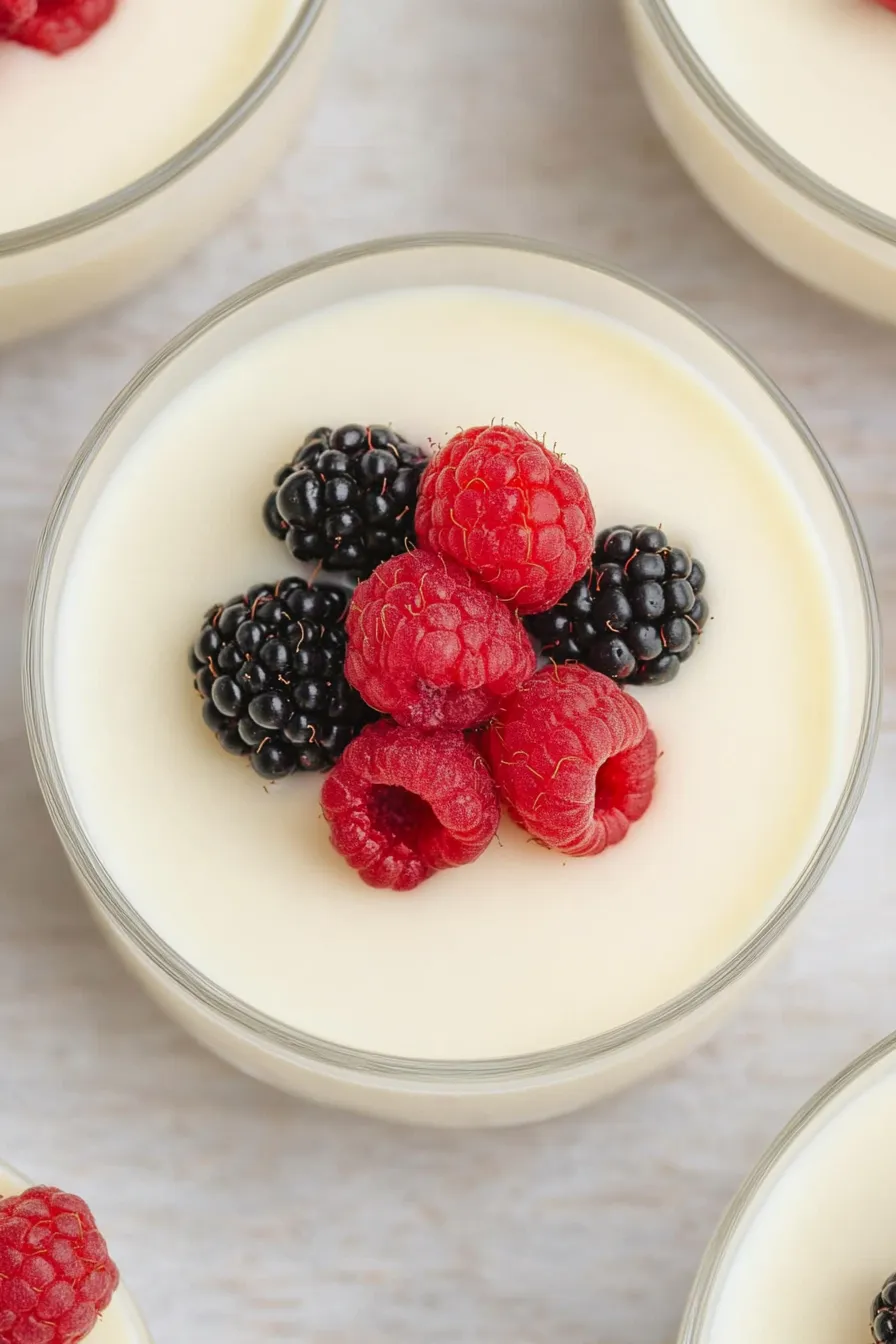
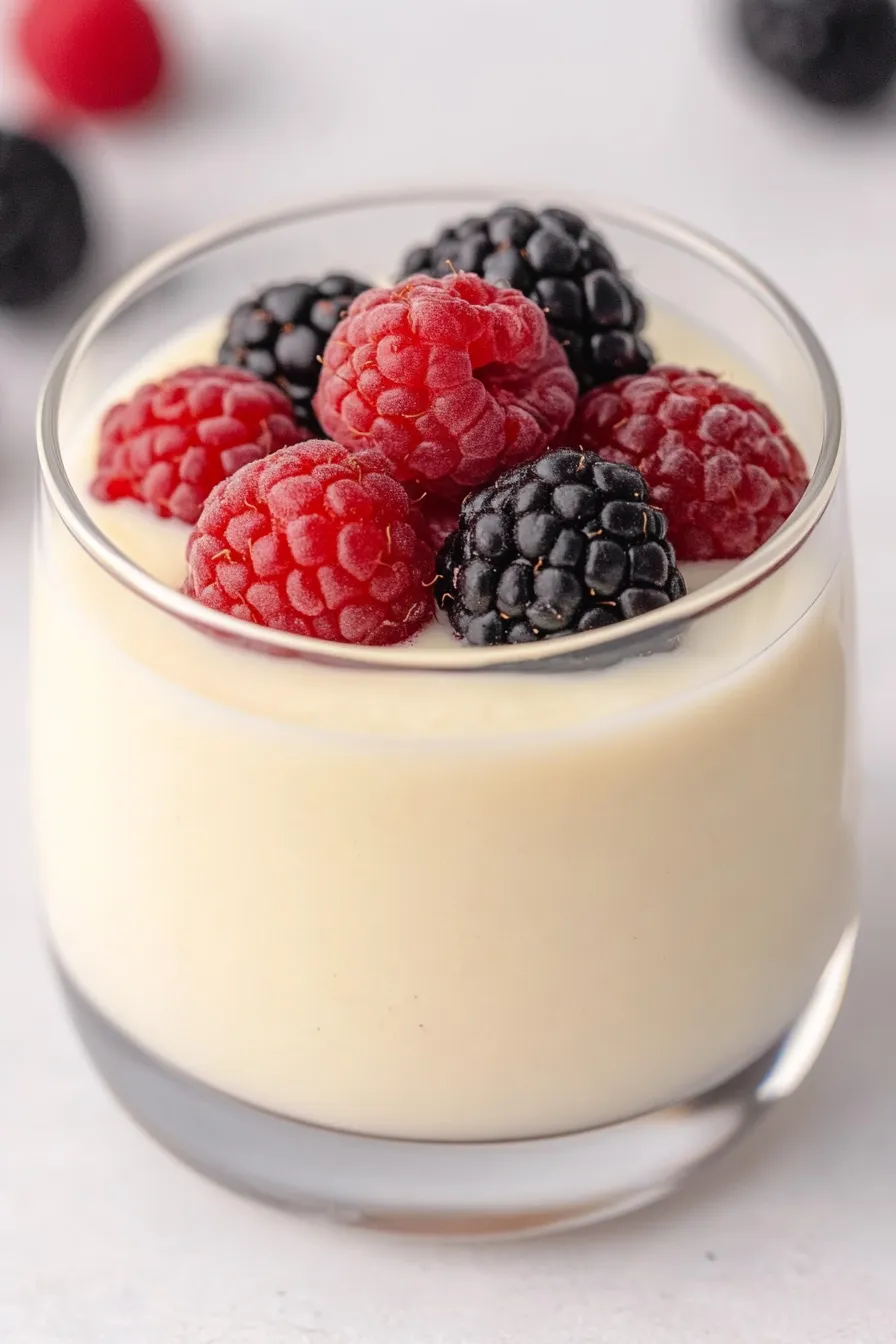
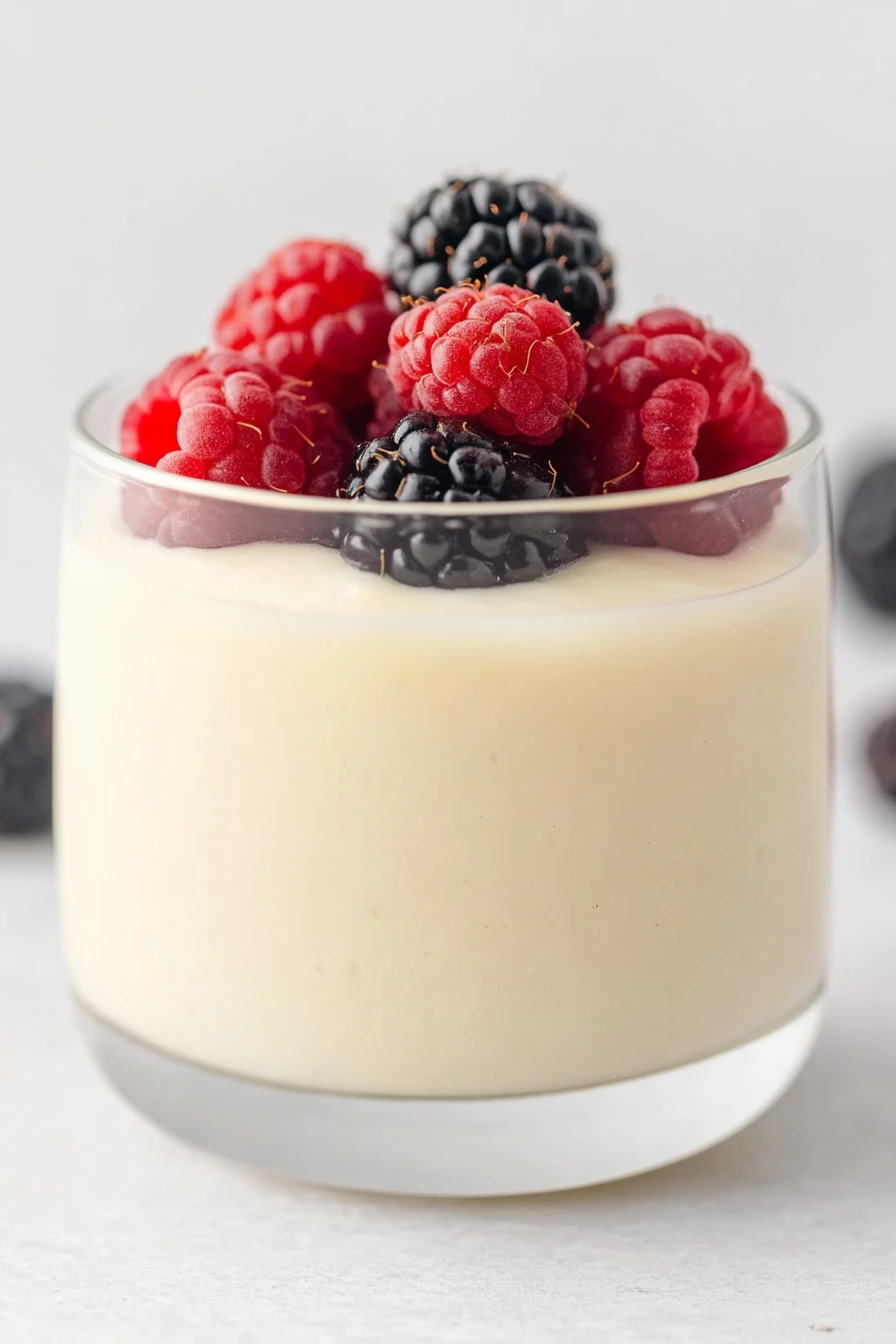
Fresh berries are the perfect companion to this light and airy white chocolate mousse – I especially love using a mix of raspberries, blackberries, and strawberries for different flavors and colors. A drizzle of dark chocolate sauce creates a nice contrast to the sweet white chocolate, and it looks really nice on the plate too! If you want to add some crunch, try sprinkling some crushed shortbread cookies or toasted sliced almonds on top. For a special touch at dinner parties, I like to serve this mousse with a small glass of dessert wine like Moscato or a cup of hot espresso to balance out the sweetness.
Storage Instructions
Chill: Your white chocolate mousse will stay perfectly smooth in the refrigerator for up to 3 days. Just cover each serving glass or container tightly with plastic wrap. The mousse actually tastes even better after sitting in the fridge for a few hours, as the flavors have time to develop!
Make Ahead: This dessert is perfect for preparing in advance. You can make it up to 24 hours before serving – just keep it covered in the fridge. If you’re planning to add fresh berries, it’s best to wait and top the mousse right before serving to keep the fruit fresh and prevent any juice from bleeding into the mousse.
Note: While freezing isn’t recommended for this mousse (it can affect the smooth texture), you can make the base ahead and whip it up fresh when needed. Just remember to let it sit at room temperature for about 30 minutes before serving to get that perfect, creamy consistency.
| Preparation Time | 15-20 minutes |
| Cooking Time | 10-15 minutes |
| Total Time | 135-155 minutes |
| Level of Difficulty | Medium |
Estimated Nutrition
Estimated nutrition for the whole recipe (without optional ingredients):
- Calories: 2200-2400
- Protein: 16-20 g
- Fat: 180-200 g
- Carbohydrates: 160-180 g
Ingredients
- 1 tbsp powdered sugar
- fresh berries (optional, for garnish)
- 12 oz white baking chocolate (good quality for best flavor, like Ghirardelli)
- 1 tsp vanilla extract (pure vanilla extract recommended)
- 2 cups heavy cream (divided, at least 36% milk fat)
Step 1: Melt the Chocolate
In a small heavy saucepan, combine the chocolate and 2/3 cup of cream.
Cook the mixture over medium-low heat, stirring constantly, until the chocolate has melted completely and the mixture is smooth.
Once smooth, transfer the chocolate mixture to a large bowl and allow it to cool to room temperature.
Step 2: Whip the Cream
In a small bowl, beat the remaining cream until it begins to thicken.
Gradually add confectioners’ sugar and vanilla to the cream, continuing to beat until soft peaks form.
This means that when you lift the beater, the peaks gently fall back instead of standing stiffly.
Step 3: Combine Mixtures
Gently fold 1/4 cup of the whipped cream into the cooled chocolate mixture to lighten it.
Once incorporated, gradually fold in the remaining whipped cream.
Be careful not to over-mix, as you want to maintain the light and fluffy texture.
Step 4: Chill the Dessert
Spoon the chocolate mixture into individual dessert dishes.
Cover and refrigerate for at least 2 hours to allow the mousse to set and develop its flavors.
This chilling time is crucial for achieving the desired texture.
Step 5: Garnish and Serve
If desired, garnish the chocolate mousse with fresh berries just before serving.
The berries add a refreshing contrast to the rich chocolate flavor.
Enjoy your elegant, homemade chocolate mousse!
