If you ask me, staying hydrated doesn’t have to be boring.
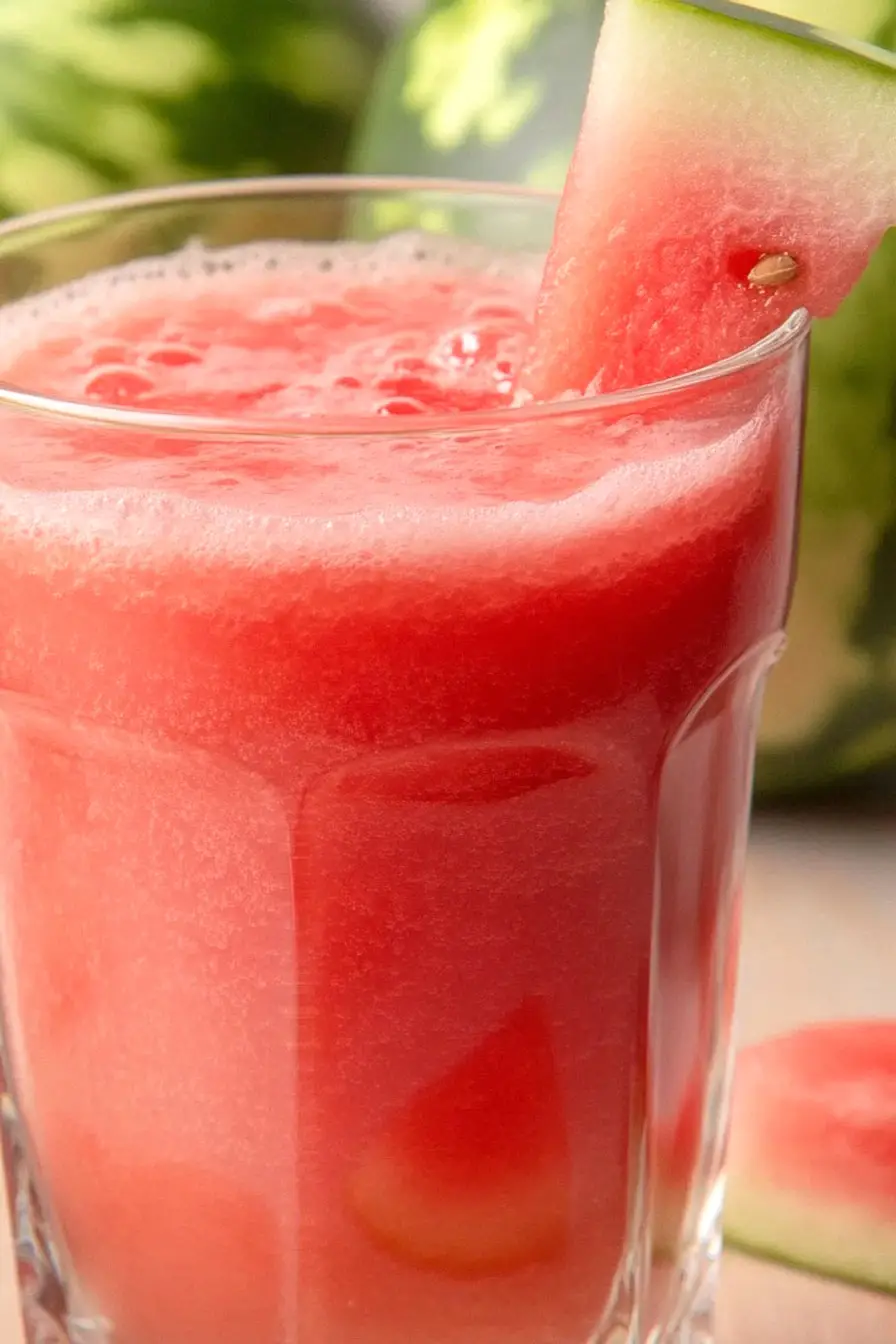
This fresh watermelon drink is a natural way to replenish electrolytes after a hot day or workout. Sweet, juicy watermelon blends with a pinch of salt and lime juice to create a refreshing alternative to store-bought sports drinks.
It’s made with simple ingredients you probably already have in your kitchen, and the natural sugars from the fruit give you just the right energy boost. A touch of mint makes it extra refreshing without any artificial flavors.
It’s a family-friendly beverage that’s perfect for summer afternoons and post-exercise recovery.

Why You’ll Love This Electrolyte Drink
- Natural hydration – Skip the artificial sports drinks – this homemade electrolyte drink uses real watermelon and natural pink salt to replenish your body after exercise or on hot days.
- Quick 5-minute prep – Just blend a few simple ingredients together and you’re done – it’s faster than running to the store for packaged drinks.
- Clean ingredients – With just watermelon, lemon, water, and pink salt, you know exactly what’s going into your drink – no artificial colors, flavors, or preservatives.
- Cost-effective – Making your own electrolyte drink at home costs a fraction of what you’d spend on store-bought sports drinks, especially when watermelon is in season.
What Kind of Watermelon Should I Use?
For the juiciest and sweetest results in this drink, you’ll want to pick a ripe watermelon that feels heavy for its size and has a yellow spot where it sat on the ground. Whether you choose a seeded or seedless watermelon doesn’t matter much since you’ll be blending it anyway. The most common varieties you’ll find at the grocery store are the dark green Crimson Sweet or Jubilee watermelons, and both work great in this recipe. Just make sure your watermelon is properly chilled before using – warm watermelon juice just isn’t as refreshing. If you’re cutting up more than you need, the extra cubes freeze well for future batches.

Options for Substitutions
This refreshing drink can be customized with a few simple swaps if needed:
- Watermelon: While watermelon is the star here, you can use coconut water as a base instead. Keep in mind this will change the flavor profile, but you’ll still get those needed electrolytes.
- Lemon juice: Out of lemons? Lime juice works just as well, or try apple cider vinegar (use 1-2 tablespoons) for that tart kick.
- Himalayan pink salt: Regular sea salt or table salt can work here – just use about half the amount since they’re typically more concentrated. Celtic sea salt is another good option at the same measurement.
- Filtered water: Any clean drinking water works fine here – tap water, spring water, or even coconut water if you want extra minerals.
- Ice cubes: If you’re planning to drink it right away, try freezing some watermelon chunks instead of using ice – this way your drink won’t get diluted.
Watch Out for These Mistakes While Making
The biggest mistake when making this electrolyte drink is using unripe watermelon, which lacks the natural sweetness needed to balance the saltiness – make sure to choose a watermelon that sounds hollow when tapped and has a yellow spot where it sat on the ground.
Another common error is adding too much salt at once; it’s better to start with half the amount and adjust to taste, as everyone’s electrolyte needs and salt preferences differ.
When blending, avoid over-processing the watermelon as this can create a foamy texture – pulse just until smooth, and if you notice any foam forming, let the drink sit for a few minutes and skim it off before serving.
For the freshest taste and best nutrient preservation, drink within 24 hours of making, and always give it a quick stir before serving as the natural ingredients tend to separate.
What to Serve With Watermelon Electrolyte Drink?
This refreshing drink is perfect for pairing with your pre- or post-workout snacks! A light protein-rich snack like almonds or a small turkey wrap works great alongside this hydrating beverage. Since this drink is naturally sweet from the watermelon, it pairs nicely with salty snacks like lightly salted popcorn or whole grain crackers. If you’re serving this at a summer gathering, it’s a perfect match for fresh fruit platters and light appetizers that won’t weigh you down in the heat.
Storage Instructions
Keep Fresh: Pour your watermelon electrolyte drink into an airtight container or bottle and keep it in the fridge. It stays fresh and tasty for up to 2 days. Give it a good shake before drinking since the natural ingredients might settle at the bottom.
Prep Ahead: You can cube the watermelon ahead of time and store it in the fridge for up to 24 hours before blending. This makes it super convenient when you need a quick post-workout drink or want to make a fresh batch in the morning.
Serve: For the best taste, serve your electrolyte drink well chilled over ice. If you’ve stored it for a while and notice any separation, just give it a quick stir or shake to mix everything back together.
| Preparation Time | 5-10 minutes |
| Cooking Time | 0 minutes |
| Total Time | 5-10 minutes |
| Level of Difficulty | Easy |
Estimated Nutrition
Estimated nutrition for the whole recipe (without optional ingredients):
- Calories: 150-200
- Protein: 2-3 g
- Fat: 0-1 g
- Carbohydrates: 35-40 g
Ingredients
- 1 cup filtered water
- ice cubes (for serving)
- 4 1/2 cups cubed watermelon
- juice of 1 lemon
- 1/4 cup pink salt (I use Sherpa Pink Himalayan Pink Salt)
Step 1: Combine Ingredients
Gather all your ingredients and place them in a blender.
Ensure you adhere to any specific quantities or preparation methods needed for each ingredient to guarantee the best flavor and consistency.
Step 2: Blend Until Smooth
Turn on the blender and blend the mixture until everything is smooth.
Keep blending until you achieve a fully combined and creamy texture, with no visible chunks remaining.
Step 3: Strain and Serve
Once blended, pour the mixture through a strainer to remove any pulp.
This will result in a smoother final product.
Discard the pulp or save it for another use.
Pour the strained liquid into a glass, and enjoy your freshly prepared drink!
