Finding treats that are both gluten-free and satisfying can feel like searching for a needle in a haystack. Between scanning endless ingredient labels at the store and dealing with disappointing alternatives that just don’t taste quite right, it’s enough to make anyone want to give up on their favorite sweets altogether.
That’s why these homemade gluten-free peanut butter cups are such a game-changer: they’re incredibly easy to make, use simple ingredients you can actually pronounce, and taste even better than the store-bought versions we all grew up loving.

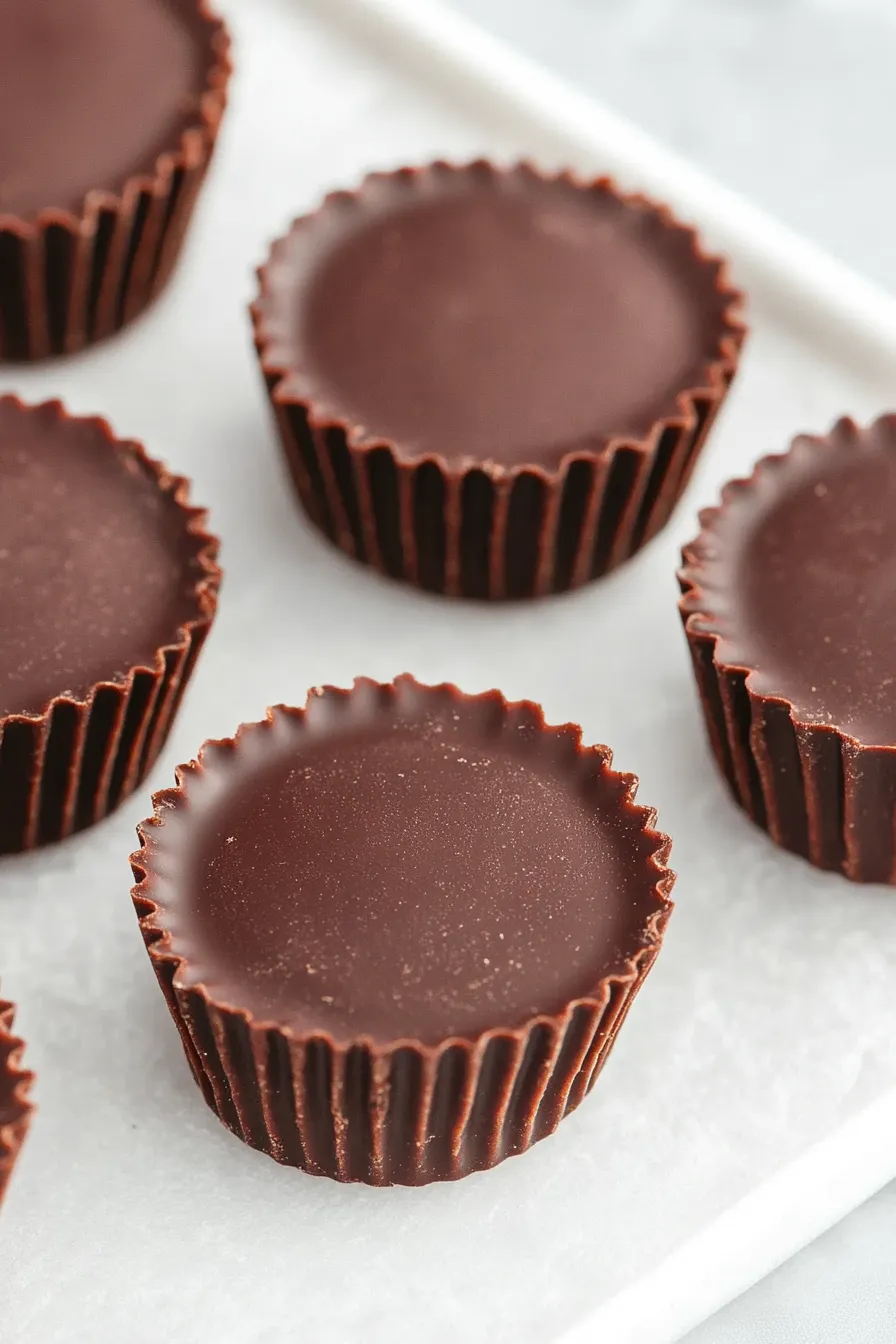
Why You’ll Love These Peanut Butter Cups
- Diet-friendly treats – These homemade peanut butter cups are naturally gluten-free and can be made sugar-free by choosing the right chocolate and sweetener options.
- Simple ingredients – You only need 4 basic ingredients to make these treats – no complicated shopping list or hard-to-find items required.
- Quick preparation – With just 30-40 minutes from start to finish, you can satisfy your chocolate craving faster than running to the store.
- Customizable recipe – You can easily adjust the sweetness, switch up the nut butter, or use different types of chocolate to make these exactly how you like them.
What Kind of Peanut Butter Should I Use?
Natural peanut butter is the way to go for these homemade peanut butter cups, but there are a few things to keep in mind. The best choice is a peanut butter that contains just peanuts (and maybe salt), without added oils, sugar, or stabilizers. While chunky peanut butter can work, creamy gives you that classic smooth filling that’s most like the store-bought version. Before using your natural peanut butter, make sure to stir it well since the oils tend to separate – you want that perfect, spreadable consistency. If your peanut butter is too stiff from being in the fridge, let it come to room temperature before mixing it with the other ingredients.
Options for Substitutions
Looking to make these peanut butter cups but need to switch things up? Here are some handy swaps:
- Dark chocolate: You can use milk chocolate or semi-sweet chocolate instead of dark. For a dairy-free version, make sure to use dairy-free chocolate chips. White chocolate works too, though it will make the treats sweeter.
- Peanut butter: Not a fan of peanut butter or have an allergy? Try almond butter, cashew butter, or sunflower seed butter for a nut-free option. Just keep in mind that natural nut butters work best – avoid ones with added oils or sugar.
- Maple syrup: Honey works perfectly as a 1:1 swap for maple syrup. You could also use agave nectar or date syrup. If using regular sweetened peanut butter, you might want to reduce the sweetener amount to 2 tablespoons.
- Cupcake liners: No cupcake liners? You can use a silicon candy mold, mini muffin tin lined with parchment paper, or even make them as bark by spreading the layers on parchment paper and breaking into pieces once set.
Watch Out for These Mistakes While Making
The biggest challenge when making homemade peanut butter cups is working with chocolate that’s not properly tempered – if your chocolate is too hot, it won’t set properly and might develop a dull, streaky appearance. For best results, melt your chocolate slowly using a double boiler or in 30-second microwave intervals, stirring between each interval until just smooth. Another common mistake is rushing the layering process – make sure your first chocolate layer is completely set in the refrigerator (about 10 minutes) before adding the peanut butter mixture, and again before adding the final chocolate layer. To prevent your peanut butter filling from being too runny or too stiff, mix it thoroughly with the maple syrup until you achieve a texture that’s firm but still spreadable – if it’s too thick, it won’t settle evenly in the cups. For easier removal, don’t skip the cupcake liners, and let the finished cups set in the refrigerator for at least 1 hour before enjoying.

What to Serve With Peanut Butter Cups?
These homemade peanut butter cups make a perfect after-dinner treat or sweet afternoon pick-me-up, especially when paired with a cold glass of milk (dairy or plant-based works great!). I love serving them alongside a hot cup of coffee or tea, as the warm drinks create a nice contrast with the cool, chocolatey treats. For a dessert board, try placing these peanut butter cups next to some fresh berries, banana slices, or other bite-sized treats like raw almonds or chocolate-covered pretzels. If you’re feeling extra indulgent, serve them slightly chilled with a scoop of vanilla ice cream on the side!
Storage Instructions
Keep Cool: These homemade peanut butter cups need to stay cool to maintain their shape. Keep them in an airtight container in the refrigerator, where they’ll stay fresh for up to 2 weeks. I like to separate layers with parchment paper to prevent them from sticking together.
Freeze: Want to make a bigger batch? These peanut butter cups are perfect for freezing! Place them in a freezer-safe container, separated by parchment paper, and they’ll keep for up to 3 months. They’re actually pretty tasty straight from the freezer, or you can let them thaw in the fridge for about 30 minutes.
Room Temperature: While these treats can sit out for a short time during serving, they’re best enjoyed cool. If you’re taking them to a party or gathering, try to keep them in a cooler or refrigerated until ready to serve – they tend to get a bit melty at room temperature, especially on warm days!
| Preparation Time | 15-20 minutes |
| Cooking Time | 15-20 minutes |
| Total Time | 30-40 minutes |
| Level of Difficulty | Easy |
Estimated Nutrition
Estimated nutrition for the whole recipe (without optional ingredients):
- Calories: 900-1000
- Protein: 20-25 g
- Fat: 60-70 g
- Carbohydrates: 80-90 g
Ingredients
For the chocolate coating:
- 7 oz dark chocolate (I use Ghirardelli 60% cacao), melted
For the peanut butter filling:
- 1 pinch salt
- 2.5 tbsp maple syrup
- 1/2 cup creamy peanut butter (all-natural preferred for easier mixing)
Other item:
- 15 small cupcake liners
Step 1: Coat the Cupcake Liners with Chocolate
Begin by filling a small cupcake liner with melted chocolate all the way to the top.
Once filled, turn the liner upside-down and let the excess chocolate drip off.
Repeat this process with the remaining cupcake liners.
Place the chocolate-coated liners onto a baking sheet and freeze them for about 5 minutes to set the initial layer.
Step 2: Reinforce the Chocolate Coating
After the initial freeze, fill each liner with more melted chocolate, letting the excess drip off again.
Pay special attention to ensure the sides of the cupcake liners are well coated with chocolate.
Freeze the liners again for another 5 minutes to ensure they are sturdy and well coated.
Step 3: Prepare the Peanut Butter Filling
While the liners are in the freezer, prepare the filling by mixing together the peanut butter, maple syrup (or honey), and an optional pinch of salt.
Stir until the mixture is smooth and well combined.
Step 4: Fill the Chocolate Cups
Retrieve the firm chocolate-coated cupcake liners from the freezer.
Spoon the peanut butter filling into each liner, smoothing out the top with a spatula or back of a spoon.
Ensure you leave about 1 mm of space at the top of each cup for the final chocolate layer.
Step 5: Add the Final Chocolate Layer
Spoon some melted chocolate over the top of each filled cup to create a smooth, even top.
After topping each cup, freeze the assembled cups for at least 30 minutes to allow the chocolate to fully set.
Step 6: Peel and Store the Peanut Butter Cups
Once the chocolate has set, peel off the cupcake liners carefully.
Your homemade peanut butter cups are now ready to enjoy!
For storage, keep them in a closed container in a cool, dry place, or in the fridge for about a week.
They can also be stored in the freezer for up to a month.
