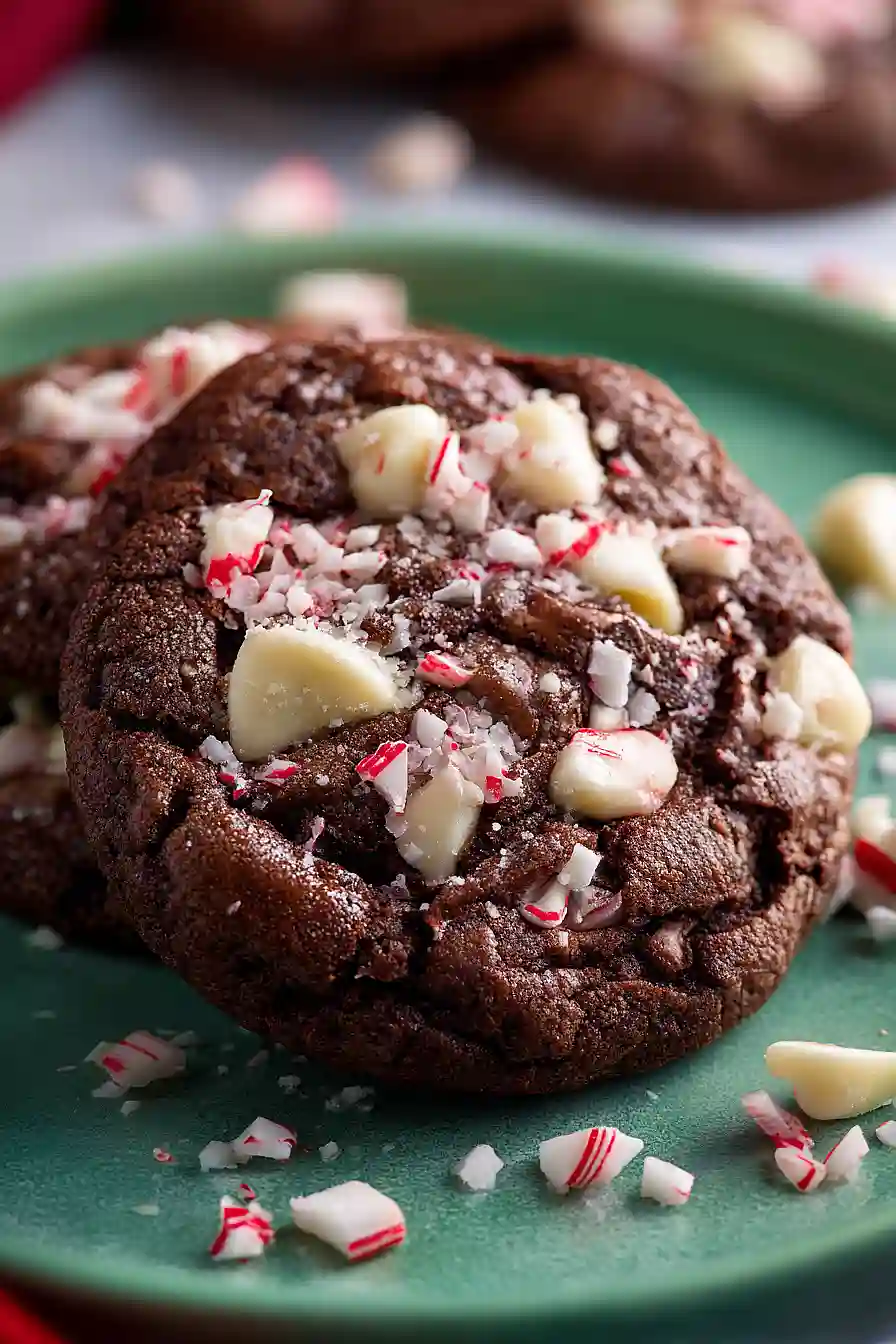
Here are my cake mix peppermint bark cookies, with a rich chocolate base, chunks of white chocolate peppermint bark, and crushed peppermint candies for that perfect holiday crunch.
These cookies are my go-to when I need something festive but don’t have a lot of time. They start with a box of cake mix, so they come together super fast, and everyone always asks for the recipe. Plus, they make your kitchen smell amazing!

Why You’ll Love These Cake Mix Peppermint Bark Cookies
- Super quick and easy – These cookies come together in under 25 minutes using a cake mix shortcut, so you can whip up a batch even on busy weeknights.
- Perfect for the holidays – The peppermint bark and candy cane pieces make these cookies festive and fun for Christmas cookie exchanges or holiday gatherings.
- Simple ingredients – You only need a handful of ingredients, and most of them are probably already in your pantry.
- No mixer required – Just melt, mix, and bake. There’s no need to pull out your stand mixer or deal with complicated techniques.
- Crowd-pleasing flavor – The rich chocolate cookie base paired with sweet white chocolate and refreshing peppermint creates a flavor combination that everyone loves.
What Kind of Peppermint Bark Should I Use?
You can use store-bought peppermint bark from pretty much any grocery store or specialty shop during the holiday season, and it’ll work great in these cookies. Brands like Ghirardelli or Williams Sonoma make popular versions, but honestly, even the peppermint bark from your local supermarket will do the trick. If you can’t find peppermint bark specifically, you can make your own by melting white chocolate and stirring in some crushed candy canes. Just chop it into small chunks so it distributes evenly throughout the cookie dough and gives you that nice minty surprise in every bite.

Options for Substitutions
These festive cookies are easy to customize with a few simple swaps:
- Devil’s food cake mix: You can use any chocolate cake mix you have – regular chocolate, dark chocolate, or even red velvet would work great here. Just stick with a standard 15.25-oz box size.
- Butter: If you’re out of butter, you can use all coconut oil instead (so 6 tablespoons total coconut oil). The cookies will spread a bit more but still taste great.
- Coconut oil: Don’t have coconut oil? Just use 6 tablespoons of melted butter total instead. Vegetable oil works too, though the texture will be slightly different.
- White chocolate peppermint bark: Can’t find peppermint bark? Use regular white chocolate chips and add 1/4 teaspoon peppermint extract to the dough. You’ll get that same minty flavor.
- Crushed candy canes: If you don’t have candy canes, peppermint candies or even Andes mints (chopped up) will give you that festive touch. You can also leave them out if peppermint isn’t your thing.
Watch Out for These Mistakes While Baking
The biggest mistake with cake mix cookies is overmixing the dough, which can make your cookies tough and dense instead of soft and chewy – just stir until the ingredients are combined and you’re good to go.
Another common error is adding the peppermint bark and candy canes too early, as overmixing can cause them to melt from the warmth of your hands or the melted butter, so fold them in gently at the very end.
Be careful not to overbake these cookies since they’ll continue cooking on the hot baking sheet after you remove them from the oven – take them out when the edges are set but the centers still look slightly underdone, usually around 8-10 minutes.
For the best texture, let the melted butter and coconut oil cool for a few minutes before mixing them with the eggs, which prevents the eggs from cooking and keeps your dough smooth.
What to Serve With Cake Mix Peppermint Bark Cookies?
These cookies are pretty rich and sweet on their own, so they pair perfectly with a big glass of cold milk or a mug of hot chocolate. If you’re putting together a holiday cookie platter, they look great alongside sugar cookies, gingerbread, and chocolate chip cookies for variety. I also love serving them with vanilla ice cream for an over-the-top dessert, or you can crumble them on top of brownies or a chocolate trifle. For a cozy winter gathering, set them out with some coffee or peppermint tea so guests can enjoy them as an afternoon treat.
Storage Instructions
Store: These cookies stay soft and chewy when kept in an airtight container at room temperature for up to 5 days. Just make sure they’re completely cooled before storing, or they’ll get sticky. I like to toss a piece of bread in the container to keep them extra soft.
Freeze: You can freeze baked cookies in a freezer-safe container with parchment paper between layers for up to 3 months. They thaw quickly on the counter in about 20 minutes, making them perfect for when unexpected guests drop by during the holidays.
Make Ahead: Want to get ahead? Roll the dough into balls and freeze them on a baking sheet, then transfer to a freezer bag once solid. Bake them straight from frozen, just add an extra minute or two to the baking time.
| Preparation Time | 10-15 minutes |
| Cooking Time | 7-10 minutes |
| Total Time | 17-25 minutes |
| Level of Difficulty | Easy |
Estimated Nutrition
Estimated nutrition for the whole recipe (without optional ingredients):
- Calories: 3150-3400
- Protein: 25-30 g
- Fat: 155-170 g
- Carbohydrates: 410-440 g
Ingredients
For the dough:
- 15.25 oz devil’s food cake mix
- 2/3 cup white chocolate peppermint bark (chopped into small pieces)
- 1 tbsp coconut oil
- 5 tbsp unsalted butter (softened)
- 2 large eggs (room temperature)
For the topping:
- 1/2 cup crushed peppermint candies (use a food processor for uniform pieces)
Step 1: Prepare Mise en Place and Preheat
- 15.25 oz devil’s food cake mix
- 2/3 cup white chocolate peppermint bark
- 1/2 cup crushed peppermint candies
Start by preheating your oven to 350°F so it’s ready when you need it.
While the oven heats, chop the white chocolate peppermint bark into small pieces using a knife or food processor, then crush the peppermint candies into uniform pieces using a food processor—this ensures even distribution and a consistent texture throughout your cookies.
Pour the crushed candies into a shallow bowl for easy dipping later.
Step 2: Create the Cookie Dough Base
- 5 tbsp unsalted butter
- 1 tbsp coconut oil
- 2 large eggs
- 15.25 oz devil’s food cake mix
In a large bowl, combine the softened butter, coconut oil, and eggs, mixing until well combined.
Add the devil’s food cake mix and stir until the mixture comes together into a cohesive dough—the cake mix acts as both a dry ingredient and flavor base, making this much simpler than a traditional cookie.
The dough will be slightly thick and fudgy, which is exactly what you want.
Step 3: Fold in Chocolate and Rest the Dough
- dough base from Step 2
- 2/3 cup white chocolate peppermint bark
Gently fold the chopped white chocolate peppermint bark into the dough from Step 2, distributing it evenly throughout.
I like to reserve a few of the larger pieces to press into the tops of the cookies later for extra visual appeal.
Let the dough rest for 10 to 15 minutes at room temperature—this allows the chocolate to soften slightly and helps the cookies bake more evenly.
Step 4: Shape and Candy-Coat the Cookies
- dough base with chocolate from Step 3
- crushed peppermint candies from Step 1
Scoop the dough into balls roughly the size of a tablespoon and dip the top of each ball into the bowl of crushed peppermint candies from Step 1, pressing gently so the candies adhere.
This creates a festive, candy-coated top that will provide a nice texture contrast.
Place the coated dough balls on a baking sheet lined with parchment paper, spacing them about 2 inches apart, and press down slightly so they’re slightly flattened.
Step 5: Bake and Bloom the Cookies
- prepared cookies from Step 4
Bake the cookies in your preheated 350°F oven for 4 minutes until the tops begin to set but still look slightly shiny.
Remove the pan from the oven and tap it firmly on the counter a few times—this causes the cookies to settle and creates those signature crackled tops that peppermint bark cookies are known for.
Return to the oven and bake for 3 to 4 more minutes until the cookies lose their shiny appearance and the edges are set but the centers are still slightly soft.
Step 6: Cool and Finish
- baked cookies from Step 5
Let the cookies cool on the baking sheet for 5 to 10 minutes—I find this time crucial because it allows them to set without becoming brittle, keeping the centers fudgy and the candy coating intact.
Transfer the cookies to a wire cooling rack to cool completely, which should take another 10 to 15 minutes.
The cookies will continue to firm up as they cool, developing that perfect chewy-fudgy texture.

Simple Cake Mix Peppermint Bark Cookies
Ingredients
For the dough:
- 15.25 oz devil's food cake mix
- 2/3 cup white chocolate peppermint bark (chopped into small pieces)
- 1 tbsp coconut oil
- 5 tbsp unsalted butter (softened)
- 2 large eggs (room temperature)
For the topping:
- 1/2 cup crushed peppermint candies (use a food processor for uniform pieces)
Instructions
- Start by preheating your oven to 350°F so it's ready when you need it. While the oven heats, chop the white chocolate peppermint bark into small pieces using a knife or food processor, then crush the peppermint candies into uniform pieces using a food processor—this ensures even distribution and a consistent texture throughout your cookies. Pour the crushed candies into a shallow bowl for easy dipping later.
- In a large bowl, combine the softened butter, coconut oil, and eggs, mixing until well combined. Add the devil's food cake mix and stir until the mixture comes together into a cohesive dough—the cake mix acts as both a dry ingredient and flavor base, making this much simpler than a traditional cookie. The dough will be slightly thick and fudgy, which is exactly what you want.
- Gently fold the chopped white chocolate peppermint bark into the dough from Step 2, distributing it evenly throughout. I like to reserve a few of the larger pieces to press into the tops of the cookies later for extra visual appeal. Let the dough rest for 10 to 15 minutes at room temperature—this allows the chocolate to soften slightly and helps the cookies bake more evenly.
- Scoop the dough into balls roughly the size of a tablespoon and dip the top of each ball into the bowl of crushed peppermint candies from Step 1, pressing gently so the candies adhere. This creates a festive, candy-coated top that will provide a nice texture contrast. Place the coated dough balls on a baking sheet lined with parchment paper, spacing them about 2 inches apart, and press down slightly so they're slightly flattened.
- Bake the cookies in your preheated 350°F oven for 4 minutes until the tops begin to set but still look slightly shiny. Remove the pan from the oven and tap it firmly on the counter a few times—this causes the cookies to settle and creates those signature crackled tops that peppermint bark cookies are known for. Return to the oven and bake for 3 to 4 more minutes until the cookies lose their shiny appearance and the edges are set but the centers are still slightly soft.
- Let the cookies cool on the baking sheet for 5 to 10 minutes—I find this time crucial because it allows them to set without becoming brittle, keeping the centers fudgy and the candy coating intact. Transfer the cookies to a wire cooling rack to cool completely, which should take another 10 to 15 minutes. The cookies will continue to firm up as they cool, developing that perfect chewy-fudgy texture.
