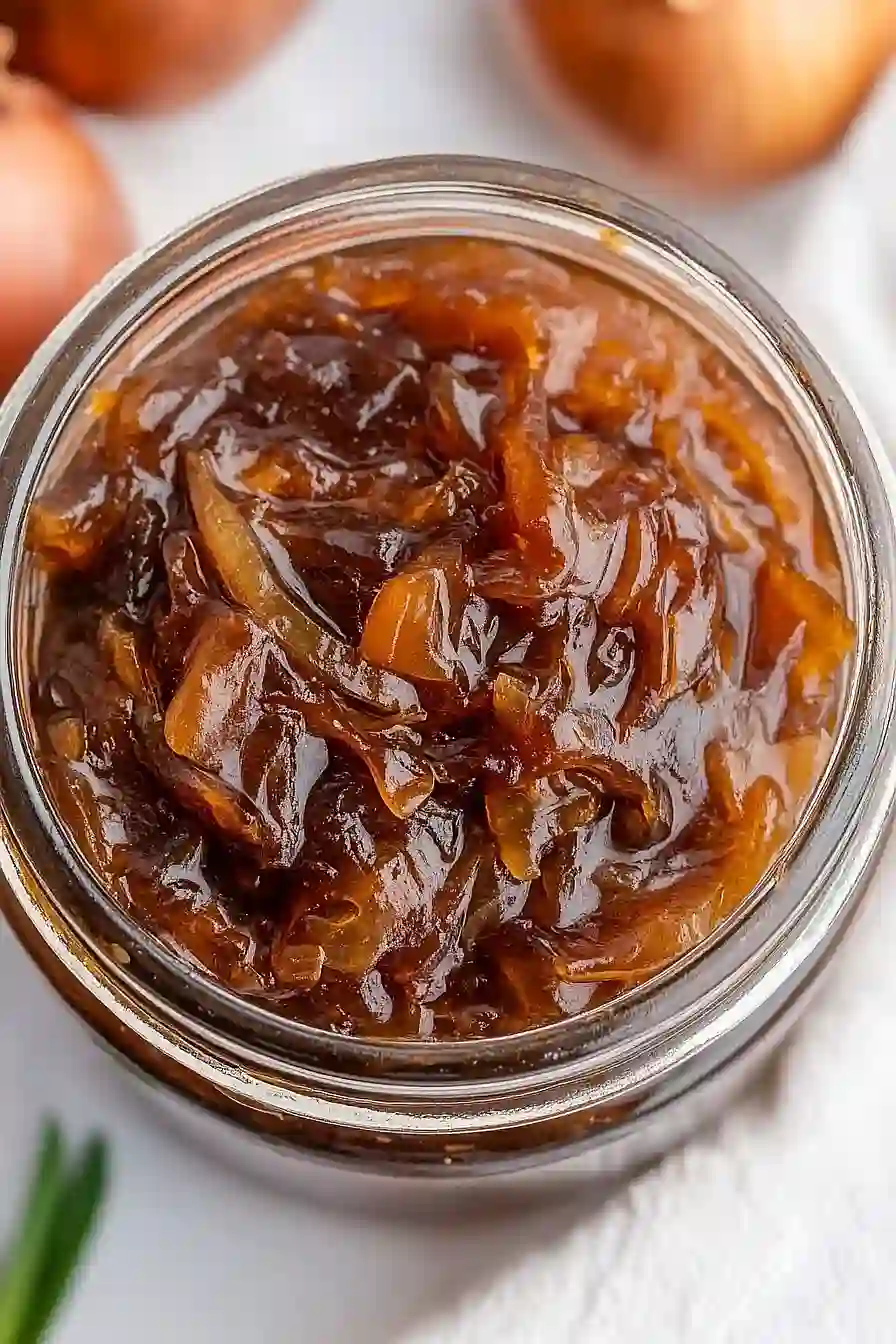
If you ask me, caramelized onion jam is one of those things that sounds fancy but is actually pretty simple to make.
This sweet and savory spread turns ordinary yellow onions into something special with just a bit of patience and stirring. The onions cook down slowly until they’re golden brown and jammy, with hints of sweetness that pair well with both savory and sweet dishes.
It’s great on everything from grilled cheese sandwiches to cheese boards. You can spread it on crackers, mix it into pasta, or even use it as a topping for pizza.
It’s one of those recipes that makes you look like a cooking pro, but really just requires some time and a good pan.
Why You’ll Love This Caramelized Onion Jam
- Simple ingredients – You probably have most of these pantry staples on hand already, making this an easy recipe to whip up anytime.
- Sweet and savory flavor – The combination of caramelized onions, balsamic vinegar, and herbs creates a perfect balance that pairs well with cheese boards, sandwiches, or grilled meats.
- Long shelf life – This jam keeps well in the fridge for weeks, so you can make a big batch and enjoy it whenever you need to add flavor to your meals.
- Great for entertaining – It’s the perfect addition to any cheese board or appetizer spread, and your guests will think you’re a gourmet cook.
- Make-ahead friendly – You can prepare this jam days in advance, making it a stress-free option for meal planning or special occasions.
What Kind of Onions Should I Use?
Sweet yellow onions are your best bet for this jam since they have a naturally mild flavor and high sugar content that caramelizes beautifully. Vidalia, Walla Walla, or Maui onions are all great choices if you can find them, but regular yellow onions from the grocery store will work just fine too. You’ll want to avoid red onions for this recipe since they can turn an unappetizing color when cooked down, and white onions tend to be too sharp and won’t give you that mellow, sweet flavor you’re after. When selecting your onions, look for ones that feel firm and heavy for their size, with dry, papery skins and no soft spots or sprouting.
Options for Substitutions
This onion jam recipe is pretty forgiving when it comes to swaps and substitutions:
- Sweet yellow onions: You can use white onions or even red onions for a slightly different flavor profile. Red onions will give you a deeper color and a bit more bite, while white onions work just as well as yellow.
- Balsamic vinegar: If you don’t have balsamic vinegar, try red wine vinegar or apple cider vinegar. You might want to add an extra tablespoon of sugar to balance the acidity since these aren’t as naturally sweet as balsamic.
- Summer savory: Summer savory can be hard to find, so the suggested thyme and rosemary combo works great. You could also use just thyme, oregano, or even fresh sage for a different herb note.
- Granulated sugar: Brown sugar works beautifully here and adds a deeper caramel flavor. You can also try honey or maple syrup, but reduce the amount to about 1 cup since they’re sweeter than granulated sugar.
- Extra virgin olive oil: Regular olive oil or even butter works fine for cooking the onions. Butter will give you richer flavor, while regular olive oil won’t compete with the other flavors as much.
Watch Out for These Mistakes While Cooking
The biggest mistake when making caramelized onion jam is rushing the caramelization process – onions need at least 45 minutes to an hour of slow, patient cooking over medium-low heat to develop their sweet, golden color and deep flavor.
Another common error is adding the sugar too early, which can cause the onions to burn before they’re properly caramelized, so wait until your onions are already golden brown before stirring in the sugar.
Don’t skip stirring regularly during the cooking process, as onions can stick and burn quickly once the sugars start developing, and always keep your heat at medium-low to avoid scorching.
Finally, be careful when adding the balsamic vinegar since it will bubble up vigorously – add it slowly and step back to avoid any splattering, then let it reduce completely for the perfect jam-like consistency.
What to Serve With Caramelized Onion Jam?
This sweet and tangy jam is perfect for spreading on a cheese board alongside creamy brie, sharp cheddar, or goat cheese with some crusty bread or crackers. I love dolloping it on top of grilled chicken or pork chops – the caramelized sweetness pairs beautifully with savory meats. It also makes an amazing addition to burgers or sandwiches, adding that extra layer of flavor that takes things up a notch. You can even stir a spoonful into your favorite vinaigrette for salads or use it as a glaze for roasted vegetables like Brussels sprouts or carrots.
Storage Instructions
Refrigerate: This caramelized onion jam keeps really well in the fridge! Store it in clean glass jars or airtight containers for up to 3 weeks. I love having a jar ready to go because it makes such a great addition to cheese boards, sandwiches, or even stirred into pasta dishes.
Freeze: You can absolutely freeze portions of this jam in small containers or ice cube trays for easy use later. It’ll keep in the freezer for up to 6 months. Just thaw what you need in the fridge overnight and give it a good stir before using.
Make Ahead: This is one of those recipes that actually gets better with time! The flavors really develop and meld together after sitting for a day or two. I often make a big batch on the weekend to use throughout the week on everything from grilled meats to morning toast.
| Preparation Time | 15-20 minutes |
| Cooking Time | 55-60 minutes |
| Total Time | 70-80 minutes |
| Level of Difficulty | Medium |
Estimated Nutrition
Estimated nutrition for the whole recipe (without optional ingredients):
- Calories: 1700-1800
- Protein: 8-12 g
- Fat: 54-60 g
- Carbohydrates: 320-340 g
Ingredients
For the onion jam:
- 4 lb sweet yellow onions (very thinly sliced)
- 1 1/2 cups balsamic vinegar
- 1 1/2 cups granulated sugar
- 4 tbsp extra-virgin olive oil (I prefer California Olive Ranch)
For seasoning:
- 2 tsp sea salt
- 2 tbsp finely chopped summer savory (or a blend of thyme and rosemary for a similar herb profile)
- 1 tsp ground black pepper (freshly ground for best flavor)
Step 1: Prepare the Canning Equipment (Optional)
If you plan to can the onion jam, begin by filling a canning pot with water and bringing it to a boil with the lid on, as this can take some time.
Meanwhile, gather the jars you will use, ensuring each is clean and that the rims are free of any nicks or chips that could prevent proper sealing.
Wash the lids and rings in hot, soapy water.
If using non-standard canning lids, follow the manufacturer’s preparation instructions.
Step 2: Cook the Onions
- 4 tbsp extra-virgin olive oil
- 4 lb sweet yellow onions, thinly sliced
Place the extra-virgin olive oil and thinly sliced sweet yellow onions into a large, heavy-bottomed saucepan, Dutch oven, or large skillet.
Cook over medium heat, stirring only occasionally, until the onions are golden and softened.
This should take about 10-15 minutes, allowing the onions to caramelize gently—don’t rush this step, as the flavor develops here.
Step 3: Make the Onion Jam
- caramelized onions and olive oil (from Step 2)
- 1 1/2 cups granulated sugar
- 1 1/2 cups balsamic vinegar
- 2 tsp sea salt
- 1 tsp ground black pepper
- 2 tbsp finely chopped summer savory (or a blend of thyme and rosemary)
To the golden onions (from Step 2), add the granulated sugar and balsamic vinegar.
Continue cooking the mixture over medium heat for about 45 minutes, stirring occasionally, until the mixture thickens and takes on a syrupy consistency.
Near the end of this time, mix in the sea salt, ground black pepper, and finely chopped summer savory (or your herb blend).
I like to taste the jam at this stage and tweak the seasoning if needed—a touch of extra herbs can add great depth.
Step 4: Jar and Process the Jam (Optional, for Canning)
- hot onion jam (from Step 3)
While the jam is hot, use a ladle (and a canning funnel, if available) to fill the prepared jars, leaving about 1/4″ headspace at the top.
Wipe the rims clean to ensure a good seal, then set the lids in place and screw the bands on until finger tight.
Using a jar lifter, gently submerge the filled jars into the boiling water in the canning pot, making sure the water covers the jars by at least an inch.
Bring the water back to a simmer and process the jars for 10 minutes (add 1 minute for each additional 1,000 feet of altitude if needed).
Remove the jars and set them on a towel-covered surface to cool for 24 hours.
Step 5: Cool and Store the Finished Onion Jam
After allowing the jars to cool for 24 hours, check that the seals have properly formed—the lids should be pulled down tight and shouldn’t flex when pressed.
Remove the screw bands and wash the outsides of the jars.
Store the sealed jars in a cool, dry place.
If any jars didn’t seal, refrigerate and use those first.
If you are not canning, simply cool the onion jam and transfer it to airtight containers for refrigerator storage.
I love serving this jam with sharp cheese or roasted meats—it elevates any charcuterie board.
