If you ask me, dark chocolate nut bark is one of those perfect no-fuss treats.
This simple dessert brings together rich dark chocolate and your favorite nuts in a way that’s both satisfying and straightforward. The smooth chocolate creates the perfect base for crunchy nuts scattered throughout.
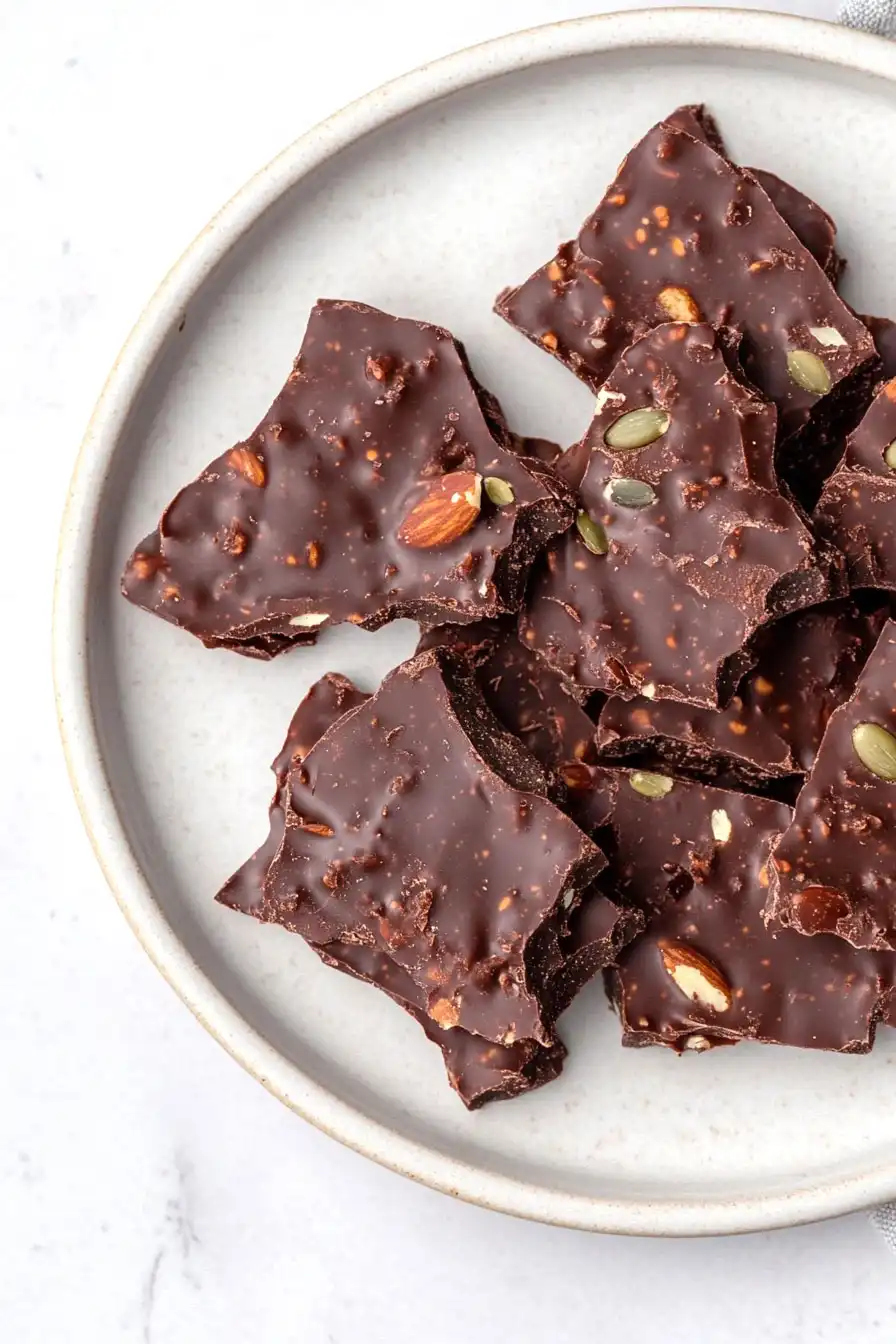
It’s made by melting good quality chocolate and adding a mix of toasted nuts – I like using almonds, pecans, and walnuts for different textures. A sprinkle of sea salt on top makes all the flavors pop.
It’s an easy-to-make sweet that’s perfect for gift-giving or keeping in the fridge for when chocolate cravings strike.
Why You’ll Love This Dark Chocolate Bark
- Quick and simple – This recipe needs just 3 ingredients and takes less than 30 minutes to make – perfect for when you need a last-minute treat or gift.
- No special equipment needed – All you need is a baking sheet, parchment paper, and a microwave or double boiler to melt the chocolate.
- Customizable treat – You can easily swap the nuts and seeds for your favorites, or mix up the chocolate type to suit your taste.
- Nutritious indulgence – Dark chocolate combined with protein-rich nuts and seeds makes this treat both satisfying and better for you than regular candy.
What Kind of Dark Chocolate Should I Use?
For chocolate bark, you’ll want to use good quality dark chocolate in the 60-70% cocoa range, which offers the perfect balance of sweetness and rich chocolate flavor. Bar chocolate works better than chocolate chips since chips contain additives that affect how they melt. Look for brands like Ghirardelli, Lindt, or Guittard in the baking aisle – they’re reliable and easy to find at most grocery stores. Just make sure to check that your chocolate is fresh and hasn’t developed any white spots (known as bloom), which can happen when chocolate isn’t stored properly. If you’re feeling fancy, you can even experiment with single-origin dark chocolates, though they tend to be pricier.
Options for Substitutions
This simple bark recipe is super adaptable and you can make lots of tasty swaps:
- Dark chocolate: While dark chocolate gives the best rich flavor, you can use milk chocolate or even white chocolate instead. Semi-sweet chocolate chips work too – just know the final taste will be sweeter. Whatever type you choose, make sure to use good quality chocolate since it’s the main ingredient.
- Almonds: Not a fan of almonds? No worries! Try pecans, walnuts, macadamia nuts, or cashews. You can even mix different nuts together. Just make sure they’re roasted for the best crunch and flavor.
- Sunflower and pumpkin seeds: These seeds can be swapped with any other seeds you like – try hemp seeds, chopped pistachios, or pine nuts. If you’re not into seeds at all, just use more nuts instead. Remember to keep the total amount of mix-ins about the same so the chocolate can hold everything together.
Watch Out for These Mistakes While Making
The biggest challenge when making chocolate bark is improper tempering of chocolate – if you skip this crucial step or rush through it, your bark won’t have that satisfying snap and might develop a dull, grayish coating called bloom. To properly temper, heat your chocolate slowly using a double boiler method until it reaches 115°F, then cool it to 81°F before reheating to 88-90°F. Another common mistake is adding nuts that aren’t completely dry or are too cold, which can cause the chocolate to seize up – make sure your nuts and seeds are at room temperature and completely moisture-free before mixing them in. For the smoothest results, don’t forget to tap your baking sheet several times on the counter after spreading the chocolate mixture, which helps eliminate air bubbles and creates an even surface that looks professional. Finally, resist the urge to speed up the cooling process in the refrigerator, as this can affect the chocolate’s texture – instead, let it set at room temperature for the best results.

What to Serve With Chocolate Bark?
This rich dark chocolate bark makes a perfect addition to any dessert spread or coffee break! I love serving it alongside a warm cup of coffee or tea, as the heat from the drinks creates a nice contrast with the cool, snappy chocolate. For a dessert party, try breaking the bark into smaller pieces and arranging it on a platter with some fresh berries and maybe a few other cookies or treats. If you’re enjoying it as an afternoon pick-me-up, a glass of cold milk makes the perfect companion to help balance out the intensity of the dark chocolate.
Storage Instructions
Keep Fresh: Your chocolate bark stays perfectly snackable when kept in an airtight container at room temperature. It’ll keep its crunch and flavor for up to 2 weeks – if it lasts that long! Just make sure to keep it away from direct sunlight or heat to prevent any melting.
Refrigerate: If your kitchen runs warm or you prefer a nice snap to your bark, pop it in the fridge in an airtight container. It’ll stay fresh for up to a month this way. Just remember to separate layers with parchment paper to prevent sticking.
Gift: Planning to give this as a gift? Package the bark in cellophane bags or pretty tins, and keep it cool until ready to share. It makes a great homemade present that stays fresh for several weeks when stored properly.
| Preparation Time | 10-15 minutes |
| Cooking Time | 10-15 minutes |
| Total Time | 20-30 minutes |
| Level of Difficulty | Easy |
Estimated Nutrition
Estimated nutrition for the whole recipe (without optional ingredients):
- Calories: 2500-2700
- Protein: 65-75 g
- Fat: 200-220 g
- Carbohydrates: 150-170 g
Ingredients
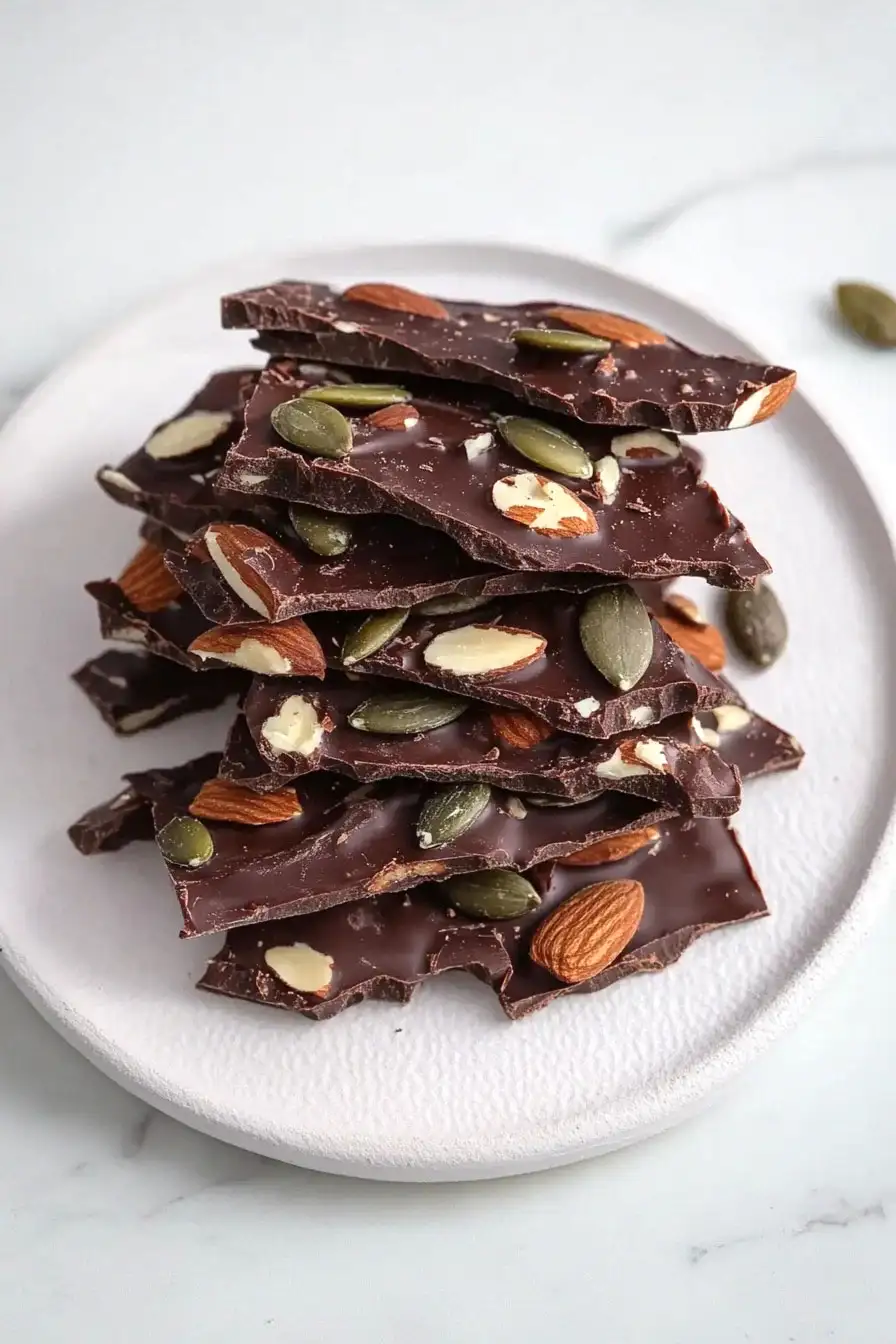
- 3/4 cup roasted sunflower and pumpkin seeds (I use Trader Joe’s brand for convenience)
- 1 lb dark chocolate (60-70% cocoa, chopped for easier melting)
- 1 1/4 cups whole roasted almonds
Step 1: Prepare Ingredients and Equipment
Start by gathering all of your ingredients.
Line a baking sheet with parchment paper to ensure easy removal of your chocolate bark later on.
Using a sharp knife, finely chop the chocolate for melting.
Step 2: Melt the Chocolate
Set a bowl over a saucepan of gently simmering water, making sure the bowl does not touch the water to prevent overheating.
Add the chopped chocolate to the bowl and heat it, stirring occasionally, until it is about two-thirds melted.
The goal is a smooth and partially melted chocolate mixture.
Step 3: Complete the Chocolate Melting Process
Remove the bowl with the chocolate from the saucepan and continue to stir until the chocolate is completely melted and smooth.
It should reach about 90°F on a candy thermometer.
If not completely melted or the temperature is too cool, return the bowl to the saucepan for an additional 1-2 minutes, constantly stirring to prevent overheating.
Step 4: Combine and Spread the Bark Mixture
Stir the nuts and seeds into the melted chocolate, ensuring they are thoroughly coated.
Pour the chocolate mixture onto the prepared baking sheet, spreading it into a 1/2-inch-thick layer to create an even bark.
Make sure the nuts and seeds are evenly distributed.
Step 5: Cool and Harden the Bark
Place the baking sheet in the refrigerator for approximately 10 minutes to allow the chocolate bark to harden and set completely.
Step 6: Finalize and Serve
Once the chocolate bark has hardened, invert it onto a work surface and carefully remove the parchment paper.
Break the bark into approximately 25 pieces for serving or storing.
Enjoy this delicious treat whenever you like!
