I was honestly shocked when I first learned you could make meringue from the liquid in a can of chickpeas. It seemed impossible – I mean, who looks at bean water and thinks “Hey, this could become fluffy white peaks”? But that’s exactly what happened in my kitchen last year.
Like many people, I’d always thrown that chickpea liquid straight down the drain. Turns out, that liquid (which food folks call aquafaba) whips up just like egg whites. And the best part? You can’t taste the chickpeas at all. For anyone worried about raw eggs or looking for a plant-based option, this little kitchen trick is pure magic.
Why You’ll Love This Chickpea Meringue
- Plant-based alternative – Perfect for vegans and those with egg allergies, these meringues use chickpea liquid (aquafaba) instead of egg whites, making them completely plant-based.
- Budget-friendly ingredients – Made with liquid you’d normally drain from a can of chickpeas, this recipe turns kitchen waste into a delicious treat.
- Simple ingredient list – You only need 4 basic ingredients to make these meringues – chances are you already have most of them in your pantry.
- Same texture as traditional meringues – These meringues have the same light, crispy texture as egg-white meringues – your guests won’t believe they’re made from chickpea liquid!
What Kind of Chickpea Liquid Should I Use?
The liquid from any can of chickpeas (also known as aquafaba) will work for making meringues, but there are a few things to keep in mind for the best results. Regular canned chickpeas typically work better than low-sodium versions, as the salt helps stabilize the foam. You’ll want to use the liquid straight from the can – don’t water it down or reduce it first for this recipe. If your can has been sitting in the pantry for a while, that’s actually great – slightly older chickpea liquid tends to whip up better than fresh ones. Just make sure to strain the liquid through a fine-mesh sieve before using to remove any small particles that might affect your meringue’s texture.

Options for Substitutions
When making these plant-based meringues, here’s what you should know about substitutions:
- Aquafaba (chickpea liquid): This is the key ingredient that can’t be substituted – it’s what makes these meringues possible! However, you can use the liquid from other canned white beans like cannellini beans if you’re in a pinch. The liquid should be thick and slightly gelatinous.
- Cream of tartar: This helps stabilize the meringue, but you can replace it with the same amount of lemon juice or white vinegar. Just keep in mind that the meringue might not be as stable without cream of tartar.
- Granulated sugar: While regular white sugar works best, you can use caster sugar (superfine sugar) for an even smoother texture. Avoid using powdered sugar or alternative sweeteners as they can affect the structure of the meringue.
- Vanilla essence: Feel free to swap this with other flavors like almond extract, peppermint extract, or even leave it out completely. If using stronger extracts like almond, start with just 1/4 teaspoon.
Watch Out for These Mistakes While Baking
The biggest challenge when making chickpea juice meringue is not whipping the aquafaba long enough – you’ll need at least 5-6 minutes of beating at high speed until stiff peaks form, just like traditional egg white meringues. Another common mistake is adding the sugar too quickly, which can deflate your carefully whipped aquafaba – instead, add it gradually, about a tablespoon at a time, while continuing to beat at medium-high speed. The temperature of your aquafaba matters too – room temperature liquid whips up much better than cold, so let it sit out for 30 minutes before starting. For the crispiest results, avoid baking on a humid day and make sure to dry out your meringues in the oven with the door slightly open after baking, which prevents them from becoming chewy or sticky.
What to Serve With Chickpea Meringue?
These light and airy meringues are super versatile when it comes to serving options! Fresh berries like strawberries, raspberries, or blueberries make a perfect partner, adding a nice pop of natural sweetness and color to the plate. You can also serve them as part of a dessert board with some dairy-free chocolate sauce, caramel, or fruit compote for dipping. For a simple but tasty treat, try crumbling the meringues over dairy-free ice cream or layering them with coconut whipped cream and fresh fruit to make a quick vegan pavlova.
Storage Instructions
Keep Fresh: Once your chickpea meringues have completely cooled, place them in an airtight container lined with parchment paper. They’ll stay crispy at room temperature for up to 5 days. Just remember to keep them away from any humidity or moisture, as this can make them lose their crunch.
Store: For the best results, add a small packet of silica gel (like the ones you find in new shoes) to your storage container. This helps keep moisture away from your meringues. If you live in a particularly humid climate, you might want to check on them daily to make sure they’re staying crisp.
Make Ahead: You can whip up these meringues a few days before you need them – they’re perfect for planning ahead! Just make sure to store them properly and they’ll be ready to go when you need them. Keep in mind that they don’t freeze well, so it’s best to enjoy them within their fresh storage window.
| Preparation Time | 15-20 minutes |
| Cooking Time | 45-60 minutes |
| Total Time | 60-80 minutes |
| Level of Difficulty | Medium |
Estimated Nutrition
Estimated nutrition for the whole recipe (without optional ingredients):
- Calories: 400-450
- Protein: 0-2 g
- Fat: 0-1 g
- Carbohydrates: 100-110 g
Ingredients
- 1/2 cup granulated sugar
- 6 tbsp chickpea liquid (from a can of chickpeas, well-chilled)
- 1/4 tsp cream of tartar
- 1/2 tsp vanilla extract (I like Nielsen-Massey brand for its rich flavor)
Step 1: Prepare the Meringue Base
Start by placing the chickpea liquid (aquafaba) and cream of tartar into the bowl of your stand mixer.
Begin whipping at a slow speed until the mixture becomes foamy.
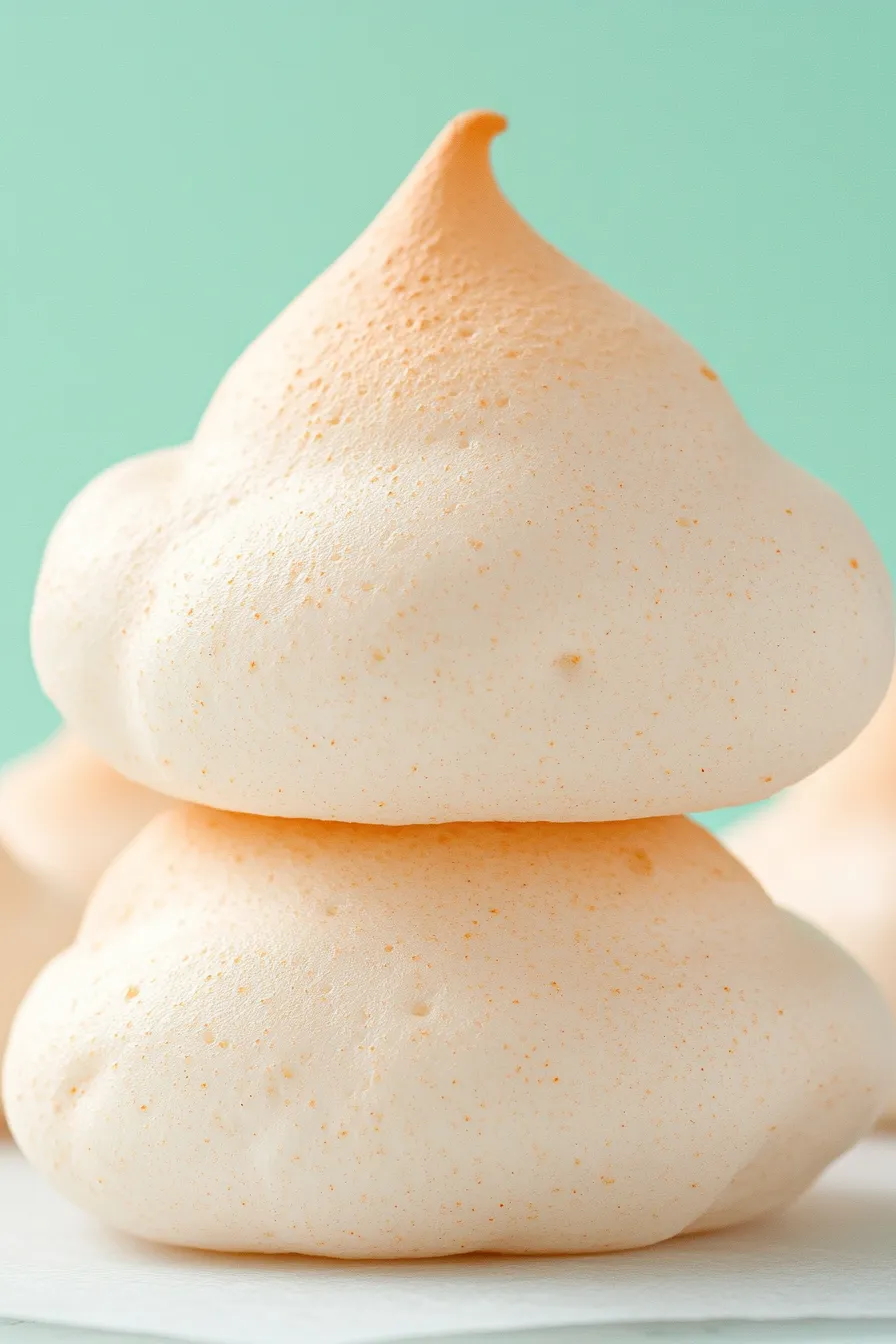
Gradually increase the speed until the mixture is white, glossy, and stiff peaks start to form.
Step 2: Sweeten and Flavor the Meringue
Slowly add the sugar while continuing to whip at a fast speed.
Once all the sugar is incorporated, add in the vanilla extract.
Keep whipping until the mixture reaches glossy stiff peaks, indicating that the meringue is ready.
Step 3: Preheat Oven and Prepare Baking Tray
Preheat your oven to 250°F (121°C).
Line a baking tray with parchment paper to prevent sticking.
This will be the base for your meringue cookies.
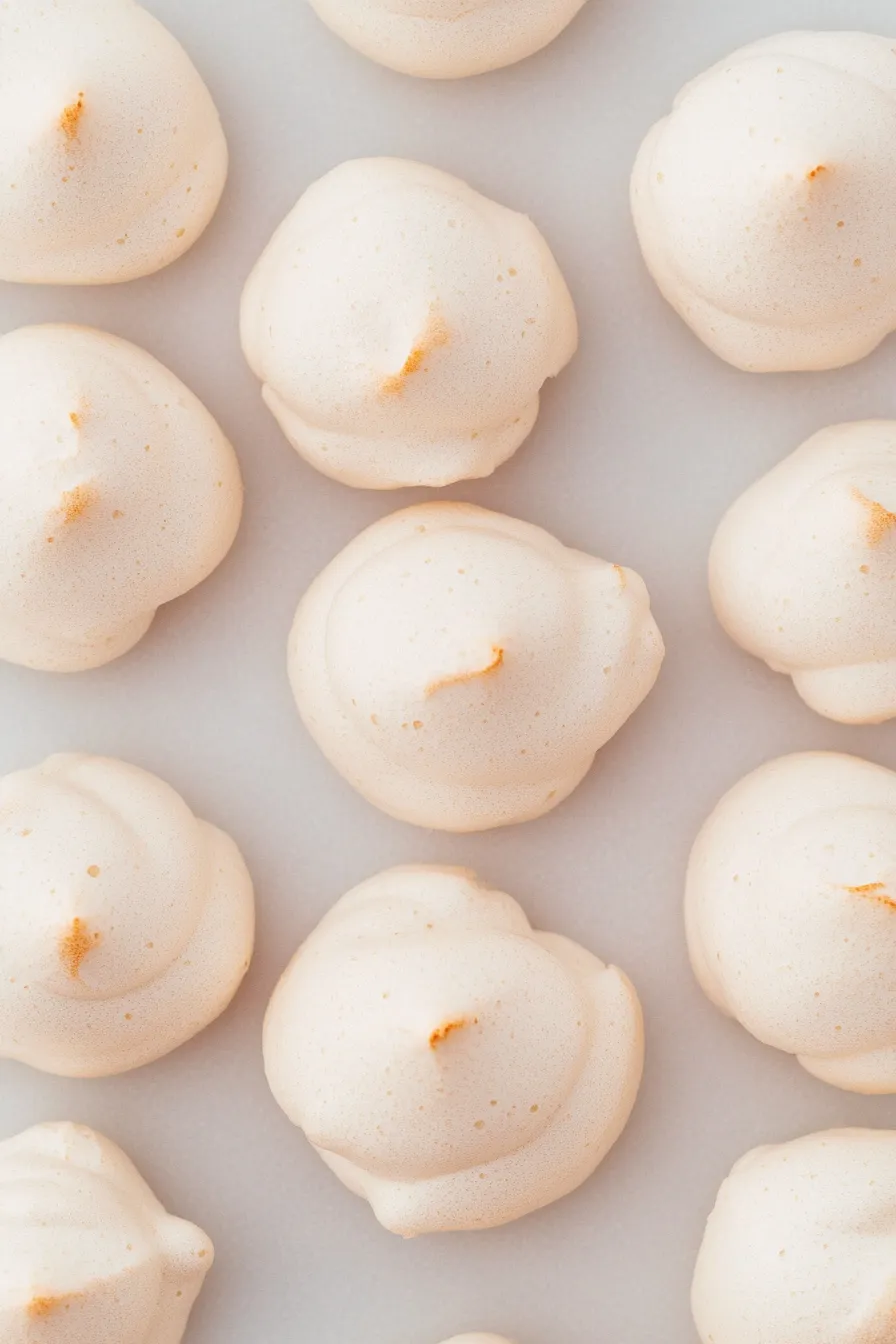
Step 4: Shape the Meringues
Pipe the meringue mixture into cookie shapes onto the parchment-lined tray.
You can also spoon the mixture onto the tray, but piping is generally easier and neater for creating uniform shapes.
Step 5: Bake and Let Meringues Set
Place the tray into the preheated oven and bake for 45 minutes.
After the 45 minutes are up, switch off the oven, but do not open it.
It’s crucial to keep the oven door closed to prevent any moisture from interfering with the meringues.
Leave the meringues in the turned-off oven for an additional hour.
Step 6: Finish and Store the Meringues
After the meringues have been baked for 45 minutes and then rested in the oven for 60 minutes, carefully remove them from the oven.
They should be light and crispy.
If the weather is hot or humid, place them in an airtight container and store them in the fridge to maintain their texture and longevity.
Enjoy your airy, crispy meringue cookies!
