Getting kids to eat fish can feel like an uphill battle, especially when you’re trying to serve something nutritious that won’t result in turned-up noses at the dinner table. Like many parents, I used to struggle with finding fish recipes that would appeal to both grown-ups and little ones, while still keeping things on the healthier side.
That’s why these baked halibut fish sticks have become such a regular feature in our weekly meal rotation – they’re crispy and fun to eat, packed with protein, and way better for you than the frozen versions you’ll find at the grocery store. Plus, they’re surprisingly easy to make with just a handful of simple ingredients.
Why You’ll Love These Fish Sticks
- Healthier than store-bought – These homemade fish sticks are baked instead of fried and use real fish fillets instead of processed fish, making them a nutritious alternative to frozen varieties.
- Quick preparation – With just 30-35 minutes from start to finish, you can have crispy, homemade fish sticks on the table faster than ordering takeout.
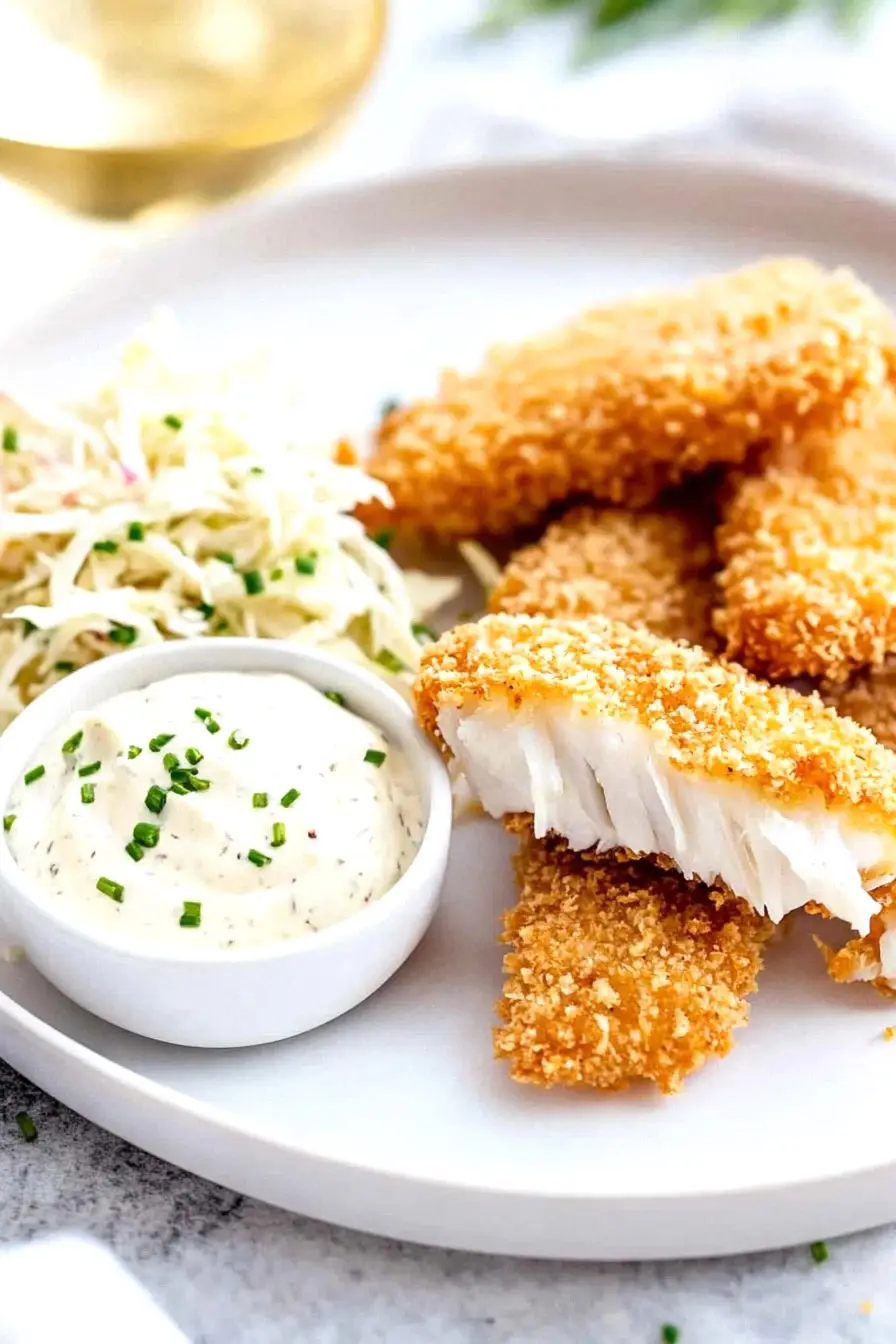
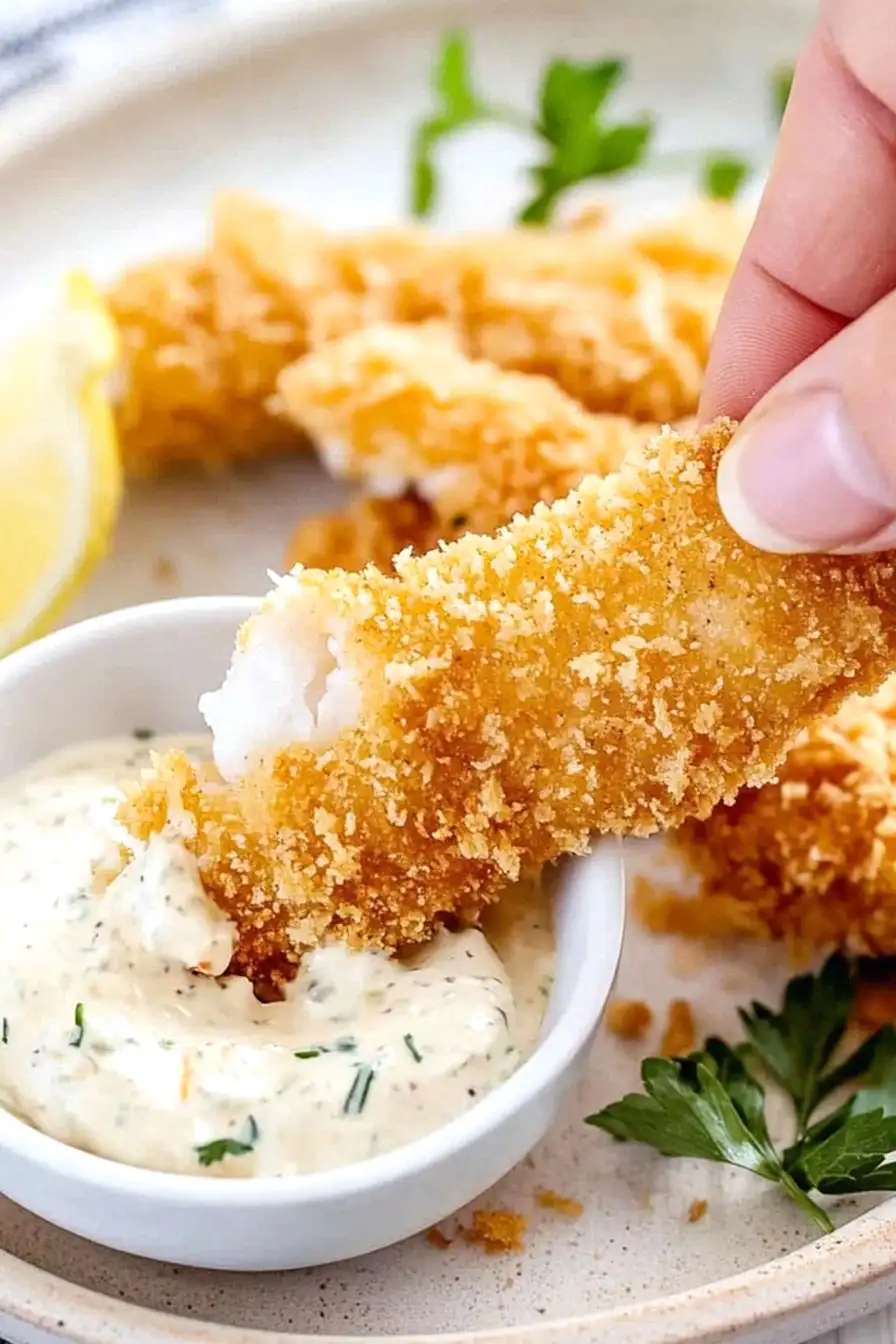
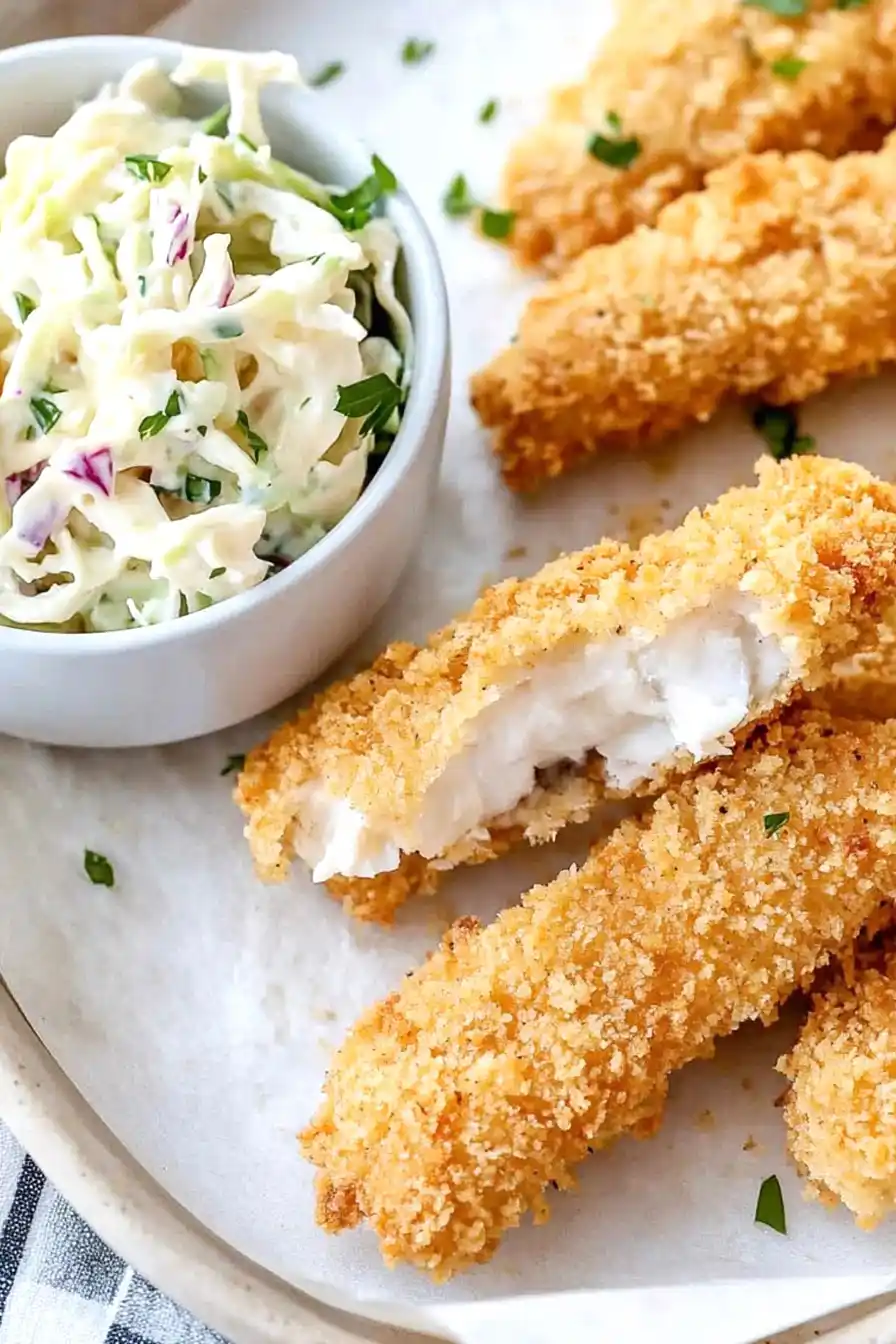
- Kid-friendly dinner – The crunchy panko coating and mild fish flavor make these perfect for children, while adults will appreciate the real ingredients and homemade tartar sauce.
- Simple ingredients – You’ll only need basic pantry staples and fresh fish to make these, with no artificial additives or preservatives found in packaged versions.
- Crispy texture – The panko breadcrumb coating gives you that satisfying crunch you want in fish sticks, even though they’re baked instead of fried.
What Kind of White Fish Should I Use?
While this recipe calls for cod or halibut, you’ve got several good options when it comes to white fish for making fish sticks. Halibut tends to be a bit pricier but has a firm, meaty texture that holds up really well during baking. Cod is more budget-friendly and works great too, with its mild flavor that kids and adults both enjoy. If you’re looking for alternatives, try haddock or pollock – they’re similar in texture and taste, and usually cost less than halibut. Just make sure whatever fish you choose is fresh (or properly thawed if frozen) and pat it dry with paper towels before breading to help the coating stick better.
Options for Substitutions
This fish stick recipe is pretty adaptable and you can make several easy swaps:
- White fish: While the recipe calls for cod or halibut, you can use any firm white fish like haddock, pollock, or even mahi-mahi. Just make sure it’s not too thin or delicate, as you want it to hold together when cutting into strips.
- Panko breadcrumbs: Regular breadcrumbs work fine here, though they won’t be quite as crunchy. For a gluten-free option, crushed corn flakes or gluten-free breadcrumbs are good alternatives. You’ll want to season them the same way.
- Avocado/canola oil: Any neutral-flavored oil with a high smoke point works well – try olive oil, grapeseed oil, or vegetable oil.
- Greek yogurt: For the sauce, you can use sour cream instead of Greek yogurt, or go with all mayonnaise if that’s what you have on hand.
- Pickle relish: No relish? Finely chop some dill pickles, or use capers for a different but tasty twist in your tartar sauce.
- Plain flour: For a gluten-free version, use rice flour or your favorite gluten-free flour blend. The coating might be slightly different but will still work well.
Watch Out for These Mistakes While Baking
The biggest challenge when making fish sticks is preventing them from turning out soggy – the key is to pat your fish completely dry with paper towels before coating, and arrange them on a wire rack over your baking sheet so hot air can circulate around them.
Another common mistake is not getting the breading to stick properly – solve this by setting up a proper dredging station (flour, then egg, then breadcrumbs) and use one hand for wet ingredients and the other for dry to avoid creating clumpy fingers that will mess up your coating.
The temperature of your oven is crucial – preheating to 425°F ensures the outside gets crispy before the inside overcooks, and remember to flip the fish sticks halfway through baking for even browning.
For extra crunch, try spraying or drizzling your breaded fish sticks with a little oil before baking, and don’t forget to let them rest for 3-5 minutes after coming out of the oven so the coating sets properly.
What to Serve With Fish Sticks?
Fish sticks are such a fun dinner option, and there are plenty of tasty sides that work perfectly with them! The classic combo is french fries or potato wedges – just pop them in the oven while your fish sticks are baking. For a healthier spin, try roasted veggies like broccoli or asparagus, which cook at about the same temperature and time as the fish. A simple coleslaw or green salad adds a nice fresh crunch, and don’t forget some lemon wedges on the side to brighten everything up. If you’re feeding kids (or kids at heart), mac and cheese makes a super comforting side dish that everyone loves.
Storage Instructions
Keep Fresh: These homemade fish sticks stay good in an airtight container in the fridge for up to 2 days. I recommend storing the tartar sauce separately in its own container – it’ll keep for up to 5 days in the fridge and you can use it for other dishes too!
Freeze: Want to meal prep? Let the fish sticks cool completely, then place them on a baking sheet and freeze until solid (about 1-2 hours). Transfer them to a freezer bag and they’ll keep for up to 3 months. This method prevents them from sticking together!
Reheat: To get that crispy coating back, pop the fish sticks in the oven at 375°F for about 10-12 minutes if thawed, or 15-20 minutes if frozen. You can also use an air fryer for 4-5 minutes at 375°F – they’ll come out perfectly crispy! Avoid microwaving as this can make them soggy.
| Preparation Time | 15-20 minutes |
| Cooking Time | 15 minutes |
| Total Time | 30-35 minutes |
| Level of Difficulty | Easy |
Estimated Nutrition
Estimated nutrition for the whole recipe (without optional ingredients):
- Calories: 1600-1800
- Protein: 100-110 g
- Fat: 90-100 g
- Carbohydrates: 130-140 g
Ingredients
For the fish sticks:
- 1/2 cup all-purpose flour (I always use King Arthur all-purpose flour)
- 1/2 tsp kosher salt
- 5 tsp avocado oil (or any other neutral oil like canola)
- 1 tsp paprika
- 2 large eggs (whisked well)
- 1 lb white fish (such as halibut, cut into 1-inch thick strips)
- 1 1/3 cups panko crumbs (for extra crispiness)
- 1/8 tsp garlic powder
For the sauce:
- 3 tbsp mayonnaise (I prefer Hellmann’s mayonnaise)
- 2 tbsp pickle relish
- 1/4 tsp salt and pepper
- 1 tsp brown mustard
- 1/3 cup nonfat greek yogurt
Step 1: Prepare Baking Sheet and Fish
Begin by preheating your oven to 400 degrees F.
Coat a large baking sheet with cooking spray or lightly brush it with oil to prevent sticking.
Cut the fish into “sticks” that are approximately three inches long and 1/3-inch wide.
Sprinkle the fish sticks with 1/2 teaspoon of kosher salt and set them aside to absorb the seasoning.
Step 2: Prepare Dredging Stations
Set up three shallow dishes for the dredging process.
In the first dish, place a suitable amount of flour.
In the second dish, beat the eggs until well combined.
In the third dish, combine breadcrumbs, paprika, and garlic powder.
Drizzle oil over the breadcrumb mixture and use a fork to mash and mix until the breadcrumbs are evenly moistened.
Step 3: Dredge and Bread the Fish Sticks
Use one hand for dry ingredients and the other for wet ingredients to minimize mess.
Begin by dipping a strip of fish into the flour mixture, turning it to coat completely.
Then, dip it into the beaten eggs, ensuring it’s fully covered.
Finally, press the fish stick into the breadcrumb mixture, turning to coat thoroughly.
Place the breaded fish stick on the prepared baking sheet.
Repeat this process with the remaining fish sticks.
Discard any leftover dredging mixtures.
Step 4: Bake the Fish Sticks
Transfer the baking sheet with the breaded fish sticks to the preheated oven.
Bake for about 15 minutes, or until the fish is cooked through and the coating is golden and crisp.
Step 5: Prepare the Sauce
While the fish sticks are baking, prepare a tasty dipping sauce.
In a medium bowl, whisk together yogurt and mayonnaise.
Stir in relish, mustard, 1/4 teaspoon of salt, and a dash of pepper to taste.
Mix until all ingredients are well combined and the sauce is smooth.
Step 6: Serve and Enjoy
Once the fish sticks are cooked, remove them from the oven.
Serve them hot alongside the prepared sauce as a delicious dip.
Enjoy your homemade crispy fish sticks!
