There’s something so comforting about chicken thighs and gravy. When the weather starts cooling down, it’s one of those dishes I find myself making more and more. My kids always know what’s for dinner when they walk through the door and smell that rich gravy bubbling away on the stove.
I learned pretty quickly that chicken thighs are way more forgiving than chicken breasts. They stay juicy even if you cook them a few minutes too long, and they’re usually cheaper at the grocery store too. Win-win! The gravy that comes together in the same pan is just the cherry on top.
If you’ve been sticking to chicken breasts, trust me – give thighs a try. Once you see how easy they are to cook and taste that flavor, you might just find yourself reaching for them every time. And that gravy? Well, let’s just say you’ll want to keep some bread nearby for soaking up every last drop.
Why You’ll Love This Chicken Thighs and Gravy
- Budget-friendly protein – Chicken thighs are not only more affordable than chicken breast, but they’re also more flavorful and harder to overcook, making this recipe perfect for both beginners and experienced cooks.
- One-pan meal – Everything cooks in the same pan, which means less cleanup and more concentrated flavors as the gravy develops from all those tasty browned bits.
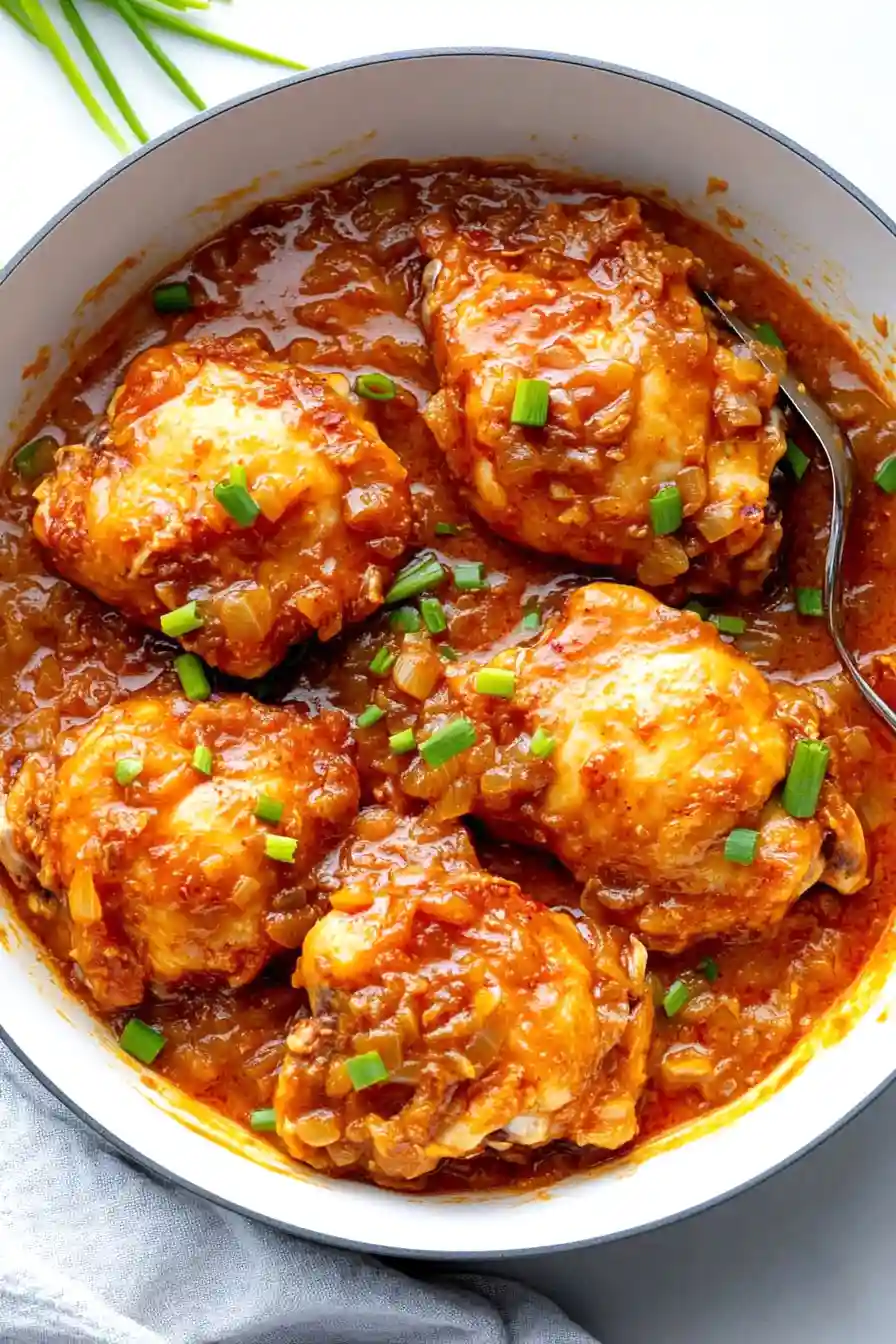
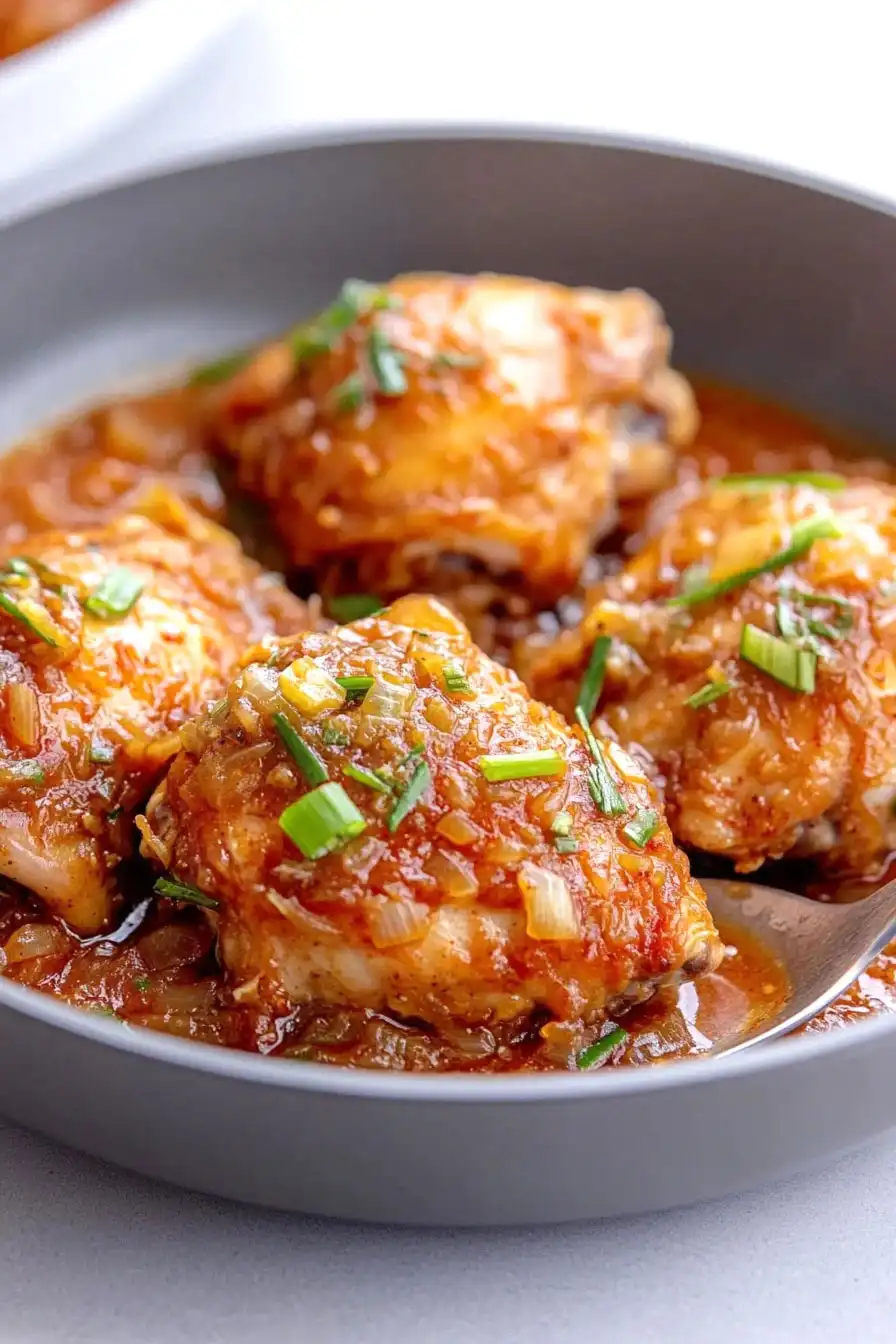
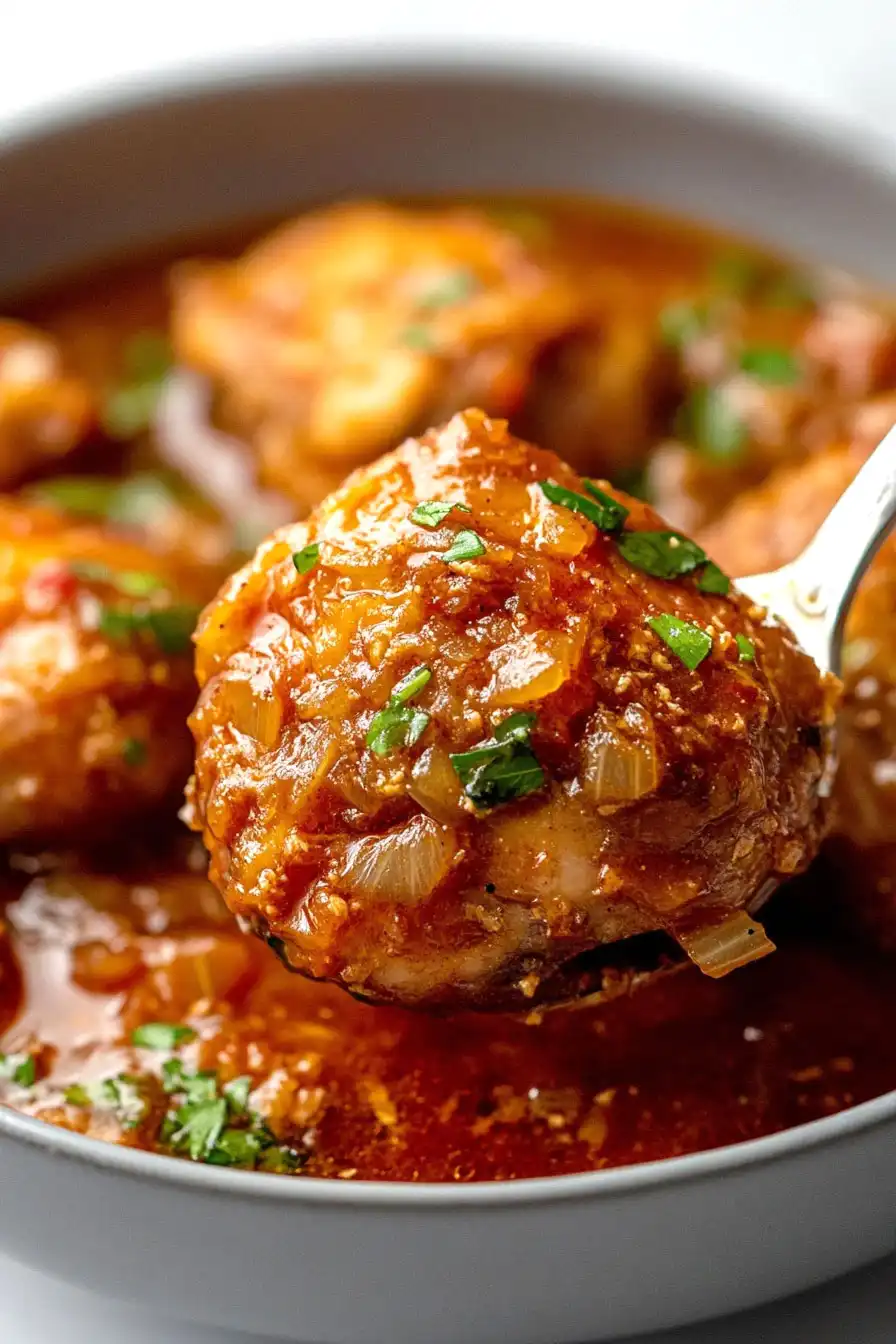
- Rich, homestyle gravy – The combination of seasoned flour, onions, and chicken drippings creates a smooth, flavorful gravy that’s perfect over rice, mashed potatoes, or crusty bread.
- Basic pantry ingredients – Most of these ingredients are kitchen staples you probably already have on hand, making this an easy go-to dinner option without a special grocery trip.
What Kind of Chicken Thighs Should I Use?
For this recipe, you’ll want to use bone-in chicken thighs, which tend to be more flavorful and stay juicier than boneless ones. While the recipe calls for removing the skin, you can actually find skinless bone-in thighs at many grocery stores to save yourself a step. If you can only find skin-on thighs, the skin peels off easily with a firm grip and a gentle pull. Dark meat like chicken thighs is more forgiving than breast meat, so you don’t have to worry as much about them drying out during cooking. When shopping, look for thighs that are similar in size so they’ll cook evenly, and check that the meat has a pink, healthy color without any gray spots.
Options for Substitutions
This chicken and gravy recipe is pretty adaptable – here are some swaps you can try:
- Chicken thighs: While chicken thighs give the best flavor and stay really juicy, you can use chicken breasts if you prefer. Just reduce the cooking time by about 5-7 minutes since breasts cook faster and can dry out more easily.
- Onion seasoning: No onion seasoning? Mix equal parts onion powder and garlic powder as a substitute, or use dried minced onion.
- Smoked paprika: Regular paprika works fine here – you’ll just miss some of that smoky flavor. You could add a tiny pinch of cumin to get some of that smokiness back.
- Sweet onions: Yellow or white onions can easily replace sweet onions. Red onions work too, though they’ll give a slightly different flavor.
- Fresh thyme: If you don’t have fresh thyme, use 1 teaspoon of dried thyme instead. In a pinch, dried rosemary or sage can work too.
- Green onion garnish: Fresh parsley, chives, or even a sprinkle of dried parsley can work as alternative garnishes. Or simply skip the garnish – it won’t affect the taste of your gravy.
Watch Out for These Mistakes While Cooking
The biggest mistake when cooking chicken thighs is not getting a proper sear – make sure your pan is hot enough before adding the meat, and don’t overcrowd the pan as this will cause the chicken to steam rather than brown.
Another common error is rushing the gravy process – for the best flavor, take your time letting the onions caramelize slowly over medium heat (about 15-20 minutes), and scrape up all those tasty brown bits from the bottom of the pan when adding your stock.
Temperature control is crucial – if your heat is too high when making the gravy, the flour can burn and create bitter flavors, so keep it at medium-low once you’ve added the flour mixture.
For the juiciest results, use a meat thermometer and cook the chicken thighs to 175°F (slightly higher than chicken breasts) since dark meat benefits from a bit more cooking to break down the connective tissues.
What to Serve With Chicken Thighs and Gravy?
This saucy dish is practically begging for something to soak up all that delicious gravy! Fluffy mashed potatoes are my go-to choice, but buttered rice or egg noodles work just as well as a base. For vegetables, I like to keep it simple with steamed green beans or roasted carrots, which taste amazing when they get a little gravy on them too. If you want to round out the meal even more, add some warm dinner rolls or crusty bread on the side – trust me, you won’t want to leave any of that gravy behind!
Storage Instructions
Keep Fresh: Let your chicken thighs and gravy cool down, then transfer them to an airtight container. They’ll stay good in the fridge for up to 4 days. The gravy might thicken up a bit in the fridge, but don’t worry about that – it’s totally normal!
Freeze: This dish is perfect for freezing! Place it in a freezer-safe container and it’ll keep well for up to 3 months. I like to portion it out before freezing – it makes thawing so much easier when you’re ready for a quick dinner.
Reheat: To warm it up, place the chicken and gravy in a pan over medium-low heat, adding a splash of chicken broth if the gravy is too thick. You can also use the microwave – just heat in 1-minute intervals, stirring the gravy between each interval. The chicken should reach 165°F when fully reheated.
| Preparation Time | 15-20 minutes |
| Cooking Time | 40-50 minutes |
| Total Time | 55-70 minutes |
| Level of Difficulty | Medium |
Estimated Nutrition
Estimated nutrition for the whole recipe (without optional ingredients):
- Calories: 1200-1400
- Protein: 105-115 g
- Fat: 70-80 g
- Carbohydrates: 50-60 g
Ingredients
For the seasoning blend:
- 1/4 tsp cayenne pepper
- 2 tbsp all-purpose flour (I use King Arthur all-purpose flour)
- 1/2 tsp ground black pepper
- 1/2 tsp kosher salt
- 1 tsp smoked paprika
- 1 tsp onion seasoning
For the chicken and gravy:
- 3 garlic cloves (freshly minced for best flavor)
- 2 large sweet onions (thinly sliced)
- 8 bone-in chicken thighs (3 lb)
- 2 fresh thyme sprigs
- 3/4 cup chicken stock (low-sodium)
- 1 tbsp extra virgin olive oil (or any neutral oil like canola)
- 1 bay leaf
For the garnish:
- 1 green onion (thinly sliced)
Step 1: Preheat Oven and Prepare Seasoned Flour
Begin by preheating your oven to 350°F.
In a large shallow dish, combine flour, onion powder, paprika, and cayenne pepper.
Season this mixture with 1/4 teaspoon of salt and 1/4 teaspoon of pepper, then stir to ensure everything is well blended.
Step 2: Heat Oil and Prepare Chicken
Heat oil in a large ovenproof skillet over medium-high heat until it shimmers.
While the oil is heating, pat the chicken thighs dry with a paper towel.
Dredge each chicken thigh in the seasoned flour mixture, coating both sides thoroughly, then shake off any excess flour.
Remember to set aside the remaining flour mixture as you’ll need it later for making gravy.
Sear the coated chicken thighs in the hot skillet in batches if needed, to avoid crowding, cooking until each side is golden brown, about 1 to 2 minutes per side.
Once done, set the chicken aside on a plate.
Step 3: Cook the Aromatics
With the chicken set aside, add onions to the skillet and reduce the heat to medium.
Season the onions with the remaining 1/4 teaspoon of salt and 1/4 teaspoon of pepper.
Cook while stirring occasionally until the onions achieve a golden brown color, approximately 5 to 7 minutes.
Add garlic and continue cooking until fragrant, which should take about 45 to 60 seconds.
Step 4: Make the Gravy
Add the reserved flour-spice mixture to the onions in the skillet and stir to coat and combine.
Pour in the chicken stock, stirring to combine everything.
Increase the heat to medium-high to bring the mixture to a boil, then reduce the heat to low allowing it to simmer and thicken into a gravy.
Step 5: Add Chicken and Simmer
Add the reserved chicken thighs along with any accumulated juices back to the skillet.
Include thyme sprigs and a bay leaf, nestling the chicken into the onion mixture.
Turn the chicken to ensure all sides are coated with the gravy.
Step 6: Finish Cooking in the Oven
Transfer the skillet to your preheated oven, leaving it uncovered.
Cook for 20 to 25 minutes, or until the chicken juices run clear when pierced with a knife and an instant-read thermometer reads 165°F.
If the gravy appears too thick, remove the chicken thighs to a serving plate and add a little chicken stock at a time to achieve the desired consistency (the sauce should be thick enough to coat a spoon).
Step 7: Adjust Seasoning and Serve
Taste the gravy and adjust seasoning with salt and pepper if needed.
Serve the chicken and gravy immediately, enjoying the rich, savory flavors.
