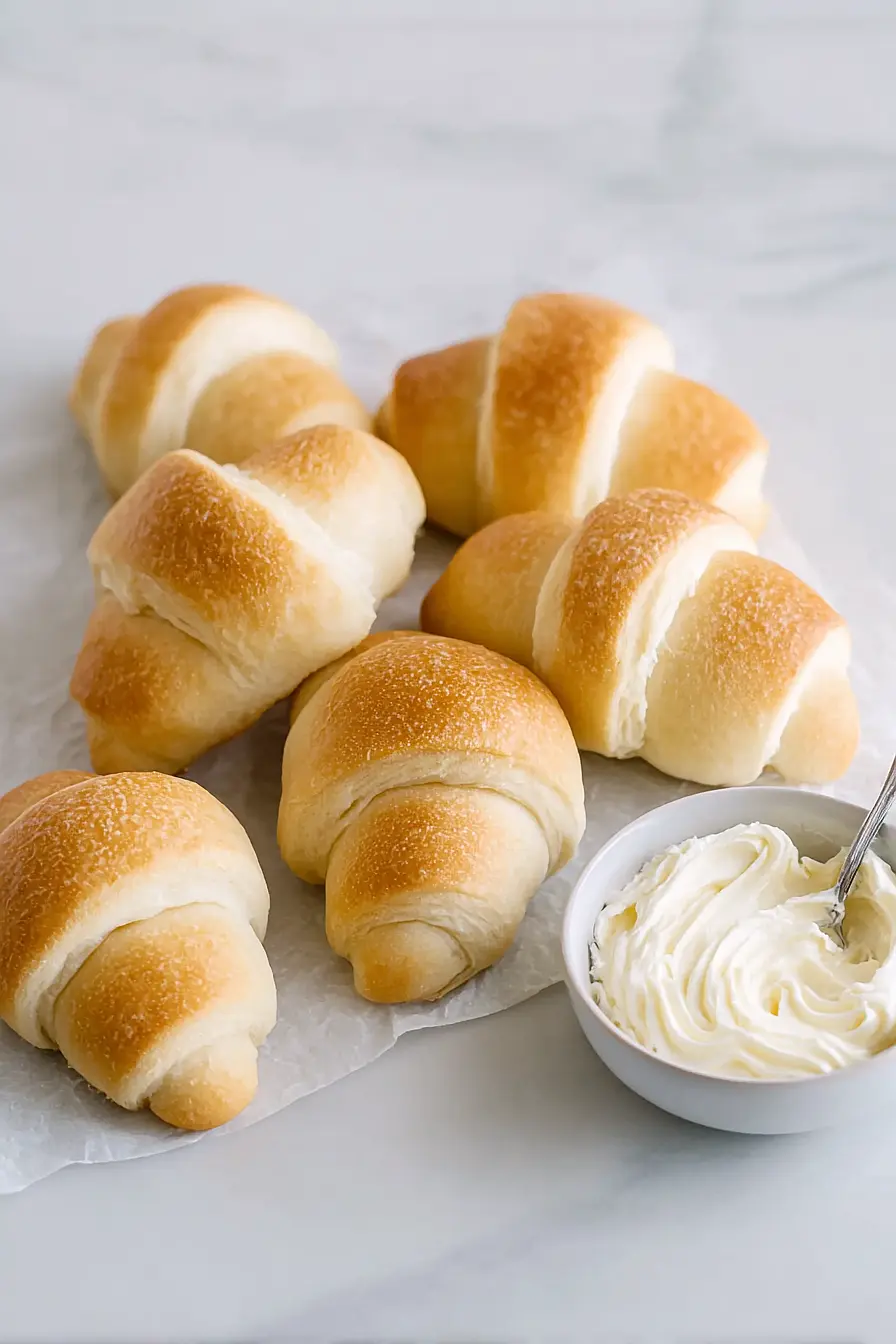
If you ask me, crescent dinner rolls are pure comfort food magic.
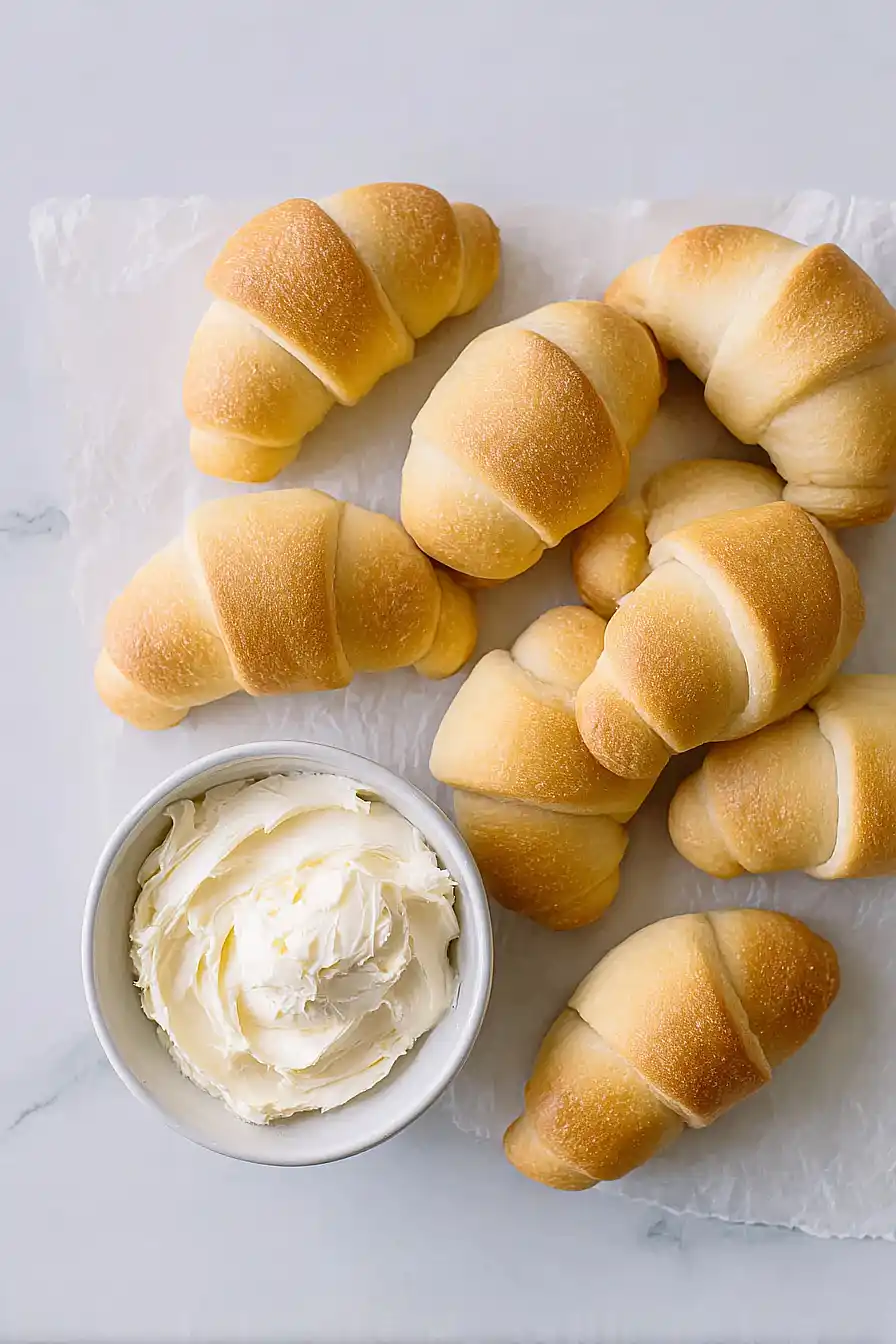
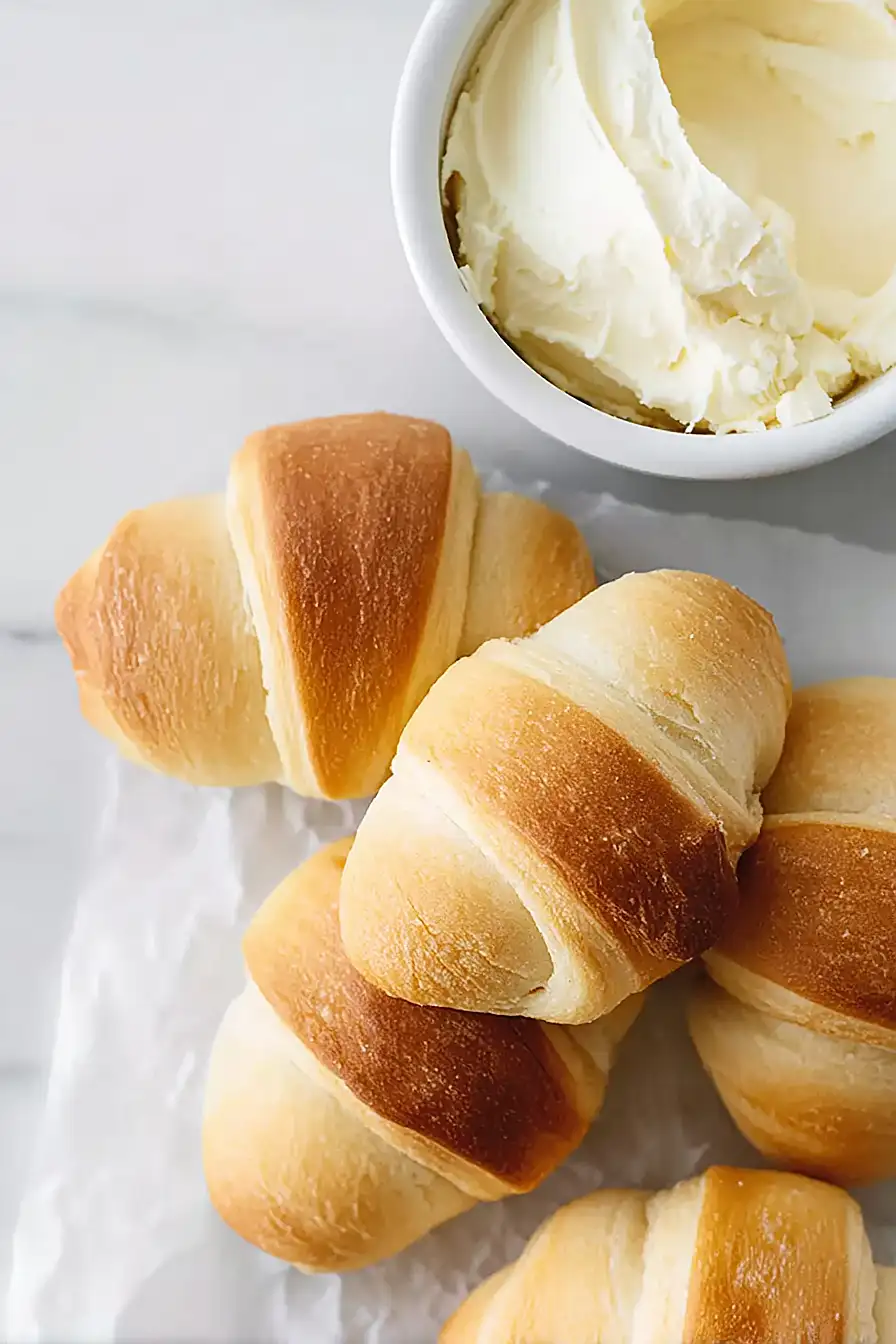
These buttery, flaky rolls make the perfect addition to any family dinner table. The soft, tender inside pairs with a golden, slightly crispy outside that everyone loves.
They’re made with simple ingredients you probably already have in your kitchen. A little butter, some basic dough, and the classic crescent shape that makes them special.
It’s a crowd-pleasing side dish that goes with everything, perfect for weeknight dinners or holiday meals.
Why You’ll Love These Crescent Dinner Rolls
- Soft, fluffy texture – The secret combination of potato flakes and powdered milk creates incredibly tender rolls that stay fresh for days.
- Perfect for any occasion – These buttery crescents work just as well for Sunday dinner as they do for holiday gatherings or weeknight meals.
- Make-ahead friendly – You can prepare the dough in advance and refrigerate it, then shape and bake the rolls when you’re ready to serve.
- Impressive homemade taste – Your family and guests will think you spent hours in the kitchen, but the process is actually quite straightforward once you get the hang of it.
- Freezer-friendly – Bake a big batch and freeze extras for quick side dishes later – they reheat beautifully in just minutes.
What Kind of Flour Should I Use?
For these dinner rolls, bread flour is your best bet since it has a higher protein content than all-purpose flour, which helps create that perfect chewy yet tender texture. If you don’t have bread flour on hand, all-purpose flour will still work, but your rolls might be a bit less structured and fluffy. You’ll want to measure your flour carefully – start with 5 cups and gradually add more until your dough feels smooth and slightly tacky but not sticky. The exact amount can vary depending on humidity and how you measure, so don’t worry if you need a little more or less than the recipe calls for.
Options for Substitutions
These dinner rolls are pretty forgiving when it comes to swaps, so here are some options if you’re missing ingredients:
- Bread flour: All-purpose flour works just fine here – your rolls will be slightly less chewy but still delicious. Use the same amount and don’t worry about adjusting anything else.
- Instant yeast: Active dry yeast is a perfect substitute. Just use the same amount but dissolve it in the warm water first and let it foam for about 5 minutes before adding to your other ingredients.
- Butter flavored shortening: You can replace this with regular shortening, more softened butter, or even vegetable oil. If using oil, start with about 6 tablespoons and add more if the dough seems too dry.
- Nonfat powdered milk: Skip this if you don’t have it on hand – just add an extra 2 tablespoons of regular milk or water to your recipe. The rolls will still turn out great.
- Potato flakes: These add softness to the rolls, but you can leave them out entirely. If you do skip them, reduce the flour by about ½ cup since the potato flakes absorb liquid.
- Eggs: In a pinch, you can use ¼ cup applesauce or mashed banana per egg, though the texture will be slightly different.
Watch Out for These Mistakes While Baking
The biggest mistake when making dinner rolls is using water that’s too hot, which can kill the yeast – stick to around 115°F, or water that feels just slightly warm to your wrist, not hot.
Another common error is adding too much flour too quickly, which creates dense, heavy rolls instead of light and fluffy ones – add flour gradually until the dough is just slightly sticky but pulls away from the bowl sides.
Don’t skip the rise times even if you’re in a hurry, as rushing this process results in rolls that don’t have that perfect airy texture, and always check that your dough has doubled in size before moving to the next step.
For the best results, make sure your butter and shortening are truly at room temperature before mixing, and brush the tops with melted butter both before and after baking for that golden, soft crust everyone loves.
What to Serve With Dinner Rolls?
These buttery crescent dinner rolls are perfect alongside just about any main dish you can think of! They’re especially great with hearty comfort foods like roast chicken, beef stew, or a big holiday turkey dinner where you can use them to soak up all those delicious gravies and sauces. I love serving them with a simple weeknight meal of grilled chicken and roasted vegetables, or even just a bowl of soup for a cozy dinner. Don’t forget to put out some honey butter or jam on the side – these soft, fluffy rolls are made for spreading your favorite toppings on them.
Storage Instructions
Keep Fresh: These crescent rolls taste best when stored in an airtight container or covered with a clean kitchen towel at room temperature for up to 2 days. If you want to keep them longer, pop them in the fridge for up to a week – just know they might lose a bit of their soft texture.
Freeze: You can freeze these rolls either baked or unbaked! For baked rolls, wrap them tightly in plastic wrap and freeze for up to 3 months. If you want to freeze them unbaked, shape the rolls and place them on a baking sheet, freeze until solid, then transfer to freezer bags.
Warm Up: To bring back that fresh-from-the-oven taste, wrap the rolls in foil and warm them in a 350°F oven for about 10 minutes. If they’re frozen, let them thaw first or add a few extra minutes to the warming time. You can also microwave them for 15-20 seconds, but the oven method keeps them fluffier.
| Preparation Time | 30-45 minutes |
| Cooking Time | 18-20 minutes |
| Total Time | 90-120 minutes |
| Level of Difficulty | Medium |
Estimated Nutrition
Estimated nutrition for the whole recipe (without optional ingredients):
- Calories: 3400-3700
- Protein: 75-85 g
- Fat: 130-145 g
- Carbohydrates: 470-520 g
Ingredients
For the dough:
- 1/2 cup butter-flavored shortening (like Crisco, for a tender crumb)
- 1 1/2 tsp salt
- 1/2 cup potato flakes (use instant mashed potato flakes)
- 1 tbsp rapid-rise yeast
- 5 to 6 cups bread flour (King Arthur brand recommended for best rise)
- 1/2 cup white sugar
- 1/4 cup nonfat dry milk (rehydrated into a paste with water)
- 2 cups water (warmed to 115°F for activating yeast)
- 1/4 cup unsalted butter (softened at room temperature)
- 2 large eggs
For brushing:
- 1/4 cup salted butter, melted
Step 1: Prepare the Dough Base
- 2 cups water, warmed to 115°F
- 1/4 cup nonfat dry milk
- 1/2 cup dehydrated potato flakes
- 1/2 cup white sugar
- 1 tbsp rapid-rise yeast
- 1 1/2 tsp salt
In a large bowl, combine the warm water (about 115°F) with the nonfat dry milk, dehydrated potato flakes, white sugar, rapid-rise yeast, and salt.
Mix well using a wire whisk until everything is dissolved and combined.
Transfer this mixture into the bowl of your stand mixer fitted with the dough hook attachment.
Step 2: Mix and Knead the Dough
- 1/4 cup unsalted butter, softened
- 1/2 cup butter-flavored shortening
- 2 large eggs
- 5 to 6 cups bread flour
Add the softened unsalted butter, butter-flavored shortening, and eggs to the mixer bowl with the wet mixture.
Add 3 cups of bread flour and mix for about 30 seconds until everything is incorporated.
Scrape down the sides of the bowl as needed.
Gradually add 2 more cups of bread flour, 1/2 cup at a time, with the mixer on low speed, letting it mix for about 1 minute after all the flour is added.
If the dough is still sticky and not cleaning the sides of the bowl, continue adding flour, 1/4 cup at a time, until it forms a smooth, slightly tacky dough that doesn’t stick to your finger.
Knead the dough on low speed for 5 minutes.
I like to go a little light on flour—it’s better to add more later than to start with too much and end up with dense rolls.
Step 3: First Rise
Remove the kneaded dough from the mixer and place it in a greased bowl.
Cover with a clean kitchen towel and let it rise in a warm area until doubled in size, about 60-90 minutes.
Step 4: Divide and Shape the Dough
- bread flour (from Step 2, for dusting work surface)
Set up your workspace by gathering a small bowl of flour for dusting, a rolling pin, pizza cutter, pastry brush, 2 baking sheets, and parchment paper.
If you have a dough scraper or food scale, those can be handy as well.
Flour your work surface lightly, then turn out the risen dough and divide it into two equal pieces (each should be about 28-30 ounces if you’re weighing).
Shape each half into a round ball to make rolling easier.
Step 5: Shape the Rolls
- divided dough (from Step 4)
- 1/4 cup salted butter, melted
Take one ball of dough and roll it into a circle about 15 inches in diameter and 1/4 inch thick on your floured surface.
Brush the top with melted salted butter, using about 2 tablespoons per dozen rolls—be careful not to overdo it, or the dough will be slippery.
Cut the circle into 12 equal wedges using a pizza cutter.
Starting from the outer edge, roll up each wedge tightly toward the center and tuck the end underneath.
Arrange each roll, tip side down, on a parchment-lined baking sheet.
Repeat with the second ball of dough.
Step 6: Second Rise
Let the shaped rolls rise, uncovered, in a warm place until they are puffy and doubled in size, about 45-60 minutes.
This extra rise is key for soft, fluffy rolls—I like to let them go the full hour if I have time.
Step 7: Bake and Cool the Rolls
Preheat your oven to 350°F.
Bake the rolls on the middle rack for 18-20 minutes, or until they are golden brown.
Allow the rolls to cool on the pan for 10 minutes, then transfer to a wire rack to cool completely before storing.
