Growing up, roasting a whole chicken felt like something only my grandmother knew how to do properly. Mom would buy rotisserie chickens from the store, saying it was “too complicated” to make one at home. I believed her until I discovered the magic of Dutch oven cooking.
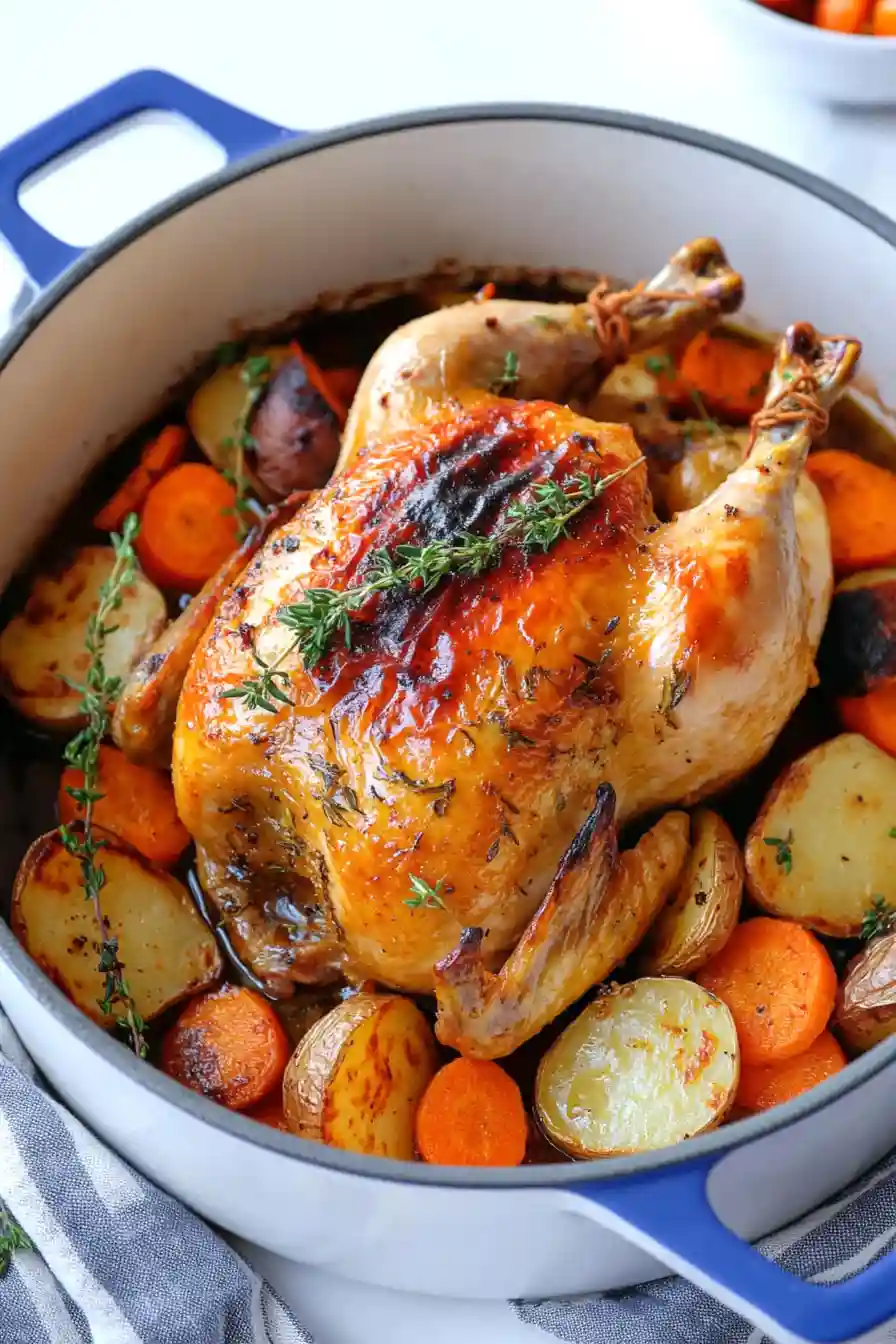
Turns out, making a whole roasted chicken isn’t complicated at all – it just needs the right tool and a bit of patience. With a Dutch oven, you get that perfectly cooked bird every time, with skin that gets nice and brown and meat that stays juicy. No fancy techniques required, just a few basic steps that anyone can follow.
Why You’ll Love This Dutch Oven Chicken
- One-pot meal – Everything cooks together in a single Dutch oven – the chicken, vegetables, and all those wonderful herbs. Less cleanup means more time to enjoy your dinner.
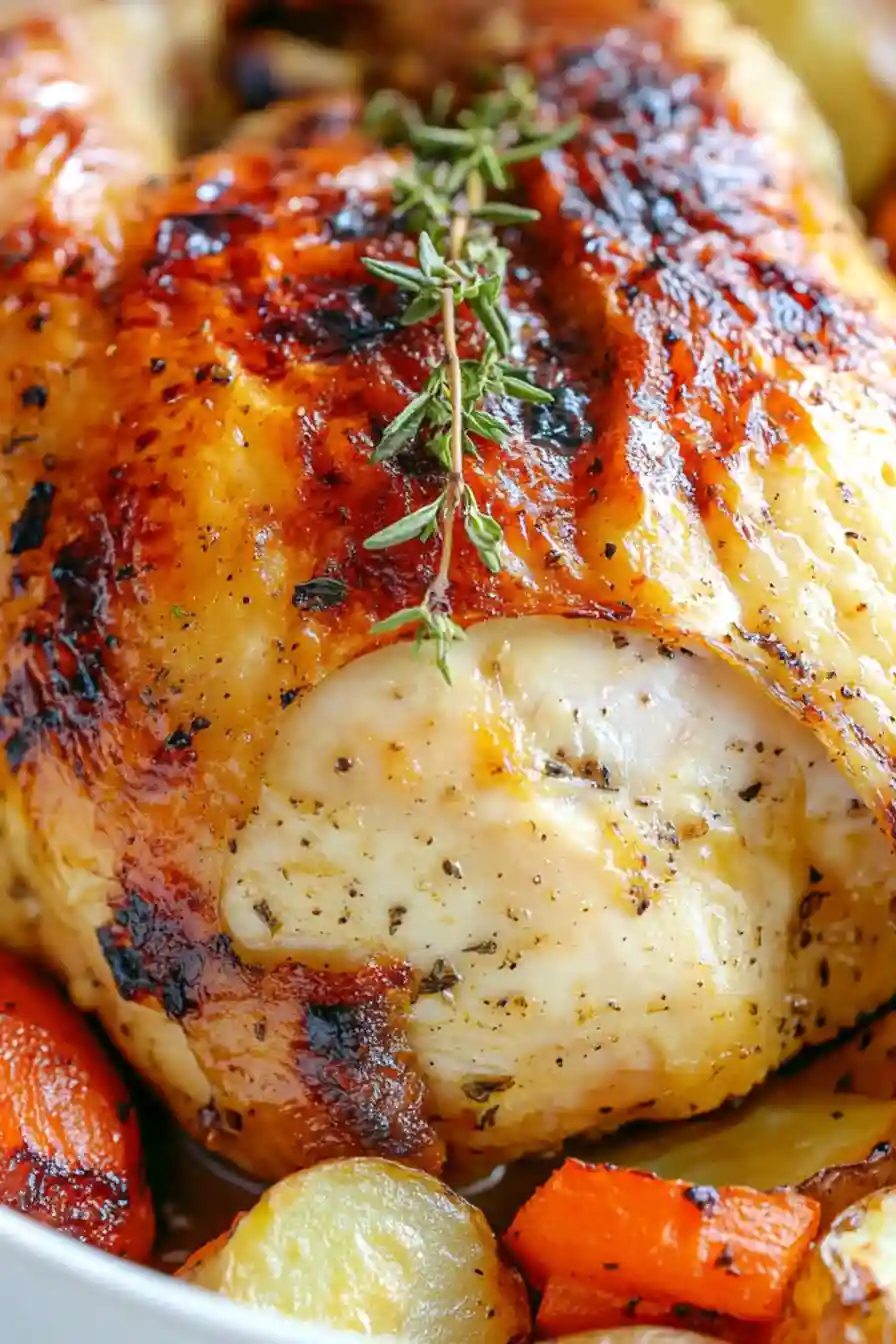
- Foolproof method – The Dutch oven method ensures a perfectly cooked chicken every time – crispy skin on the outside, juicy meat on the inside. It’s nearly impossible to mess up!
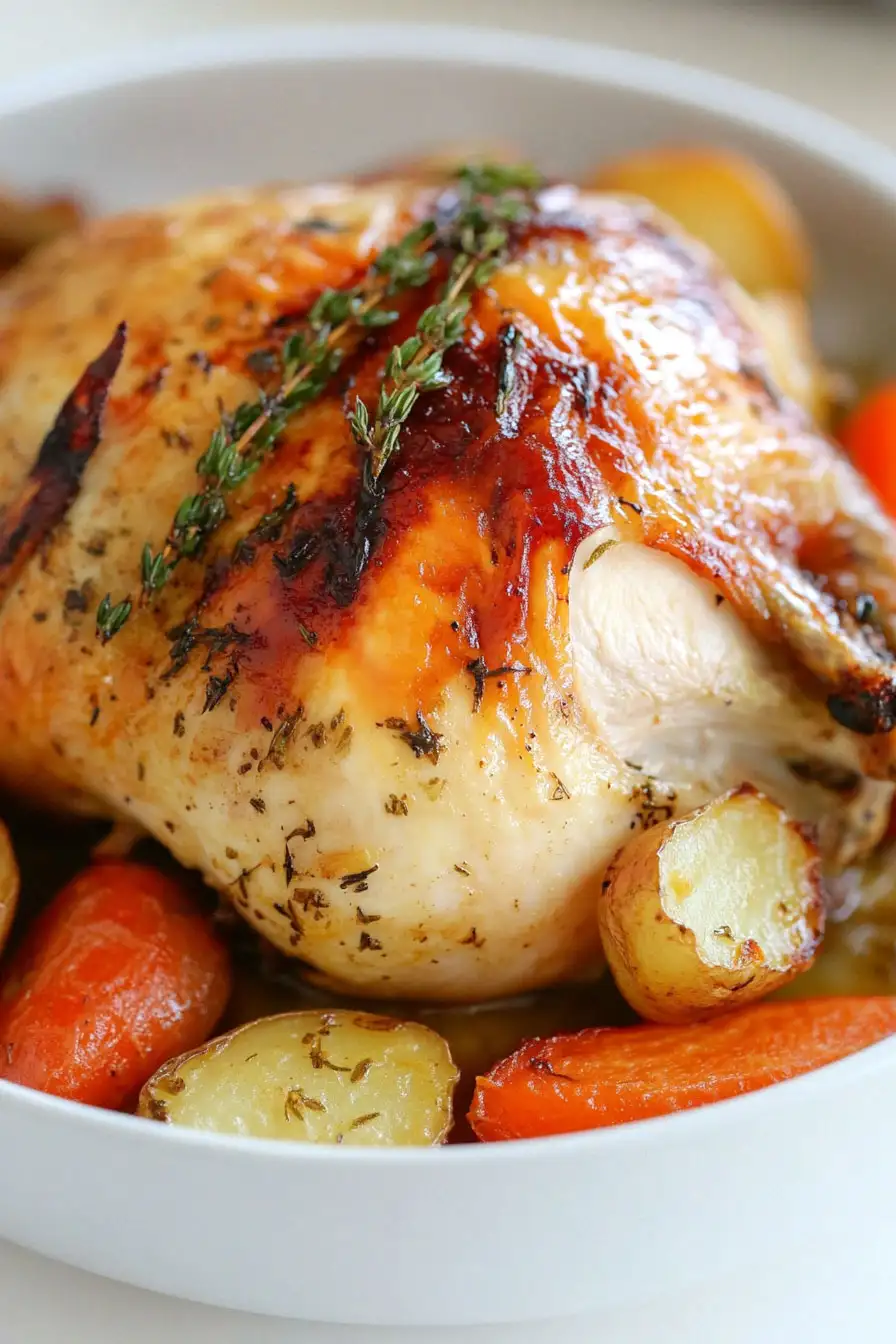
- Complete dinner solution – With tender vegetables roasting underneath the chicken, you’ve got your protein and sides cooking all at once, soaking up all those amazing flavors.
- Basic ingredients – You’ll only need common vegetables, herbs, and pantry staples that are easy to find at any grocery store.
- Meal prep friendly – This recipe makes enough for several meals, perfect for weekly meal prep or feeding a family with tasty leftovers for sandwiches or salads.
What Kind of Chicken Should I Use?
For a Dutch oven roast chicken, you’ll want to look for a whole chicken that’s around 5 pounds – this size fits nicely in most Dutch ovens and cooks evenly. Free-range or organic chickens are great choices since they tend to have better flavor and texture, but a regular supermarket chicken will still give you delicious results. When shopping, look for a bird with pink, intact skin (no tears or discoloration) and make sure it’s fresh or properly thawed if frozen. It’s best to avoid chickens labeled as “pre-brined” or “enhanced with solution” since you’ll have less control over the seasoning, and these can sometimes turn out too salty.
Options for Substitutions
This roasted chicken recipe is pretty adaptable – here are some helpful swaps if you need them:
- Parsnips: Not everyone keeps parsnips in their kitchen – you can easily swap them for extra carrots, turnips, or even sweet potatoes for a different but tasty twist.
- Fresh herbs: If you can’t find fresh rosemary or thyme, you can use dried herbs instead. Just remember to use 1/3 of the amount called for since dried herbs are more concentrated (so about 1/3 teaspoon dried rosemary and 2/3 teaspoon dried thyme).
- Butter: While butter gives the best flavor, you can use softened margarine or even olive oil as alternatives. If using olive oil, add an extra tablespoon to keep the chicken moist.
- Potatoes: Any potato variety works well here – red potatoes, Yukon golds, or russets. Just cut them to similar sizes so they cook evenly.
- Lemon: If you’re out of lemons, you can use orange for a different citrus note, or skip it altogether – just add a splash of white wine or chicken broth for moisture.
Watch Out for These Mistakes While Roasting
The biggest mistake when roasting a whole chicken is not patting the skin completely dry before seasoning – moisture is the enemy of crispy skin, so take an extra minute to thoroughly dry the chicken with paper towels inside and out. Another common error is placing a cold chicken straight into the hot Dutch oven – instead, let your chicken rest at room temperature for 30-45 minutes before cooking, which helps it cook more evenly from center to edge. To avoid undercooked chicken near the bones, make sure to test the temperature in multiple spots (especially near the thigh joint) with a meat thermometer until it reaches 165°F – don’t rely on cooking time alone since every bird is different. For the most flavorful results, don’t skip seasoning under the skin with your herb butter mixture, and remember to baste the chicken with pan juices every 20-30 minutes during cooking to keep the meat moist and add extra flavor.
What to Serve With Roasted Chicken?
Since this Dutch oven chicken already comes with potatoes, carrots, and parsnips, you’ve got your main sides covered – but there are still some great ways to round out the meal! A simple green salad with a light vinaigrette adds a fresh contrast to the rich, roasted flavors. If you want to add another vegetable, steamed green beans or roasted Brussels sprouts work really well with the herb-seasoned chicken. For bread lovers, warm dinner rolls or a crusty baguette are perfect for soaking up all those tasty pan juices that collect at the bottom of the Dutch oven.
Storage Instructions
Keep Fresh: Once your roasted chicken has cooled down, place any leftovers in an airtight container and pop them in the fridge. The chicken and roasted veggies will stay good for up to 4 days. Pro tip: store the chicken and vegetables separately to keep everything tasting its best!
Freeze: If you want to save some for later, remove the meat from the bones and pack it in freezer-safe containers or bags. It’ll keep well in the freezer for up to 3 months. The roasted vegetables can be frozen too, though they might be a bit softer when thawed.
Reheat: To warm up your chicken without drying it out, place it in a baking dish with a splash of broth or water, cover with foil, and heat in a 325°F oven until warm. For quick meals, the microwave works too – just heat in 30-second intervals. The vegetables can be reheated the same way, or crisped up in a skillet.
| Preparation Time | 20-30 minutes |
| Cooking Time | 75-90 minutes |
| Total Time | 95-120 minutes |
| Level of Difficulty | Medium |
| Servings | 4 |
| Equipment | 7 to 8 quart Dutch oven, kitchen twine (optional) |
Estimated Nutrition
Estimated nutrition for the whole recipe (without optional ingredients):
- Calories: 2200-2500
- Protein: 150-160 g
- Fat: 150-160 g
- Carbohydrates: 150-160 g
Ingredients
For the vegetable bed:
- 1 lemon (sliced into quarters)
- Olive oil
- 4 medium potatoes (cut into quarters)
- Salt and pepper (to taste)
- 3 medium carrots (peeled and sliced into 1-inch pieces)
- 2 medium yellow onions (cut into quarters)
- 3 medium parsnips (peeled and sliced into 1-inch pieces)
For the herbed butter:
- 2 tsp kosher salt
- 5 cloves garlic (finely minced)
- Zest from 1 lemon
- 2 tsp thyme (leaves removed)
- 1 tsp fresh rosemary (chopped, for best flavor)
- 8 tbsp unsalted butter (softened to room temperature)
- 1/2 tsp ground black pepper (freshly ground preferred)
For the chicken and stuffing:
- 5 sprigs fresh thyme
- 1 (5 lb) whole chicken (giblets removed)
- 1 lemon (sliced into quarters)
- 5 sprigs fresh rosemary
- 1 medium yellow onion (cut into quarters)
Step 1: Preheat Oven and Prepare Vegetable Bed
- 4 medium potatoes, cut into quarters
- 3 medium carrots, peeled and sliced into pieces
- 3 medium parsnips, peeled and sliced into pieces
- 2 medium yellow onions, peeled and cut into quarters
- 1 lemon, sliced into quarters
- Olive oil
- Salt and pepper to preference
Begin by preheating your oven to 425 degrees F.
As the oven heats, prepare the vegetable bed by placing cut-up vegetables, such as potatoes, carrots, parsnips, onions, and lemon, in the bottom of a large 7-8 quart Dutch oven pot, preferably one that is oval-shaped.
Toss the vegetables with a few drizzles of olive oil and season with salt and pepper to taste.
Set aside for later use.
Step 2: Make the Herbed Butter
- 8 tablespoons softened unsalted butter
- 5 cloves garlic, minced finely
- 1 teaspoon fresh rosemary, chopped
- 2 teaspoons thyme, leaves removed
- Zest from 1 lemon
- 2 teaspoons kosher salt
- 1/2 teaspoon ground black pepper
In a bowl, combine softened butter, minced garlic, minced rosemary, thyme leaves, lemon zest, 2 teaspoons of Kosher salt, and ½ teaspoon of pepper.
Mix until thoroughly combined.
This herbed butter will serve as a flavorful coating for the chicken.
Set aside once mixed.
Step 3: Prepare the Chicken
- 1 whole chicken, 5 pounds (giblets taken out)
Thoroughly pat the chicken dry with paper towels, including the inside of the cavity.
This step is crucial for achieving crispier skin.
Carefully rub half of the prepared herbed butter under the skin by creating “pockets” between the skin and flesh, especially around the breast and legs.
Spread the remaining butter on the outside of the chicken, covering the top, legs, and wings completely.
Step 4: Stuff and Tie the Chicken
- 1 medium yellow onion, peeled and cut into quarters
- 1 lemon, sliced into quarters
- 5 sprigs of fresh rosemary, separated
- 5 sprigs of fresh thyme, separated
Stuff the cavity of the chicken with a quartered and peeled onion, a quartered lemon, and 2 sprigs each of fresh rosemary and thyme.
Tie the chicken legs together with kitchen twine for even cooking and a neat presentation.
If twine is unavailable, this step can be skipped.
Ensure the chicken is ready for roasting by placing it in a roasting pan with its breast side up, and tuck the wings underneath to prevent burning.
Place the remaining rosemary and thyme sprigs around the chicken.
Step 5: Roast the Chicken
Place the covered Dutch oven securely in the preheated oven and roast for 1 hour and 15 minutes.
After this, uncover the dish and roast for an additional 30 minutes to allow the skin to crisp up and gain a golden brown color.
If the vegetables start to burn, add a few splashes of chicken broth.
The chicken is done when a meat thermometer inserted into the thickest part of the thigh reads 165 degrees F.
To ensure even cooking, avoid opening the oven repeatedly and rotate the chicken if certain areas are browning faster.
Step 6: Rest and Serve
Once roasting is complete, let the chicken rest in the Dutch oven for 15 minutes.
This resting period allows juices to redistribute throughout the meat, ensuring moistness.
Serve the chicken alongside the roasted vegetables and enjoy!
