There’s something so comforting about making banana bread, especially when those spotty bananas are sitting on your counter begging to be used. I’ve tried plenty of fancy recipes over the years, but I always come back to this simple one-bowl version. Maybe it’s because I don’t want to spend my morning washing a sink full of dishes, or maybe it’s because this recipe just works every single time.
I started making this banana bread years ago when my kids were little, and it quickly became our go-to weekend treat. I mix it up while my morning coffee is brewing, pop it in the oven, and let those sweet banana smells fill the house. The best part? When cleanup means just one bowl and a measuring cup, you know you’ve found a keeper.
Whether you’re a beginner baker or just someone who appreciates keeping things simple, this recipe is right up your alley. No fancy techniques, no long list of ingredients – just good old-fashioned banana bread that turns out great every time.
Why You’ll Love This Banana Bread
- One-bowl recipe – Less dishes to wash means more time to enjoy your baking! You’ll only need a single bowl to mix up this easy banana bread.
- Basic pantry ingredients – No fancy ingredients needed here – just common items you probably already have in your kitchen, plus those overripe bananas on your counter.
- Perfect for beginners – If you’re new to baking, this foolproof recipe is a great place to start. Just mix, pour, and bake!
- Great way to use overripe bananas – Those spotty, brown bananas that nobody wants to eat? They’re perfect for this recipe – the riper they are, the sweeter and more flavorful your bread will be.
What Kind of Bananas Should I Use?
For banana bread, you’ll want to use overripe bananas – the ones with lots of brown spots or that have turned mostly brown. These super-ripe bananas are much sweeter and more flavorful than yellow or green bananas, which makes them perfect for baking. If your bananas aren’t quite ripe enough, you can speed up the process by placing them in a paper bag with an apple for a day or two, or pop them in a 300°F oven for about 15-20 minutes until they turn black. Don’t worry about using bananas that look too dark or spotty – as long as they’re not moldy, the darker they are, the better your bread will taste.
Options for Substitutions
This banana bread recipe is pretty forgiving and works well with several substitutions:
- Bananas: The riper the bananas, the better! You’ll need about 1.5 cups of mashed banana – if you’re short, you can make up the difference with unsweetened applesauce or pumpkin puree.
- Butter: You can swap the melted butter with an equal amount of vegetable oil, coconut oil, or even unsweetened applesauce (though the texture will be less rich with applesauce).
- White sugar: Brown sugar works great here and adds a nice caramel note. You can also use coconut sugar or even reduce the sugar to 1/2 cup if you prefer it less sweet.
- Eggs: For each egg, you can use either 1/4 cup mashed banana, 1/4 cup applesauce, or a flax egg (1 tablespoon ground flaxseed mixed with 3 tablespoons water, let sit for 5 minutes).
- Plain flour: Whole wheat flour works for a heartier loaf – just expect a denser texture. For gluten-free, use a 1:1 gluten-free flour blend with xanthan gum.
- Cinnamon: Feel free to skip it or try other warm spices like nutmeg, allspice, or pumpkin pie spice mix.
Watch Out for These Mistakes While Baking
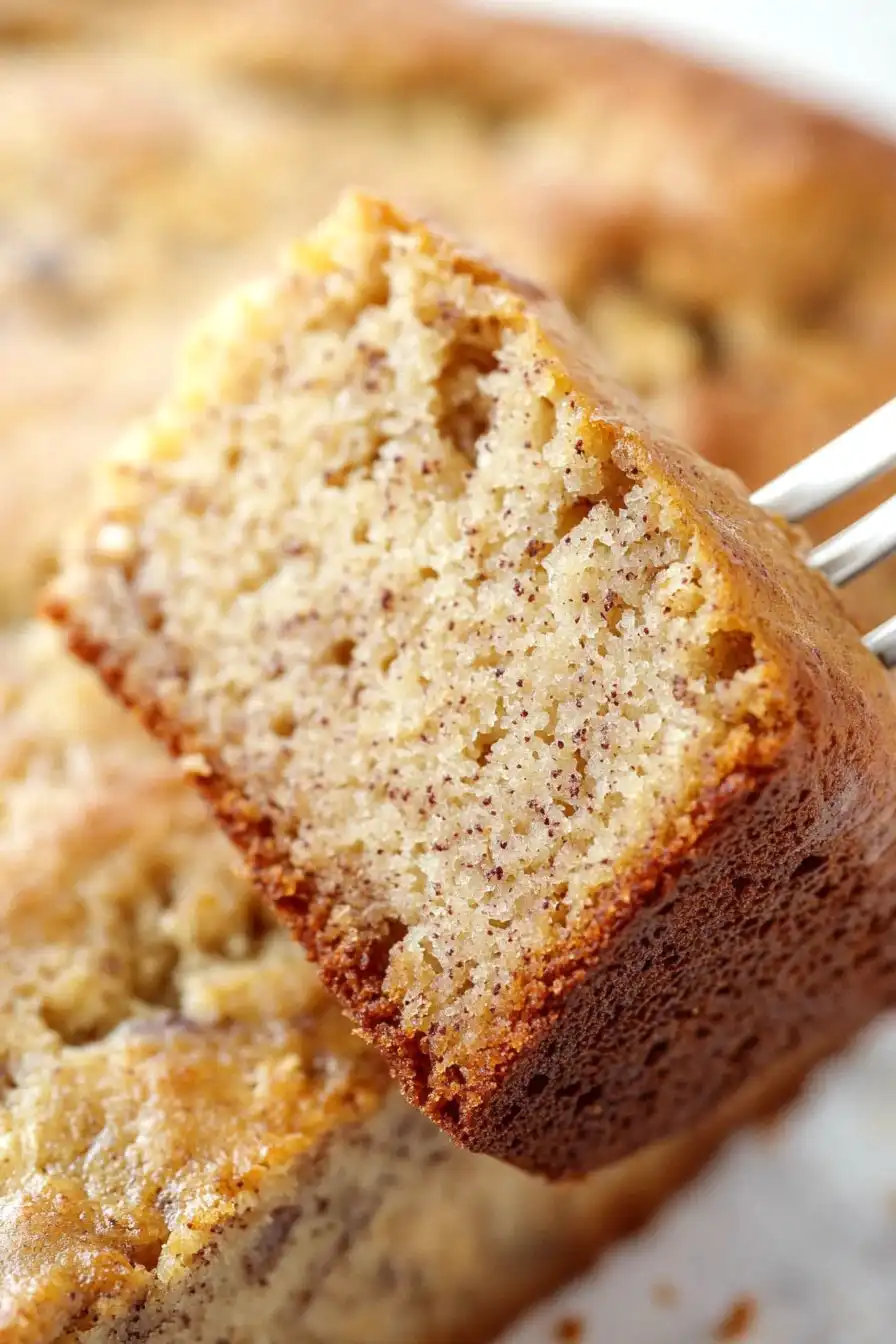
The biggest mistake when making banana bread is using underripe or overripe bananas – you want them to be deeply speckled with brown spots but not completely black, as this ensures the perfect natural sweetness and moisture in your bread. Another common error is overmixing the batter once you’ve added the flour, which can lead to a dense, tough loaf – instead, fold the dry ingredients gently until just combined, and don’t worry about a few small lumps. Temperature control is crucial too: starting with cold eggs can cause the melted butter to solidify and create an uneven texture, so make sure all your ingredients are at room temperature before mixing. For the best results, test for doneness by inserting a skewer into the center – it should come out with a few moist crumbs but no wet batter, and remember that the bread will continue cooking slightly as it cools in the pan.

What to Serve With Banana Bread?
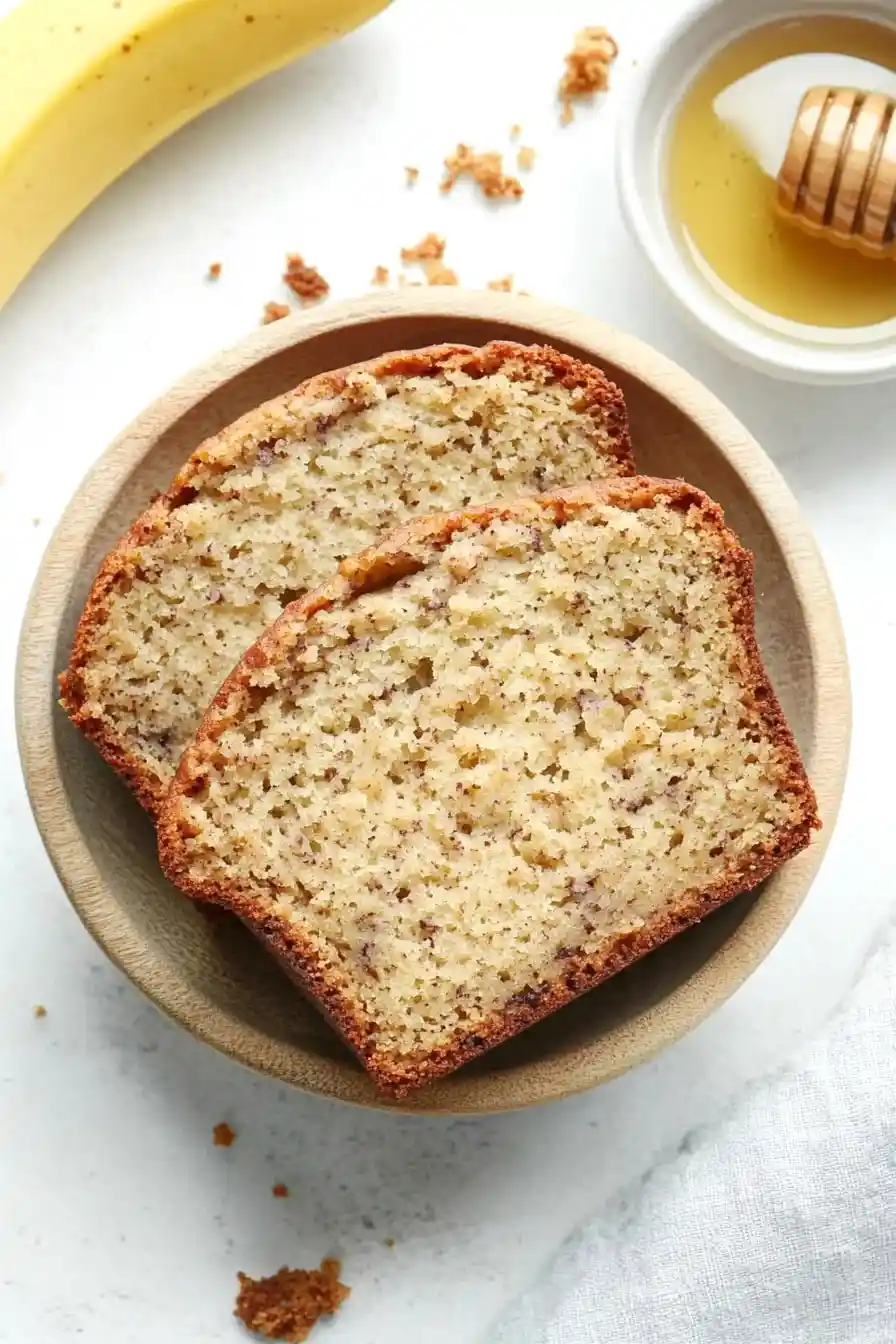
This cozy banana bread is perfect for breakfast or as an afternoon snack, and there are so many tasty ways to serve it! A classic approach is to warm up a thick slice and spread it with a pat of salted butter that melts right into the bread. For breakfast, pair it with a hot cup of coffee or tea and some fresh fruit on the side – berries or sliced peaches work really well here. If you’re feeling fancy, try topping your banana bread with a dollop of cream cheese, a drizzle of honey, or even a scoop of vanilla ice cream for dessert (trust me on this one!).
Storage Instructions
Counter Storage: Your banana bread will stay fresh at room temperature for up to 4 days when wrapped well in plastic wrap or stored in an airtight container. I like to place a paper towel in the container to absorb any excess moisture and keep the bread from getting too soft.
Refrigerate: Want to keep it longer? Pop your wrapped banana bread in the fridge where it’ll stay good for up to a week. Just remember that the fridge can make it a bit firmer, but it’ll still taste great!
Freeze: This banana bread freezes like a dream! Wrap individual slices or the whole loaf in plastic wrap, then aluminum foil, and freeze for up to 3 months. It’s perfect for when you want a quick breakfast or snack – just thaw a slice overnight in the fridge or pop it in the microwave for a few seconds.
Serving: If you’re enjoying refrigerated or frozen banana bread, let it come to room temperature before serving, or warm it slightly in the microwave or toaster. A little butter on a warm slice is absolutely wonderful!
| Preparation Time | 10-15 minutes |
| Cooking Time | 60 minutes |
| Total Time | 70-75 minutes |
| Level of Difficulty | Easy |
Estimated Nutrition
Estimated nutrition for the whole recipe (without optional ingredients):
- Calories: 1200-1400
- Protein: 15-20 g
- Fat: 60-70 g
- Carbohydrates: 180-200 g
Ingredients
- 2 cups plain flour (King Arthur all-purpose flour works great here)
- 1 tsp baking soda
- 1 tsp ground cinnamon (for a warm, sweet aroma)
- 1/2 tsp baking powder
- 1/4 tsp salt
- 2 large eggs (room temperature for better emulsification)
- 1/2 cup unsalted butter (melted and cooled slightly)
- 1 tsp vanilla essence (I use Nielsen-Massey for rich flavor)
- 2/3 cup white sugar
- 3 large bananas (very ripe, spotted, and mashed for sweetness)
Step 1: Prepare the Oven and Loaf Pan
Start by preheating your oven to 350°F (175°C).
While waiting for the oven to heat up, grease a 9×5 inch loaf pan thoroughly and set it aside.
This will ensure that your banana bread doesn’t stick to the pan and is easy to remove once baked.
Step 2: Mash the Bananas and Combine Wet Ingredients
In a large mixing bowl, mash 3 large or 4 small overripe bananas using a fork or a potato masher.
Once they’re well-mashed, add 1/2 cup of melted butter to the bananas and whisk until the mixture is combined.
Then, whisk in 2/3 cup sugar, 2 eggs, and 1 teaspoon of vanilla extract until the ingredients are well mixed.
Step 3: Incorporate the Dry Ingredients
To the wet mixture, add the dry ingredients: 2 cups of all-purpose flour, 1 teaspoon of baking soda, 1/2 teaspoon of baking powder, 1 teaspoon of cinnamon, and 1/4 teaspoon of salt.
Using a spatula, gently fold the dry ingredients into the wet mixture until just combined.
Be careful not to over-mix to keep the bread tender.
Step 4: Pour Batter and Bake
Pour the prepared batter into the pre-greased 9×5 inch loaf pan, spreading it evenly.
Place the pan in the preheated oven and bake for about 60 minutes or until a toothpick inserted into the center of the bread comes out clean, indicating that it’s fully cooked.
Step 5: Cool the Bread
Once baked, remove the loaf pan from the oven and allow it to sit on the counter for 5-10 minutes to cool slightly.
Then, carefully transfer the banana bread to a wire rack to cool completely.
This will help the bread set and make it easier to slice once cooled.
