I’ll be honest—when I first heard about banana pudding without bananas, I thought someone was pulling my leg. How can you make banana pudding and leave out the main ingredient? But then I tried it, and I got it. Sometimes you want that creamy, vanilla wafer goodness without dealing with bananas that brown too quickly or having to run to the store when you’re out.
This version is actually easier to throw together than traditional banana pudding. You don’t have to worry about slicing bananas or racing against the clock before they turn brown. Everything comes together in minutes, and you can make it ahead without any stress. Plus, kids who are picky about fruit texture? They’ll actually eat this one.
It might sound strange at first, but trust me on this. Once you taste those layers of creamy vanilla pudding with crunchy vanilla wafers, you won’t miss the bananas one bit.

Why You’ll Love This Banana Pudding Without Bananas
- No bananas needed – Perfect for those who aren’t fans of bananas or don’t have any on hand, yet you still get that classic banana pudding flavor from the vanilla wafers.
- Simple ingredients – Just four basic ingredients that you can easily grab at any grocery store, with no complicated prep work required.
- Make-ahead friendly – This dessert needs to chill anyway, so you can prepare it hours or even a day before you need it, making it great for potlucks and gatherings.
- Crowd-pleasing dessert – Everyone loves the creamy, sweet layers of pudding, whipped topping, and vanilla wafers, making it a hit at any get-together.
What Kind of Milk Should I Use?
For this banana pudding recipe, whole milk is your best bet since it creates the creamiest, richest pudding texture. That said, 2% milk will also work just fine if that’s what you have in your fridge. I’d avoid skim milk if possible, as it can make your pudding a bit thin and watery. If you’re looking for a dairy-free option, oat milk or cashew milk tend to work better than almond milk, which can sometimes separate or give you a slightly grainy texture.

Options for Substitutions
This recipe is pretty straightforward, but here are some swaps you can make if needed:
- Vanilla wafers: You can use graham crackers, shortbread cookies, or even Nilla-style wafers from any brand. Break them into pieces if they’re larger cookies.
- Whipped topping: Store-bought whipped topping like Cool Whip works great, but you can also make your own by whipping 2 cups of heavy cream with 2 tablespoons of sugar until stiff peaks form.
- Vanilla pudding: Instant pudding mix is what you’ll need here – don’t substitute with ready-made pudding cups as the consistency won’t be right. Stick with vanilla flavor to keep that classic taste.
- Milk: Whole milk gives the creamiest results, but you can use 2% or even almond milk if that’s what you have. Just know that lower fat milks might make the pudding slightly less rich.
Watch Out for These Mistakes While Making
The biggest mistake when making this no-banana pudding is not letting it chill long enough – rushing the process means you’ll end up with runny pudding instead of that thick, creamy texture everyone loves, so give it the full 3 hours or even overnight if you can.
Another common error is using instant pudding mix without whisking it thoroughly with the milk, which can leave you with lumps throughout your dessert – mix it for at least 2 minutes until completely smooth before moving on.
When folding in the whipped topping, be gentle and don’t overmix or you’ll deflate all those air bubbles that make the pudding light and fluffy.
Finally, make sure your vanilla wafers are arranged in a single, even layer rather than randomly scattered, as this ensures every spoonful has the perfect ratio of creamy pudding to crunchy cookie.
What to Serve With Banana Pudding?
Banana pudding is one of those desserts that really stands on its own, but I love serving it after a big Southern-style meal with fried chicken, collard greens, and mac and cheese. It’s the perfect cool and creamy finish to a hearty dinner, especially during the summer months when you want something refreshing. If you’re serving it at a potluck or barbecue, it pairs nicely with other classic comfort foods like pulled pork sandwiches or baked beans. You can also dress it up a bit by serving it alongside fresh berries or a cup of strong coffee for a simple but satisfying dessert spread.
Storage Instructions
Store: Keep your banana pudding (without bananas!) covered tightly in the fridge for up to 3 days. The vanilla wafers will soften as it sits, which some people actually prefer! Just make sure it’s in an airtight container or covered well with plastic wrap to keep it from drying out.
Make Ahead: This dessert is actually perfect for making a few hours ahead of time. The wafers get nice and soft, and all the flavors blend together beautifully. I usually make it in the morning if I’m serving it for dinner that night.
Serve: This pudding is best served cold straight from the fridge. If you want to freshen it up before serving, you can add a dollop of extra whipped topping on top. Just keep in mind that it doesn’t freeze well since the texture of the pudding and whipped topping changes quite a bit.
| Preparation Time | 10-15 minutes |
| Cooking Time | 0-0 minutes |
| Total Time | 190-360 minutes |
| Level of Difficulty | Easy |
| Servings | 12 servings |
Estimated Nutrition
Estimated nutrition for the whole recipe (without optional ingredients):
- Calories: 1900-2100
- Protein: 25-30 g
- Fat: 50-60 g
- Carbohydrates: 340-370 g
Ingredients
For the pudding mixture:
- 5 oz vanilla instant pudding (I always use Jell-O brand for the best set)
- 3.5 cups milk (cold, whole milk makes it extra creamy and rich)
- 3 oz whipped topping
- 1 teaspoon vanilla extract
For the assembly:
- 11 oz vanilla wafers (I prefer Nilla Wafers for the classic texture)
- 5 oz whipped topping (thawed completely in the fridge before using)
Step 1: Prepare the Pudding Base
- 5 oz vanilla instant pudding
- 3.5 cups cold whole milk
Pour the cold whole milk into a large mixing bowl, then add the vanilla instant pudding mix.
Whisk vigorously for about 2 minutes until the pudding thickens and becomes smooth—you’ll notice it transform from liquid to a custard-like consistency.
The cold milk is essential here; it helps the pudding set properly and creates that rich, creamy texture we’re after.
I always use whole milk instead of low-fat because it makes a noticeably creamier pudding.
Step 2: Create the Whipped Pudding Mixture
- pudding mixture from Step 1
- 3 oz whipped topping
- 1 teaspoon vanilla extract
Fold the first portion of thawed whipped topping (3 oz) gently into the pudding mixture using a spatula, being careful not to deflate the whipped topping—use folding motions rather than stirring to maintain the airy texture.
Then stir in the vanilla extract until fully incorporated.
This creates a lighter, fluffier pudding base that will make the dessert less heavy.
Reserve the remaining 5 oz of whipped topping for the top layer.
Step 3: Assemble the Layers
- whipped pudding mixture from Step 2
- 11 oz vanilla wafers
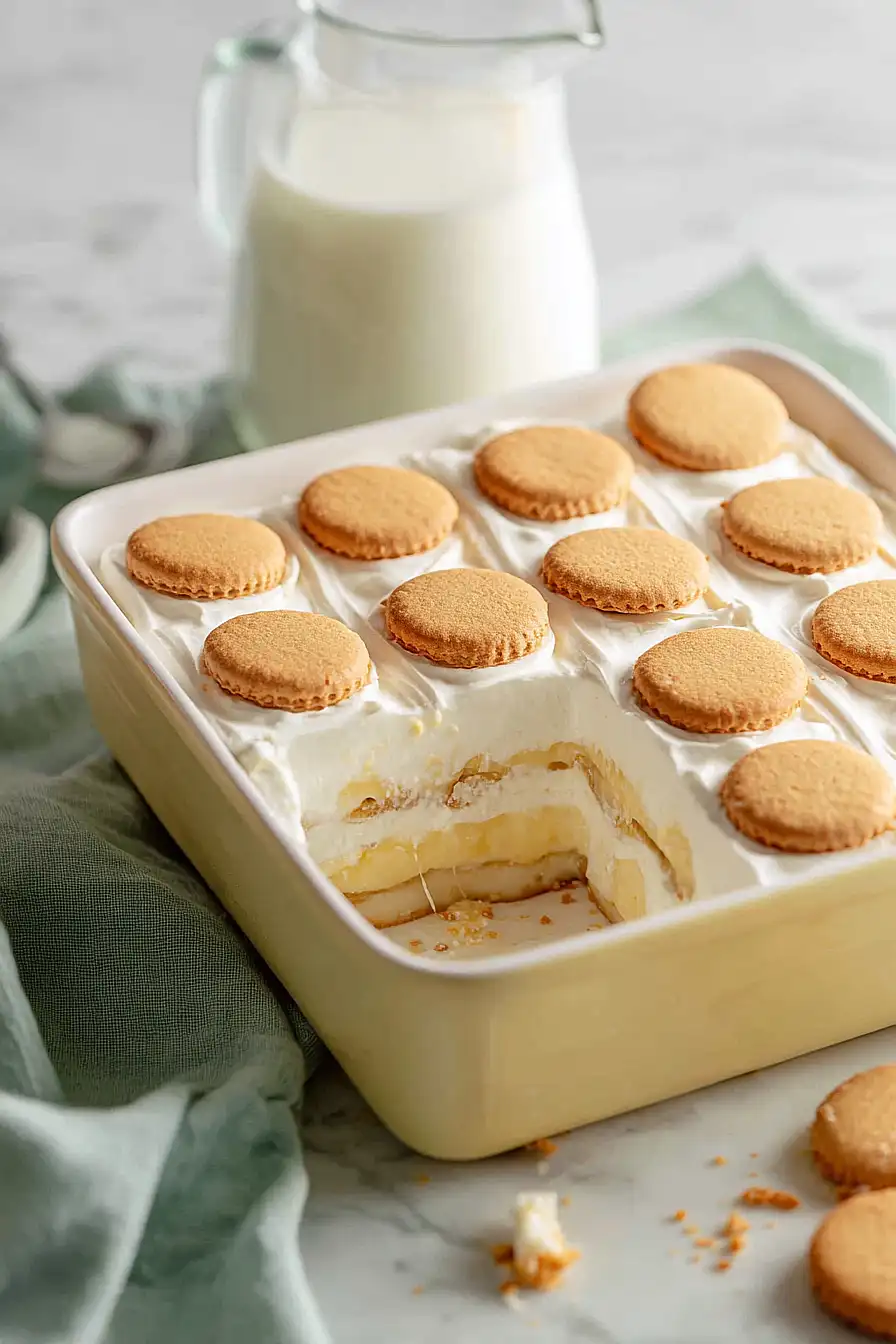
Spread a thin layer of the whipped pudding mixture (about 1/4 inch) on the bottom of a 9×13 inch baking dish or similar-sized serving dish.
Arrange a single layer of vanilla wafers on top, breaking them as needed to fit snugly.
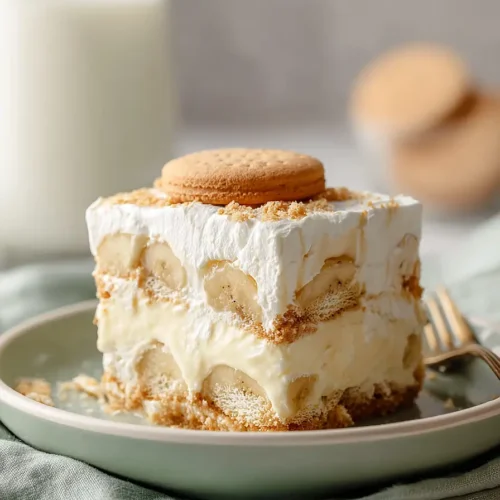
Repeat this layering: pudding mixture, then wafers, then pudding, then wafers again, for a total of three pudding layers and three wafer layers, ending with a pudding layer.
The thin pudding layers allow the wafers to soften slightly while maintaining some texture—I like to stagger the wafer placement so each bite gets a mix of wafer and pudding.
Step 4: Top and Garnish
- 5 oz whipped topping
- vanilla wafers for garnish
Spread the reserved 5 oz of thawed whipped topping evenly over the top layer of pudding.
Crumble a few vanilla wafers and scatter them across the whipped topping as a garnish for visual appeal and a hint of crispy texture on top.
Step 5: Chill and Set
Cover the dish loosely with plastic wrap and refrigerate for at least 3 hours, or until the layers have melded together and the pudding has fully set.
You can also make this dessert the day before—it actually improves as the wafers soften and absorb the pudding flavors overnight, creating a more cohesive texture throughout.
Smooth Banana Pudding Without Bananas
Ingredients
For the pudding mixture::
- 5 oz vanilla instant pudding (I always use Jell-O brand for the best set)
- 3.5 cups milk (cold, whole milk makes it extra creamy and rich)
- 3 oz whipped topping
- 1 teaspoon vanilla extract
For the assembly::
- 11 oz vanilla wafers (I prefer Nilla Wafers for the classic texture)
- 5 oz whipped topping (thawed completely in the fridge before using)
Instructions
- Pour the cold whole milk into a large mixing bowl, then add the vanilla instant pudding mix. Whisk vigorously for about 2 minutes until the pudding thickens and becomes smooth—you'll notice it transform from liquid to a custard-like consistency. The cold milk is essential here; it helps the pudding set properly and creates that rich, creamy texture we're after. I always use whole milk instead of low-fat because it makes a noticeably creamier pudding.
- Fold the first portion of thawed whipped topping (3 oz) gently into the pudding mixture using a spatula, being careful not to deflate the whipped topping—use folding motions rather than stirring to maintain the airy texture. Then stir in the vanilla extract until fully incorporated. This creates a lighter, fluffier pudding base that will make the dessert less heavy. Reserve the remaining 5 oz of whipped topping for the top layer.
- Spread a thin layer of the whipped pudding mixture (about 1/4 inch) on the bottom of a 9x13 inch baking dish or similar-sized serving dish. Arrange a single layer of vanilla wafers on top, breaking them as needed to fit snugly. Repeat this layering: pudding mixture, then wafers, then pudding, then wafers again, for a total of three pudding layers and three wafer layers, ending with a pudding layer. The thin pudding layers allow the wafers to soften slightly while maintaining some texture—I like to stagger the wafer placement so each bite gets a mix of wafer and pudding.
- Spread the reserved 5 oz of thawed whipped topping evenly over the top layer of pudding. Crumble a few vanilla wafers and scatter them across the whipped topping as a garnish for visual appeal and a hint of crispy texture on top.
- Cover the dish loosely with plastic wrap and refrigerate for at least 3 hours, or until the layers have melded together and the pudding has fully set. You can also make this dessert the day before—it actually improves as the wafers soften and absorb the pudding flavors overnight, creating a more cohesive texture throughout.
